|
|
| Tribute Automotive Builds Discuss your Tribute kit build |

15th May 2016, 13:59
|
 |
Senior Member
|
|
Join Date: Jan 2014
Location: Egham, Surrey
Posts: 1,780
|
|
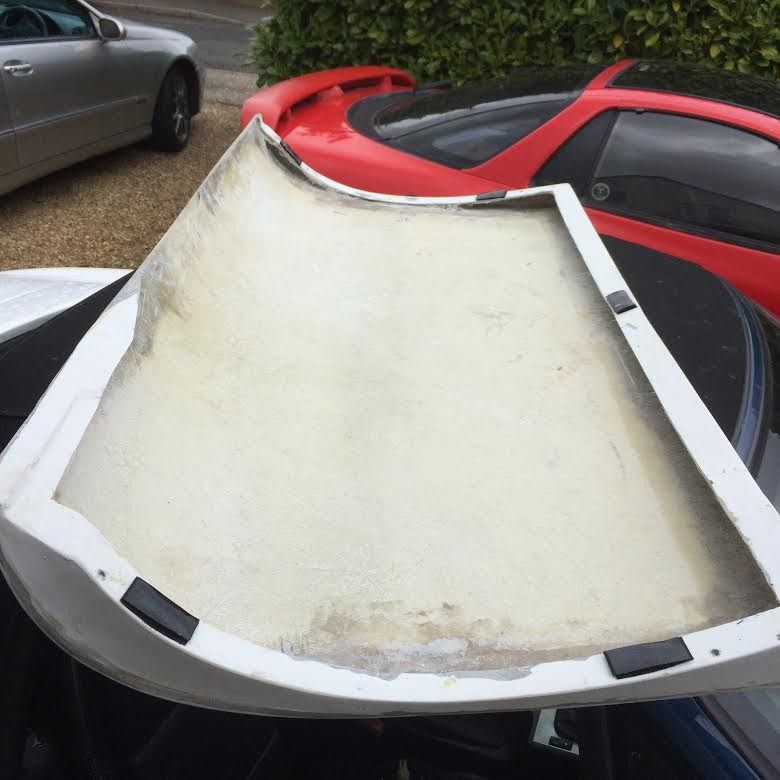
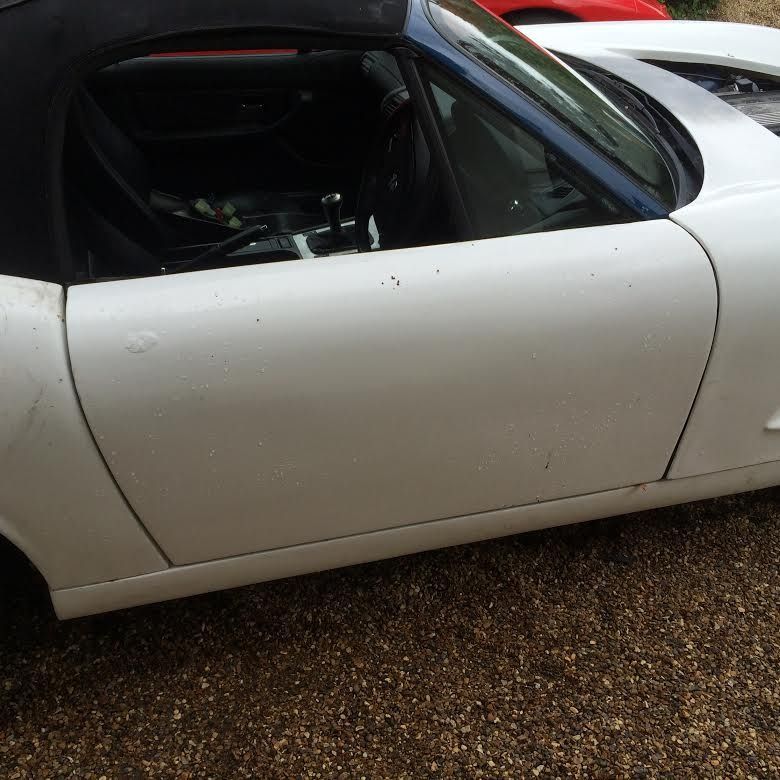
Strip complete and it took 4 hours to get it done. No problems, very straight forward. Collecting the kit from Chris tomorrow morning.
I expect the first job will be to fit the boot hinge assembly, I will take some photos of this as I don't think it has been covered before.
[img] 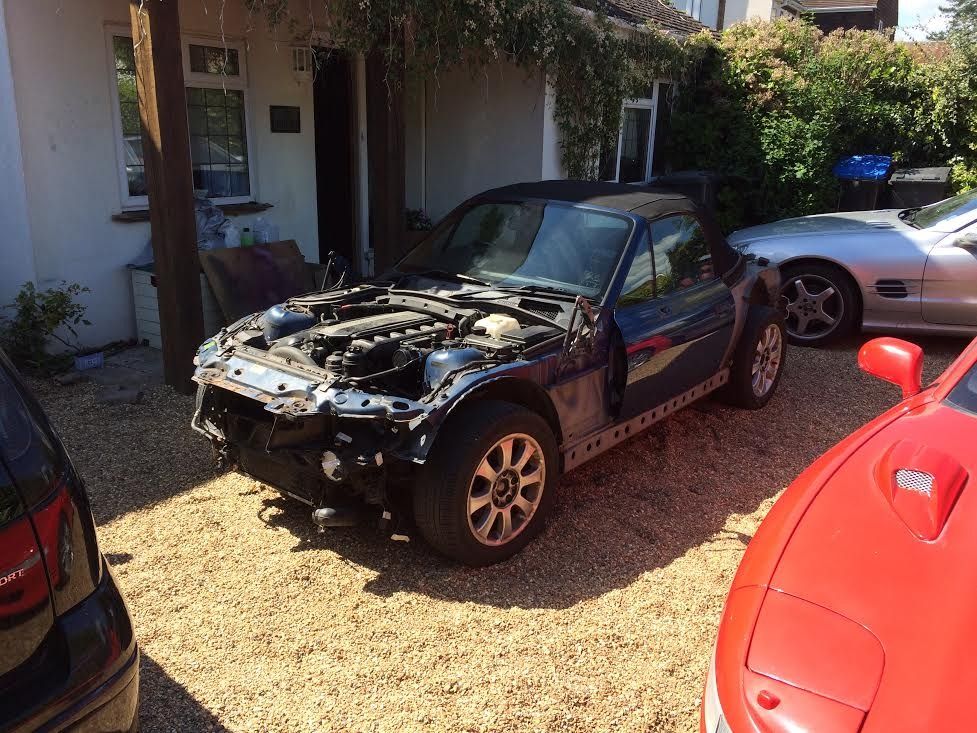 [img]
Last edited by Jaguartvr; 15th May 2016 at 14:04..
|
15th May 2016, 17:57
|
 |
Senior Member
|
|
Join Date: Oct 2010
Posts: 1,622
|
|
Quote:
Originally Posted by Jaguartvr

Strip complete and it took 4 hours to get it done. No problems, very straight forward. Collecting the kit from Chris tomorrow morning.
I expect the first job will be to fit the boot hinge assembly, I will take some photos of this as I don't think it has been covered before.
[img] [img] |
You are right about the boot hinges going on first. See you tomorrow. |
16th May 2016, 19:17
|
|
Senior Member
|
|
Join Date: Jan 2014
Location: Egham, Surrey
Posts: 1,780
|
|
Drove to Chris's today, normally when I buy something, something has been lost, one part of the order is incorrect etc, etc.
What a breath of fresh air to find everything better than expected, all fitted to mule so that I can get an idea of how it all goes together and lots of good advice.
His order list is getting longer so if you want to order a kit now is the time.
Thanks again Chris for the fantastic service.
|
17th May 2016, 13:07
|
|
Senior Member
|
|
Join Date: Jan 2014
Location: Egham, Surrey
Posts: 1,780
|
|
I'm limited to what I can do for the next couple of days as I'm in the dog house for wasting £750 on a body kit without the correct permissions! If only she knew!!
However i have managed to order a pair of uprated custom bonnet struts. The originals are rated at 750 Newtons and I have ordered 1200 Newton adjustable with have a thicker rod, all for just under £60 including carriage. I will report back when they arrive which should be tomorrow. They said that if you can quote my invoice number they can easily duplicate them, I will post this up as soon as I get it, providing of course that they work.
|
17th May 2016, 19:00
|
|
Senior Member
|
|
Join Date: Feb 2016
Posts: 272
|
|
Quote:
Originally Posted by Jaguartvr
I'm limited to what I can do for the next couple of days as I'm in the dog house for wasting £750 on a body kit without the correct permissions! If only she knew!!
However i have managed to order a pair of uprated custom bonnet struts. The originals are rated at 750 Newtons and I have ordered 1200 Newton adjustable with have a thicker rod, all for just under £60 including carriage. I will report back when they arrive which should be tomorrow. They said that if you can quote my invoice number they can easily duplicate them, I will post this up as soon as I get it, providing of course that they work.
|
Aaaah, the old long haired Guv'nor permissions!!!! I know all about those mate.  |
17th May 2016, 19:21
|
|
Senior Member
|
|
Join Date: Feb 2016
Posts: 272
|
|
Just had a bid on your BM lights on the Bay. They look like an old / odd bulb fitment - are they easy enough to get hold of? I presume you were going to cunningly fashion some fibreglass bowls for them to sit in?
|
17th May 2016, 19:48
|
|
Senior Member
|
|
Join Date: Jan 2014
Location: Egham, Surrey
Posts: 1,780
|
|
The bulbs are just standard single filament 21w bulbs, the same as you find in a standard indicator or sidelight, very easy to find.
If you look at the pictures you will see the mounting threaded bar, this will unwind from the light fitting and I was going to replace it with a longer threaded bar so that it went straight through the fibreglass, that way you just undo the 2 mounting nuts and you can remove the base from inside the car to replace the bulbs. Fit with LED bulbs and the chances are you will never have to replace the bulbs.
[img] 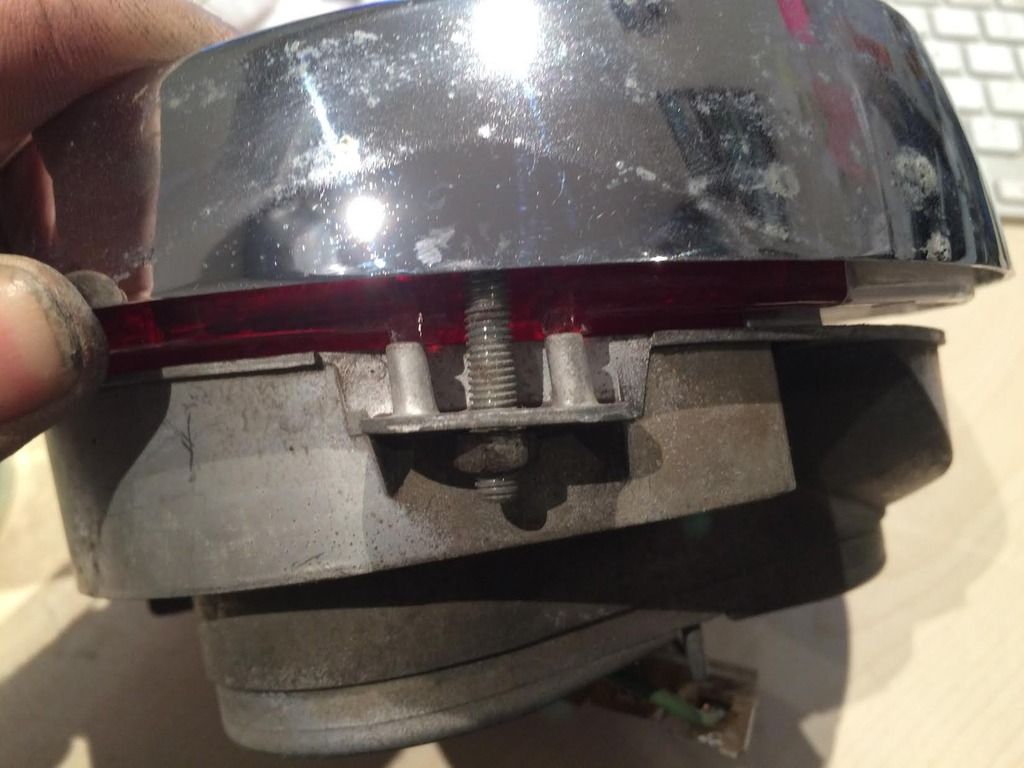 [/img]
[img 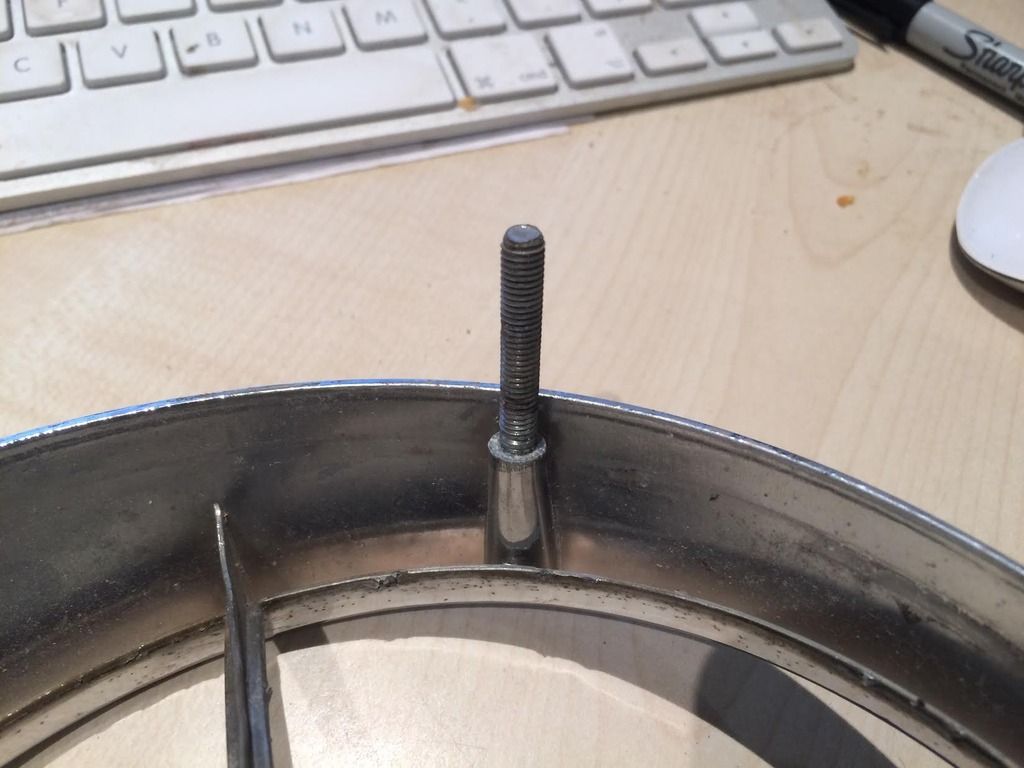 [/img] |
17th May 2016, 20:32
|
|
Senior Member
|
|
Join Date: Feb 2016
Posts: 272
|
|
Quote:
Originally Posted by Jaguartvr
The bulbs are just standard single filament 21w bulbs, the same as you find in a standard indicator or sidelight, very easy to find.
If you look at the pictures you will see the mounting threaded bar, this will unwind from the light fitting and I was going to replace it with a longer threaded bar so that it went straight through the fibreglass, that way you just undo the 2 mounting nuts and you can remove the base from inside the car to replace the bulbs. Fit with LED bulbs and the chances are you will never have to replace the bulbs.
[img] [/img]
[img [/img] |
Nice one, cheers mate. |
17th May 2016, 20:59
|
|
Senior Member
|
|
Join Date: Aug 2012
Posts: 2,143
|
|
Quote:
Originally Posted by 306craig
Aaaah, the old long haired Guv'nor permissions!!!! I know all about those mate. |
A mate of mine kept a Ferrari 308 in his garage for over a year before his mrs found it one day ! That was a near devorce if I remember rightly !! |
17th May 2016, 21:50
|
|
Senior Member
|
|
Join Date: Apr 2014
Location: Midlands
Posts: 405
|
|
Craig have a word with Chris regarding the lights and fitment. A few have used these lights in fact I too purchased a pair for my own build I actually did a deal with Chris for them as by the time I picked up the car and many photoshop variants I decided it wasn't for me so he took them of my hands so he'll be the best person on how best to fit them if you are unsure. Jaguar tvr do look a good buy as any sold are incomplete at the rear
|
18th May 2016, 07:04
|
 |
Senior Member
|
|
Join Date: Sep 2011
Posts: 1,447
|
|
Quote:
Originally Posted by WorldClassAccident
1) open the image in Photio bucket
2) Right Click and select Copy Image Location
3) Start a post on here with [img ] but without the space after the g
4) Paste the Image Location you copied from Photoibucket
5) Add [/img ] after the link but again without the space after the g
|
if you area sing photobucket open the image you want on the right side are 4 url address codes just copy the bottom one ...Img code..paste it in your threads he photo will show directly once the thread is uploaded. No extra IMG codes to worry about |
18th May 2016, 09:48
|
|
Senior Member
|
|
Join Date: Jan 2014
Location: Egham, Surrey
Posts: 1,780
|
|
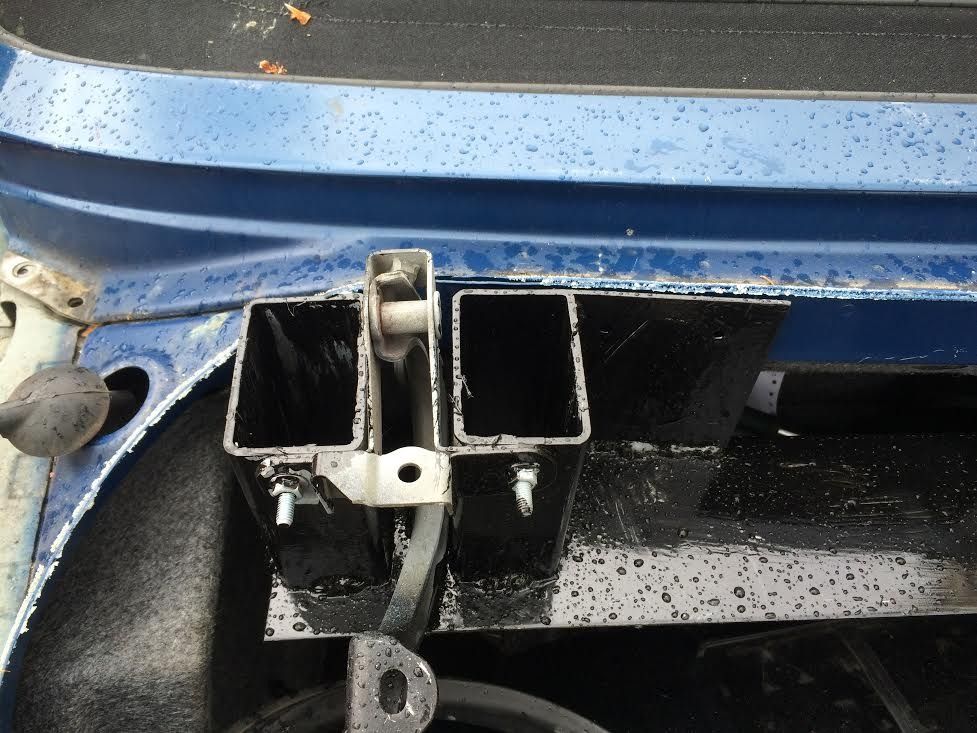
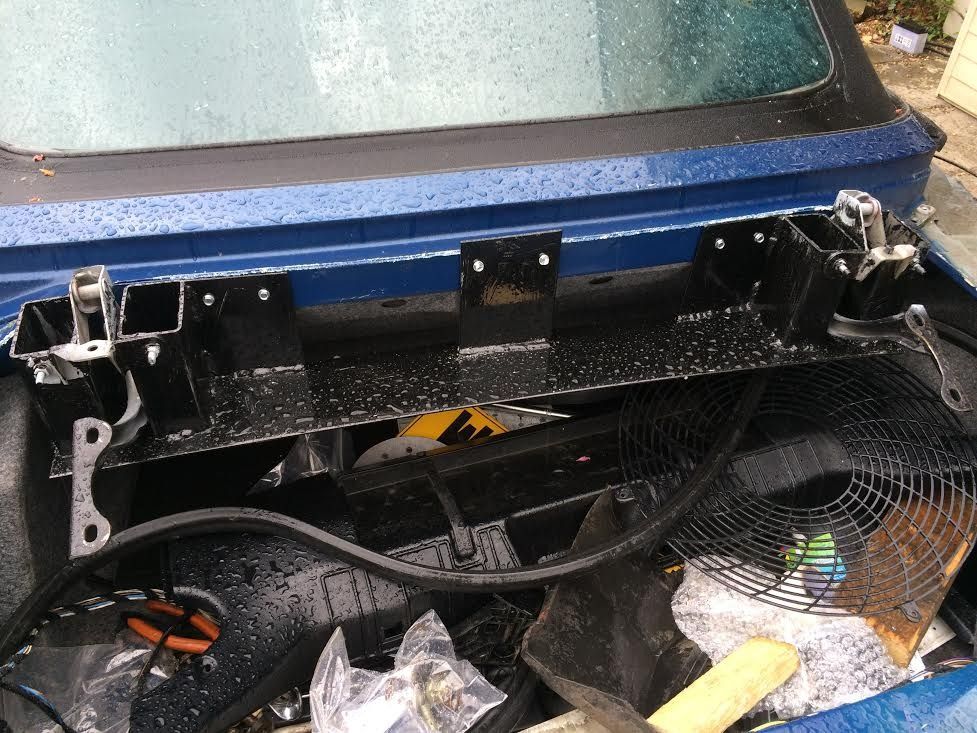
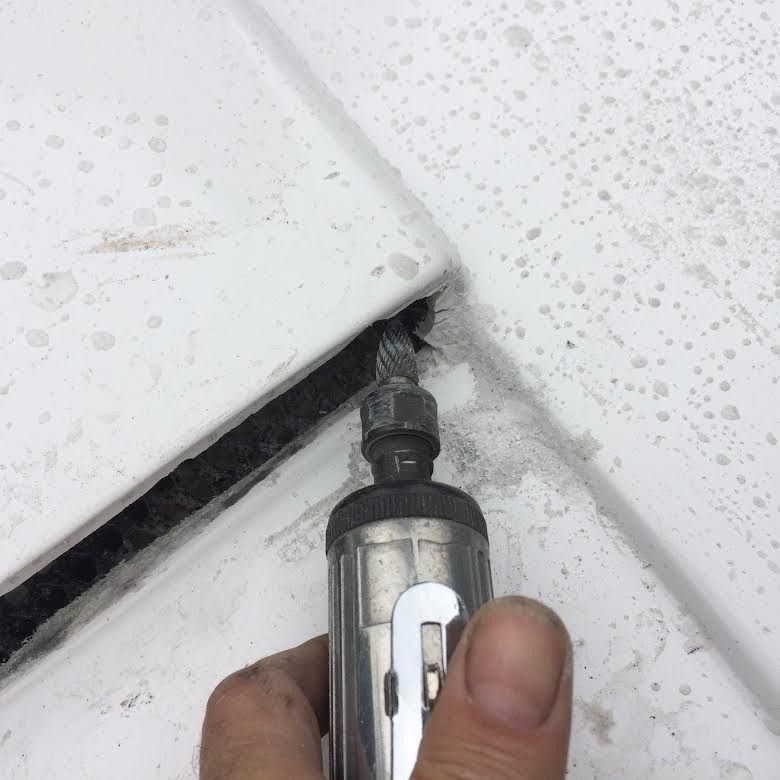
 Fitting boot hinge assembly
At last something that Eric hasn't covered!
Chris had this already attached to his mule when I collected which was a great help. Very simple to fit, keep the outside two uprights level with the boot lip and central then grip with a pair of mole grips. I then levelled it up with a spirit level, or the modern version off, there is an iPhone app for a spirit level, it is free and very useful.
Once gripped just drill through and attack with self tapping bolts, it really is as easy as that. 
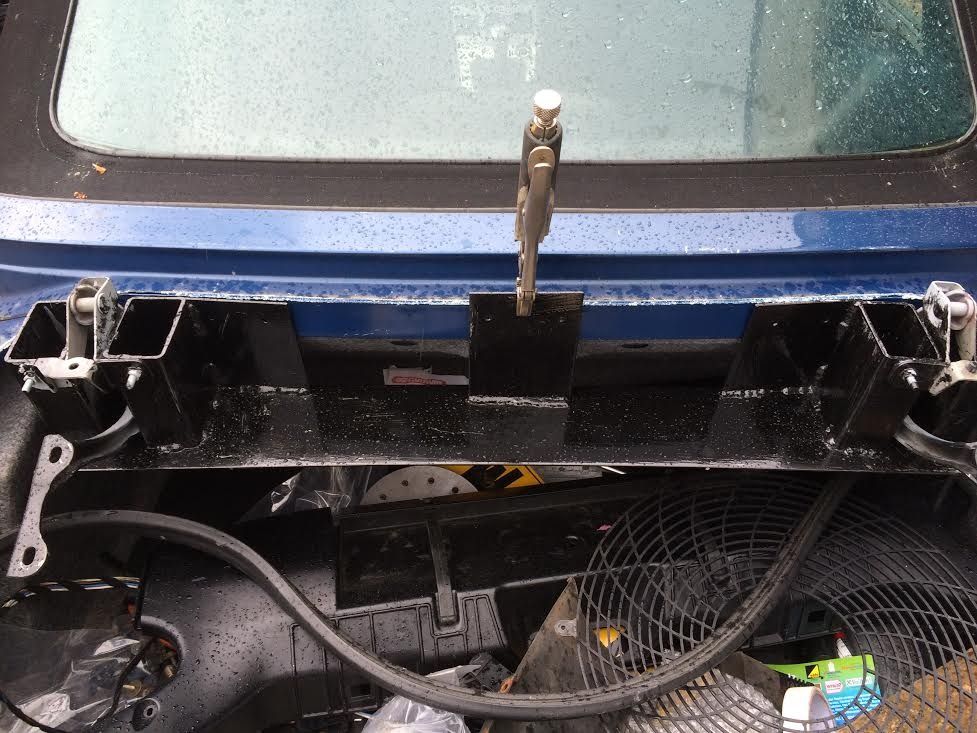  
I've got the posting pictures sorted now, in fact it is so easy I thought I might post up all my thousands of holiday snaps, starting with a picture of me in my mankini, if you all send me money, I promise not to  |
18th May 2016, 10:00
|
|
Member
|
|
Join Date: Feb 2015
Location: West Sussex
Posts: 93
|
|
Loving the detail. Keep up the good work!
Not anywhere near Sussex are you, would love to see it coming together!  |
18th May 2016, 10:03
|
|
Senior Member
|
|
Join Date: Jan 2014
Location: Egham, Surrey
Posts: 1,780
|
|
Egham, Surrey.
Fitting the hinges took less than 15 minutes, I can imagine how long it took to fit the outside hinges, lots of fiddling getting the measurements exact. It does look more like a production car without the exterior hinges.
Last edited by Jaguartvr; 18th May 2016 at 10:08..
|
18th May 2016, 10:04
|
|
Member
|
|
Join Date: Feb 2015
Location: West Sussex
Posts: 93
|
|
B*gger  |
18th May 2016, 10:58
|
|
Senior Member
|
|
Join Date: Jan 2014
Location: Egham, Surrey
Posts: 1,780
|
|
Uprated bonnet gas struts
Spoke to SGS yesterday and ordered a pair of uprated bonnet gas struts. The bonnet now stays up with the small bonnet in place and the front grill assembly balanced on top. I think it could do with a little pressure released later but I won't do that until everything is bolted on.
The standard BMW gas struts are 750 Newtons, the new ones are 1200 Newtons but have an allen key bleed grab screw so you can lower the pressure if needs be, the most important bit is that the bonnet now stays open on it's own, no need for old walking sticks or broom handles.
SGS 01332 576850
If you quote invoice 281326 you will get the right parts which are
2x GSV10-150
2x B3
2xE10
The struts take less than 10 minutes to fit and cost £57.84 including next day delivery
One addition benefit of the uprated struts is that now the bonnet releases on the original bonnet pins and springs so you don't need to buy the Land Rover version.
Anyone want to buy a nice pair of Land Rover springs?
Last edited by Jaguartvr; 18th May 2016 at 17:57..
|
18th May 2016, 11:44
|
 |
Senior Member
|
|
Join Date: Apr 2016
Location: Camberley
Posts: 972
|
|
Quote:
Originally Posted by Jaguartvr
I've got the posting pictures sorted now, in fact it is so easy I thought I might post up all my thousands of holiday snaps, starting with a picture of me in my mankini, if you all send me money, I promise not to |
Goes down a bomb in Vegas, I speak as an observer though. |
18th May 2016, 11:57
|
|
Senior Member
|
|
Join Date: Jan 2014
Location: Egham, Surrey
Posts: 1,780
|
|
Bonnet slot
Having seen everybody cut the slots with drills I thought there has got to be an easier and quicker way. There is! I used one of the small cut off tools, around £35, they are designed to trim door trims when fitting wood flooring.
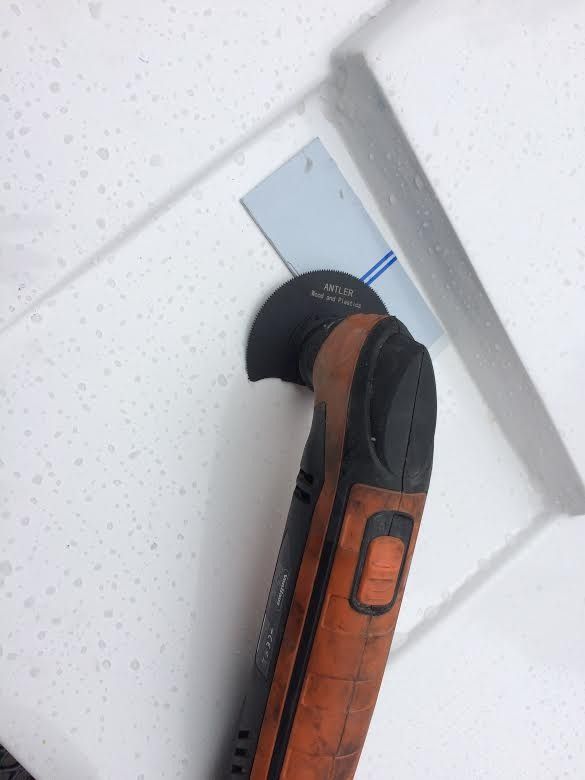
I was going to place a thin piece of alloy under the blade so as not to damage the bonnet, this was not needed, the teeth are all on the top of the blade so I just rested it on the bonnet itself and no damage was done.
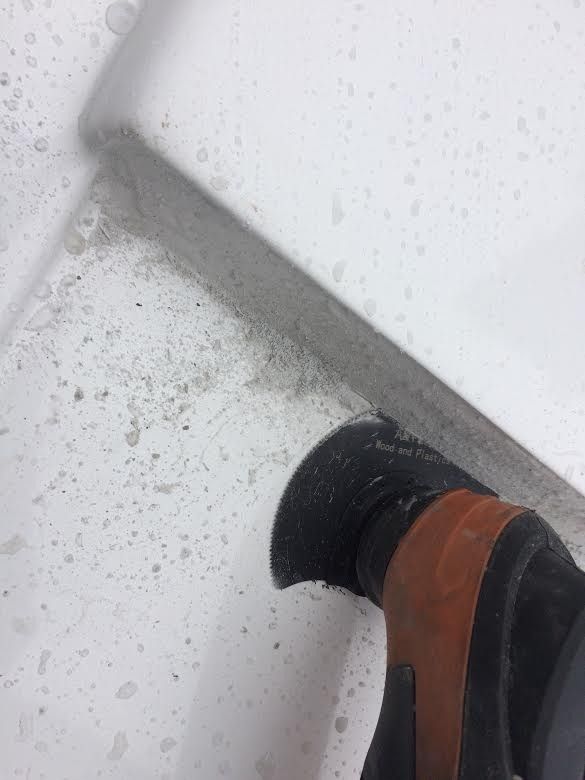
Use it as a plunge cutter, the blade is wide and thick enough so it doesn't flex giving a straight cut. For the top cut I just cut from the inside of the bonnet.

You can see from the top cut that the thickness of the layup of the GRP varies, this is quite normal.

I then swapped to a smaller blade for the vertical cuts, this blade was a bit too wide so I made the cuts at an angle to take out as much material as possible.
I then took out the excess material with an air die grinder and then ran it along the inside edges to get them roughly straight.
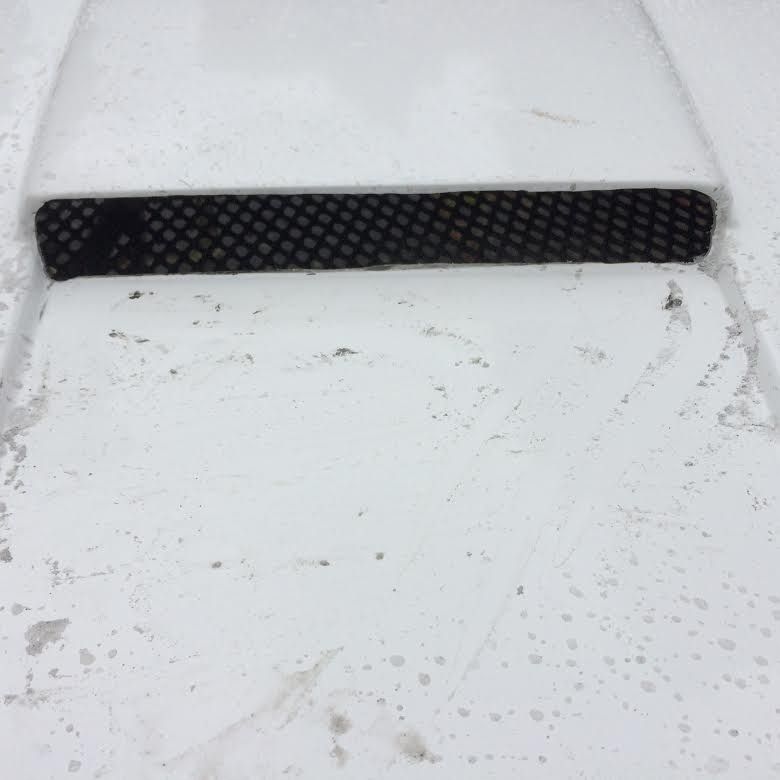
Finished result, only took 20 minutes from start to finish, obviously it will need final finishing. I haven't fitted a grill, it is just the patio table I was working on. I wonder if she would notice a small bit missing?
I would like to try and run the lower section of the opening into the opening about 25mm, I think it would neaten it up but will cause quite a bit more work.
I will be using the same method for the slots in the wings although I have bought some alloy finishers so they will hide any bodgery in cutting the slots.

|
18th May 2016, 14:42
|
|
Senior Member
|
|
Join Date: Jan 2014
Location: Egham, Surrey
Posts: 1,780
|
|
Door Skins...A cunning plan
I've been looking forward to this bit even though I know it is going to be one of the trickier bits.
And the cunning plan is
VELCRO!
I've put 5 bits of velcro on the door skin, I've then attached the other half of the velcro to the part already stuck on the door. I've laid a 3mm steel flat bar on the sill and then placed the door skin as accurately as possible to the door, push hard to get the velcro to stick to the door and then remove the door and firmly press the velcro down.
You can then position the door skin as many times as you like in seconds. You can also open and close the door to check it isn't scraping against the bonnet.
I Know, I know, what a genius!!
Once I get the position spot on, I will drill a 4.2 mm hole in the edge of the door in 2 positions, 1 either side and glue a pop rivet with the centre steel removed. This way I have 2 fixed points to hang the door skin on accurately.
 |
18th May 2016, 15:20
|
|
Senior Member
|
|
Join Date: Mar 2012
Posts: 1,152
|
|
The simplest solutions are the best. Top thinking.
|
|
Currently Active Users Viewing This Thread: 1 (0 members and 1 guests)
|
|
|
 Posting Rules
|
You may not post new threads
You may not post replies
You may not post attachments
You may not edit your posts
HTML code is Off
|
|
|
All times are GMT +0. The time now is 12:17.
|


 Linear Mode

