|
|
| Tribute Automotive Builds Discuss your Tribute kit build |

25th February 2013, 21:19
|
|
Senior Member
|
|
Join Date: Dec 2012
Location: Alton, Hampshire
Posts: 451
|
|
Ah I see
|
25th February 2013, 21:21
|
 |
Senior Member
|
|
Join Date: Oct 2010
Posts: 1,622
|
|
Quote:
Originally Posted by chargerstang

I have a question about the inner boot extender. Has only the lower part will be reduced by 2.5 " ?
|
Great start 
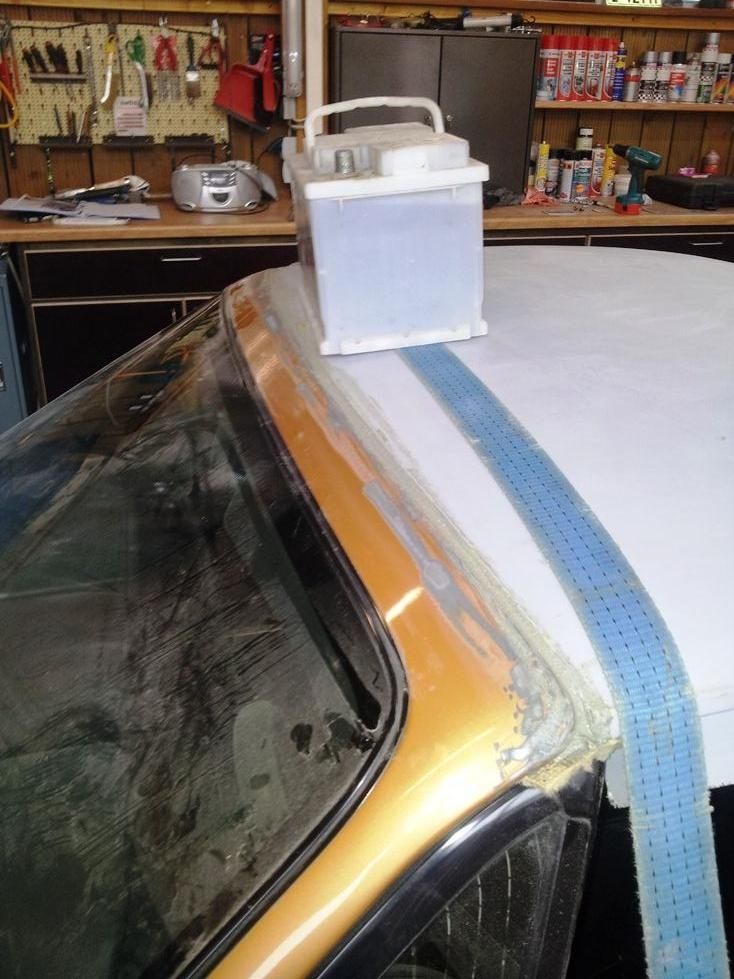
Cut down both sides here ..V...and along to bottom of the boot extender and overlap the two parts as shown and bond together with Tiger Seal.

Also trim the edge that fits against the original rear panel of the car to clear bumper brackets etc. You will need to cut holes as shown to access cables for rear lights. |
25th February 2013, 21:25
|
 |
Senior Member
|
|
Join Date: Jan 2013
Location: Germany
Posts: 188
|
|
Hi Chris,
thanks again 
I give a update tomorrow.
Greets Henry |
26th February 2013, 20:28
|
|
Senior Member
|
|
Join Date: Jan 2013
Location: Germany
Posts: 188
|
|
Day #2
Everything went according to plan.
2x electrics relocated
The rear body kit attached with 2K adhesive
Hinges attached
Petrol cap sized and drilled.
Not much but it`s twice. 
Greets Henry

Last edited by chargerstang; 26th February 2013 at 20:31..
|
27th February 2013, 19:23
|
|
Senior Member
|
|
Join Date: Jan 2013
Location: Germany
Posts: 188
|
|
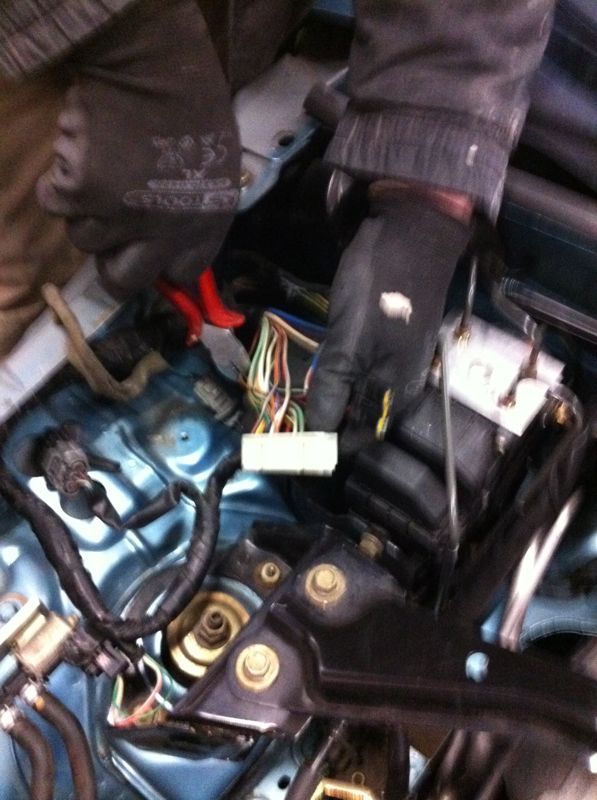
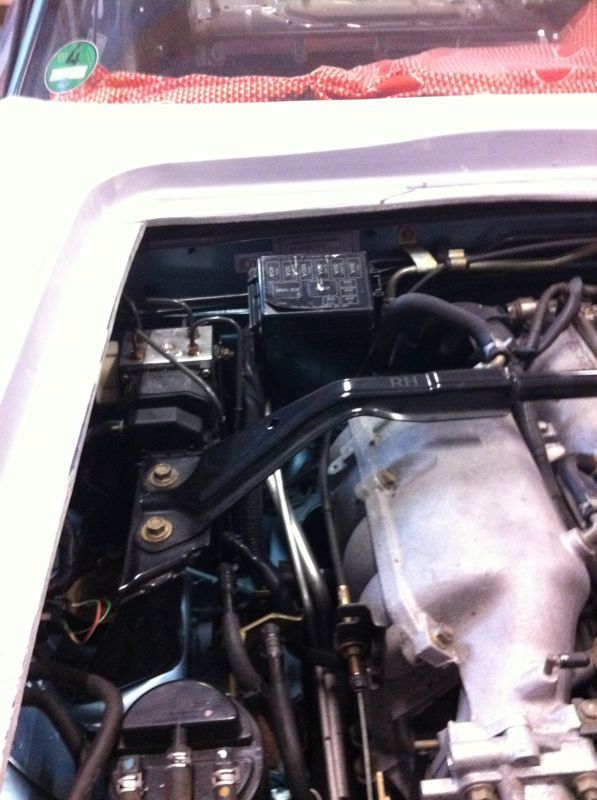
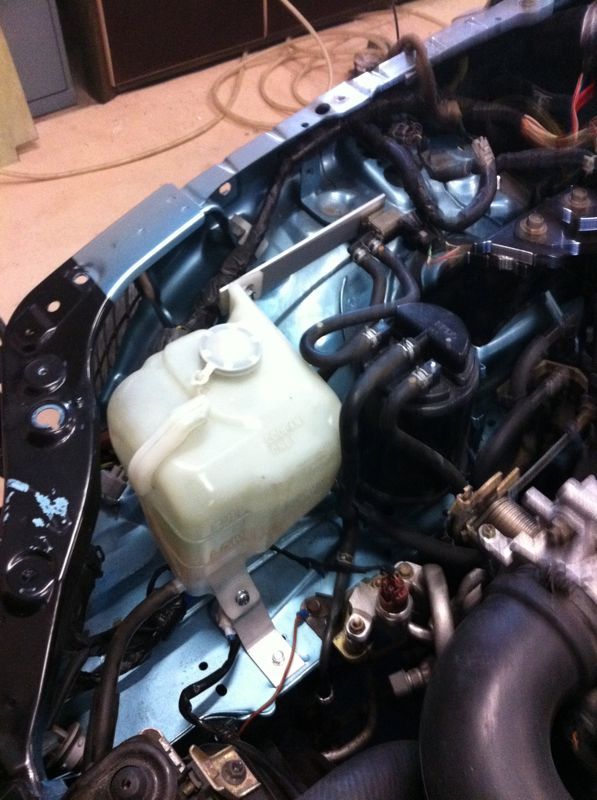
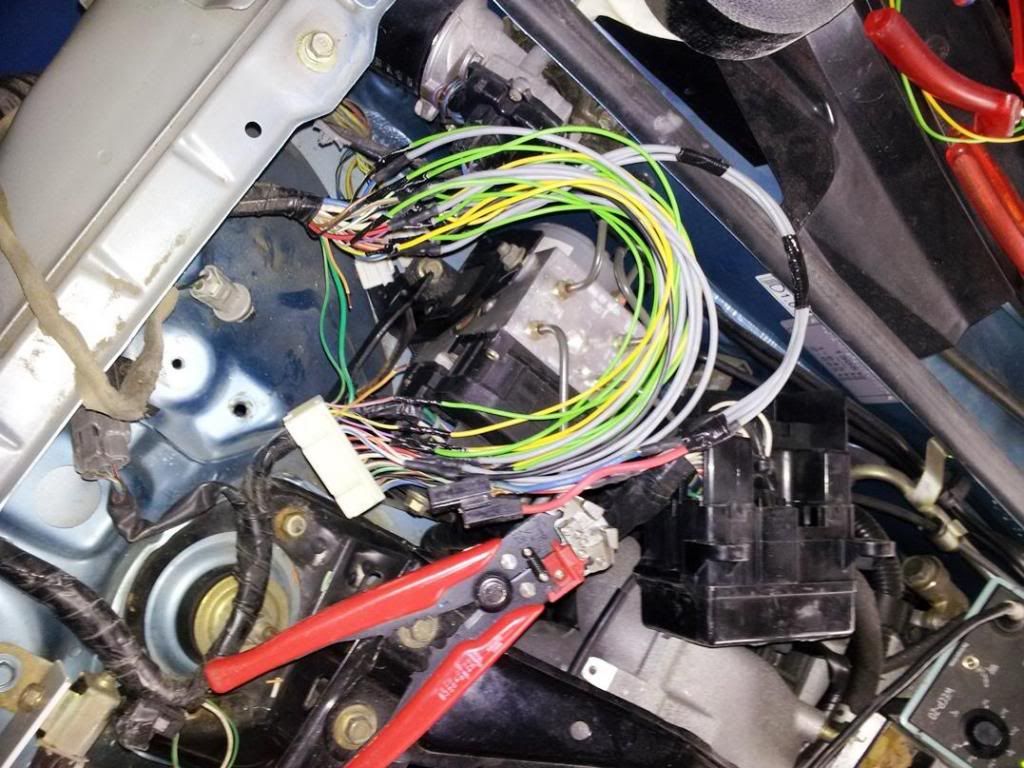
Day 3 of the rebuild.
2 Times Relocation of the fuse boxes and the expansion tank
I wanted to put the fuse box "only" inside.
That we did not like, then we cut through all the cables and 12 "extended.
Now it fits perfectly. There are about 30 wires per car and takes 2 hours.
Cut pieces to put in between, solder, insulate and re-wrap.
Tomorrow there is a new update.
regards
Henry
 |
27th February 2013, 19:43
|
|
Senior Member
|
|
Join Date: Oct 2010
Posts: 1,622
|
|
Left hand drive  You have ABS unit in the way, good solution moving fusebox  |
27th February 2013, 19:51
|
|
Senior Member
|
|
Join Date: Jan 2013
Location: Germany
Posts: 188
|
|
Hi Chris,
yes it's just everything on the "other" side. 
Now at the site, I like it also the best.
Tomorrow we start with the front end. 
Love it, thanks again for the MX250 kit.
Greetings from Germany
Henry |
1st March 2013, 20:11
|
|
Senior Member
|
|
Join Date: Jan 2013
Location: Germany
Posts: 188
|
|
Two more images
Tomorrow we will install the lights and mount the hinges (front) of the morris minor
And then we will begin with filling and sanding. How long you need for this “because normally”
 |
2nd March 2013, 20:56
|
 |
Senior Member
|
|
Join Date: Nov 2011
Location: Emsworth
Posts: 810
|
|
Making rapid progress Henry. Bang on target with your wiper spindle holes too!
As too how long sanding should take......you can take as long as you like! Its the bit I enjoy the most.
|
2nd March 2013, 21:06
|
|
Senior Member
|
|
Join Date: Jan 2013
Location: Germany
Posts: 188
|
|
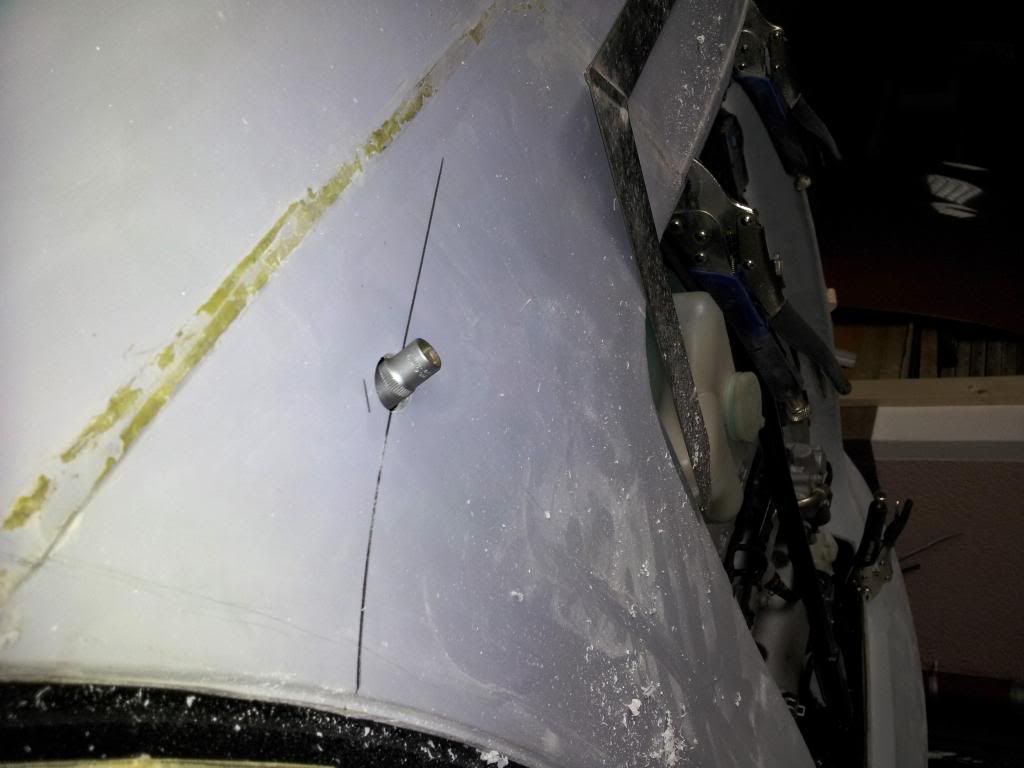
HI NicK,
yes it goes ahead. 
the bit I put over it for the exact angle.
We want to cut out the back window on Sunday.
How wide must be the edge (all around) of the rear window?
I do not want to cut too much  |
2nd March 2013, 21:11
|
|
Senior Member
|
|
Join Date: Nov 2011
Location: Emsworth
Posts: 810
|
|
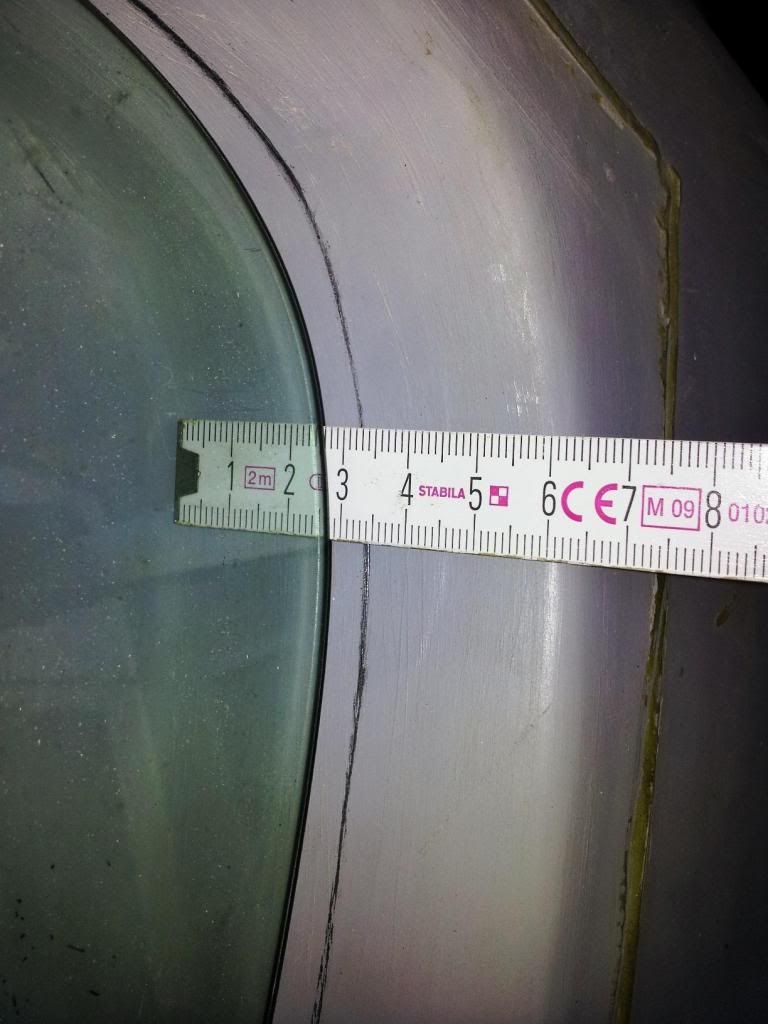
I laid the glass in position, measured the rubber thickness, which I think, was about 4mm, and added that 4mm all around the glass edge.
|
2nd March 2013, 21:13
|
|
Senior Member
|
|
Join Date: Jan 2013
Location: Germany
Posts: 188
|
|
Thats what we need,
1000 Thanks
I have to rebuild the engine hood. because the minor hinges do not fit
Has anyone installed the 10 "long?
Greets Henry
Last edited by chargerstang; 2nd March 2013 at 21:21..
|
2nd March 2013, 22:49
|
|
Senior Member
|
|
Join Date: Nov 2011
Location: Emsworth
Posts: 810
|
|
Do check your window rubber before cutting. Its +4mm from memory, but I may be wrong!
|
3rd March 2013, 09:56
|
|
Senior Member
|
|
Join Date: Oct 2010
Posts: 1,622
|
|
Hi Heinrich
As Nick says, lay just the glass on the flange and draw around it then mark 4-5mm INSIDE the line, so that the hole is SMALLER than the glass.
|
3rd March 2013, 12:16
|
|
Senior Member
|
|
Join Date: Jan 2013
Location: Germany
Posts: 188
|
|
Hi Chris, hi Nick,
thanks for the details.
More Images on Monday 
and my daily question
has anyone ever installed fog lights in the 2 round holes.
Perhaps the mini one fog lamps will fit?
http://commons.wikimedia.org/wiki/Fi...lift_front.JPG

Greets Henry
Last edited by chargerstang; 3rd March 2013 at 18:54..
|
3rd March 2013, 21:06
|
|
Senior Member
|
|
Join Date: Oct 2010
Posts: 1,622
|
|
Great idea about the lights, would look cool |
4th March 2013, 19:41
|
|
Senior Member
|
|
Join Date: Jan 2013
Location: Germany
Posts: 188
|
|
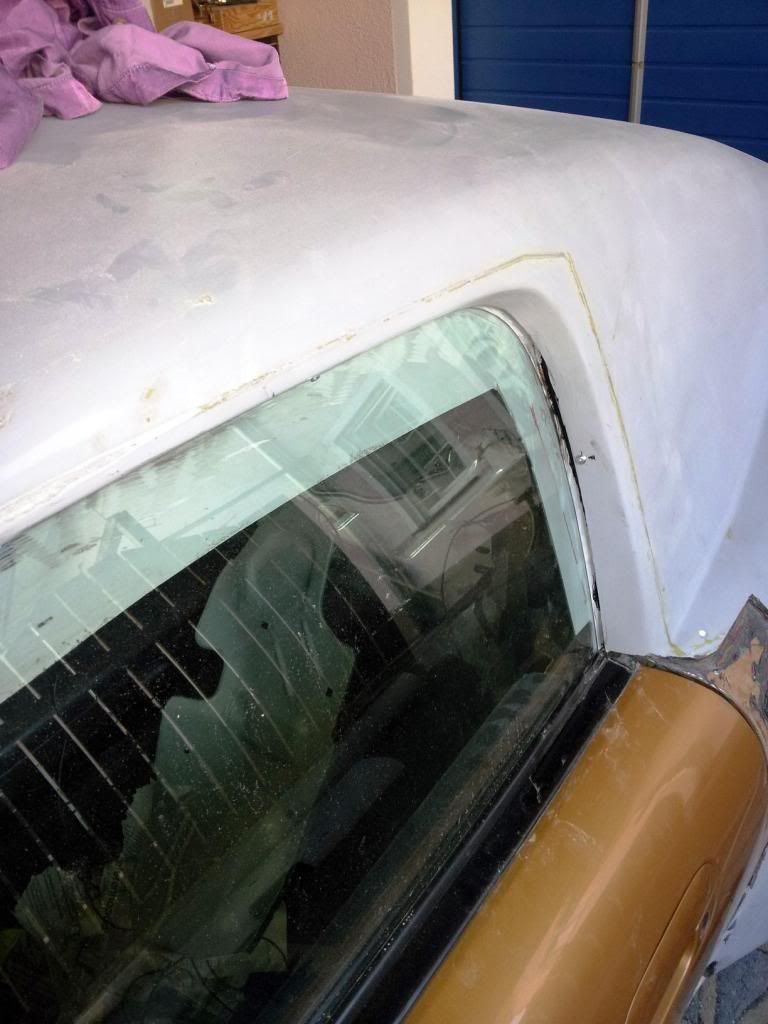
Hi Chris,
we will try to install the mini Foglamps.
Today, I have rebuilt the cutout for the side window.
A thick rubber gasket I did not want 
There was a gap of ~ 30mm between body and window.
Now, the difference was reduced to 2-3mm.
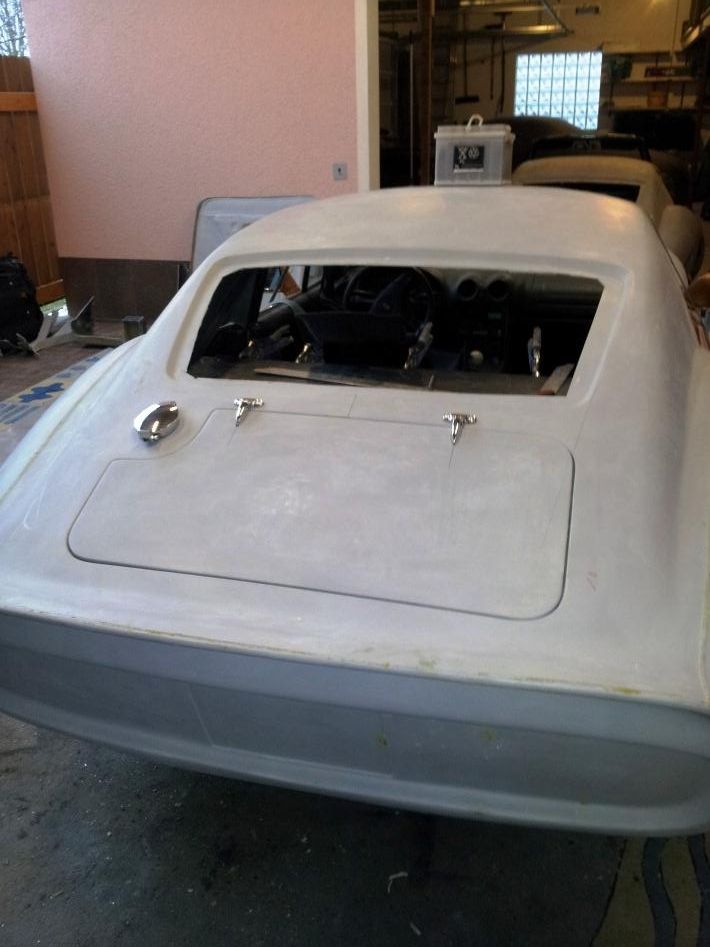
Finally, I start filling.
Now it looks like a car. 
 |
4th March 2013, 22:26
|
|
Senior Member
|
|
Join Date: Dec 2012
Location: Alton, Hampshire
Posts: 451
|
|
Quote:
Originally Posted by chargerstang
Hi Chris,
we will try to install the mini Foglamps.
Today, I have rebuilt the cutout for the side window.
A thick rubber gasket I did not want
There was a gap of ~ 30mm between body and window.
Now, the difference was reduced to 2-3mm.
Finally, I start filling.
Now it looks like a car.
|
Great progress mate! Please explain what you had to do on the window gaps |
5th March 2013, 19:48
|
|
Senior Member
|
|
Join Date: Jan 2013
Location: Germany
Posts: 188
|
|
Hi it was easy,
to reduce the gap, I'm just drawn a line outside to the window.
I Cut it Right there.
The sawed-off part of the back and put it fixed.
To get around 3mm space between the window and roof I put on bonding spacers between.
Until the glue was dry I had screwed 2 screws for fixing. Thats it
Sorry for my bad english, I hope you can do something with the instructions.
regards
And my daily update.

Last edited by chargerstang; 5th March 2013 at 20:01..
|
5th March 2013, 20:34
|
|
Senior Member
|
|
Join Date: Oct 2010
Posts: 1,622
|
|
Heinrich, how long do you have left? You are nearly done! Are both cars at the same stage?  |
|
Currently Active Users Viewing This Thread: 1 (0 members and 1 guests)
|
|
|
 Posting Rules
|
You may not post new threads
You may not post replies
You may not post attachments
You may not edit your posts
HTML code is Off
|
|
|
All times are GMT +0. The time now is 02:57.
|


 Linear Mode

