Are you madabout kit cars      
 "We've Got Kit Cars Covered" Information about Madabout-Kitcars.com Contact Madabout-Kitcars.com         Home of UK kit cars - madabout-kitcars.com Various kit car write ups All the latest kit car news Kit car related and general discussion

Search
Manufacturers
Kit Cars
Kit Car Data sheets
Picture Gallery
SVA Knowledgebase
Clubs & Communities
Build cost estimator
Kit cars for sale
Knowledge Base 
KitcarUSA.com
Classic-Kitcars.com
 

Go Back   Madabout Kitcars Forum > Mad Build Area > Tribute Automotive Builds

Tribute Automotive Builds Discuss your Tribute kit build

Reply
 
Thread Tools Display Modes
  #81  
Old 19th April 2014, 19:52
slangenracing slangenracing is offline
Senior Member
 
Join Date: Feb 2014
Location: Sweden
Posts: 140
slangenracing is on a distinguished road
Default

When i had it out i realized i needed to do something with the roofline, so i have marked it out with tape where to cut... It has been cut today and bonded together helpfully, just so i can take rear piece off and bond on inside. Unfortunally i couldnt take any picture as it got dark outside, will try tomorrow


Reply With Quote
  #82  
Old 19th April 2014, 19:54
slangenracing slangenracing is offline
Senior Member
 
Join Date: Feb 2014
Location: Sweden
Posts: 140
slangenracing is on a distinguished road
Default

Made a bar and some plates in grp for the flip to rest on. Also made the "forks" of tubing...


Reply With Quote
  #83  
Old 20th April 2014, 20:27
slangenracing slangenracing is offline
Senior Member
 
Join Date: Feb 2014
Location: Sweden
Posts: 140
slangenracing is on a distinguished road
Default

Today i ripped rear piece off from the car and layed the fiberglass on the inside.


The same time i moulded the fuelcap recess a la SeaNick!


It got really hot outside today, so i could mould the tail light recesses too. Also deleted the registrationplate recess.


Made the mould from my sons broken bucket... He was pretty happy with his new one!

Reply With Quote
  #84  
Old 20th April 2014, 20:31
slangenracing slangenracing is offline
Senior Member
 
Join Date: Feb 2014
Location: Sweden
Posts: 140
slangenracing is on a distinguished road
Default

Recess for bonnet locks...


back on again...


cap...


test fit...


Reply With Quote
  #85  
Old 20th April 2014, 20:33
slangenracing slangenracing is offline
Senior Member
 
Join Date: Feb 2014
Location: Sweden
Posts: 140
slangenracing is on a distinguished road
Default

Difference now and before straitening the roofline. Doesn´t look much on the picture, but makes a big difference in reality... I am very happy with it. Also shortened front clip about 15mm to get the arches more symmetric...


Last edited by slangenracing; 20th April 2014 at 20:59..
Reply With Quote
  #86  
Old 20th April 2014, 20:37
slangenracing slangenracing is offline
Senior Member
 
Join Date: Feb 2014
Location: Sweden
Posts: 140
slangenracing is on a distinguished road
Default

My fiancee really wanted me back up from the garage!

Yummy

Reply With Quote
  #87  
Old 21st April 2014, 19:00
Tribute Automotive's Avatar
Tribute Automotive Tribute Automotive is offline
Senior Member
 
Join Date: Oct 2010
Posts: 1,622
Tribute Automotive is on a distinguished road
Default

More great work!! I lower roof line works really well. Your new boot lid will be sent this week.
Reply With Quote
  #88  
Old 21st April 2014, 19:57
slangenracing slangenracing is offline
Senior Member
 
Join Date: Feb 2014
Location: Sweden
Posts: 140
slangenracing is on a distinguished road
Default

Glad to hear you like it Chris!

Thats just great! Don´t forget the epoxi and perspex! I will need them really soon now! Thanks again! Your a great seller!

Todays work was to mould a new grille opening, took some influenses from aston martin. Used foam plastic (is it called that??) and cut it and sanded it out to make something to mould around. Protected it with packing tape.

Also moulded in light buckets for som extra highbeam lights. Will use 5" type from older golf or BMW. Used plastic flower pots


Last edited by slangenracing; 27th April 2014 at 21:21..
Reply With Quote
  #89  
Old 21st April 2014, 19:58
slangenracing slangenracing is offline
Senior Member
 
Join Date: Feb 2014
Location: Sweden
Posts: 140
slangenracing is on a distinguished road
Default

This is how i imagine it... Also with perspex over both headlamps and extras


Last edited by slangenracing; 27th April 2014 at 21:16..
Reply With Quote
  #90  
Old 27th April 2014, 18:24
slangenracing slangenracing is offline
Senior Member
 
Join Date: Feb 2014
Location: Sweden
Posts: 140
slangenracing is on a distinguished road
Default

Today i slipped a bit with the grinder! As my car doesn´t have a slam panel, i thought i could lower the top of the frontsection a bit to have a smoother transition. -Yes i know it it perfectly fine as is, but it´s just me, i guess i was made this way


I made a "skelleton" of board pieces and foam plastic. Used hot glue gun to bond together


Packing tape so it will come of easy


Fibreglass layed. I am laying this "backwards", so i will have to sand it down, put some filler on and smooth it out. I will also have to sand it on the underside an add some more layers there.


The scoop has got some more presence...


The radiator has to be lowered a bit as well


Last edited by slangenracing; 27th April 2014 at 18:34..
Reply With Quote
  #91  
Old 27th April 2014, 18:46
Drummajor Drummajor is offline
Senior Member
 
Join Date: May 2013
Posts: 748
Drummajor is on a distinguished road
Default

This is going to look awesome . Keep it up.
Reply With Quote
  #92  
Old 27th April 2014, 19:15
slangenracing slangenracing is offline
Senior Member
 
Join Date: Feb 2014
Location: Sweden
Posts: 140
slangenracing is on a distinguished road
Default

Quote:
Originally Posted by Drummajor View Post
This is going to look awesome . Keep it up.
Ahh thanks! At least i hope it will look god. I would cry otherwhise after the amount of work i´m putting in this...
Reply With Quote
  #93  
Old 27th April 2014, 21:07
Tribute Automotive's Avatar
Tribute Automotive Tribute Automotive is offline
Senior Member
 
Join Date: Oct 2010
Posts: 1,622
Tribute Automotive is on a distinguished road
Default

Worth all that effort, the flow from front panel to bonnet and the long bulge look great.
Reply With Quote
  #94  
Old 27th April 2014, 21:25
slangenracing slangenracing is offline
Senior Member
 
Join Date: Feb 2014
Location: Sweden
Posts: 140
slangenracing is on a distinguished road
Default

Quote:
Originally Posted by Tribute Automotive View Post
Worth all that effort, the flow from front panel to bonnet and the long bulge look great.
Good to hear you like it! Maybe i don´t have to emabarrass my self
Reply With Quote
  #95  
Old 27th April 2014, 21:29
Tribute Automotive's Avatar
Tribute Automotive Tribute Automotive is offline
Senior Member
 
Join Date: Oct 2010
Posts: 1,622
Tribute Automotive is on a distinguished road
Default

Quote:
Originally Posted by slangenracing View Post
Good to hear you like it! Maybe i don´t have to emabarrass my self
Far from it. I salute your skills.
Reply With Quote
  #96  
Old 29th April 2014, 08:33
Scottie22 Scottie22 is offline
Senior Member
 
Join Date: May 2013
Posts: 2,161
Scottie22 is on a distinguished road
Default

You have done a brilliant job there! The roof-line looks well balanced.

I can identify a bit with your thoughts, it is not so much the difference that is seen by others, as the satisfaction in your own mind that you have what you want!
It is definitely worth the effort, and your car car will look fabulous because of it, keep it up.
Reply With Quote
  #97  
Old 29th April 2014, 19:49
seanick's Avatar
seanick seanick is offline
Senior Member
 
Join Date: Nov 2011
Location: Emsworth
Posts: 810
seanick is on a distinguished road
Default

Looks very good. Have you taken the 2" slice out of the rear arches yet?
Reply With Quote
  #98  
Old 30th May 2014, 22:39
jones jones is offline
Senior Member
 
Join Date: Apr 2014
Location: Midlands
Posts: 405
jones is on a distinguished road
Smile ummmmm updates?

We're at the edge of our seats here any updates? :-) thanks
Reply With Quote
  #99  
Old 1st June 2014, 21:16
slangenracing slangenracing is offline
Senior Member
 
Join Date: Feb 2014
Location: Sweden
Posts: 140
slangenracing is on a distinguished road
Default

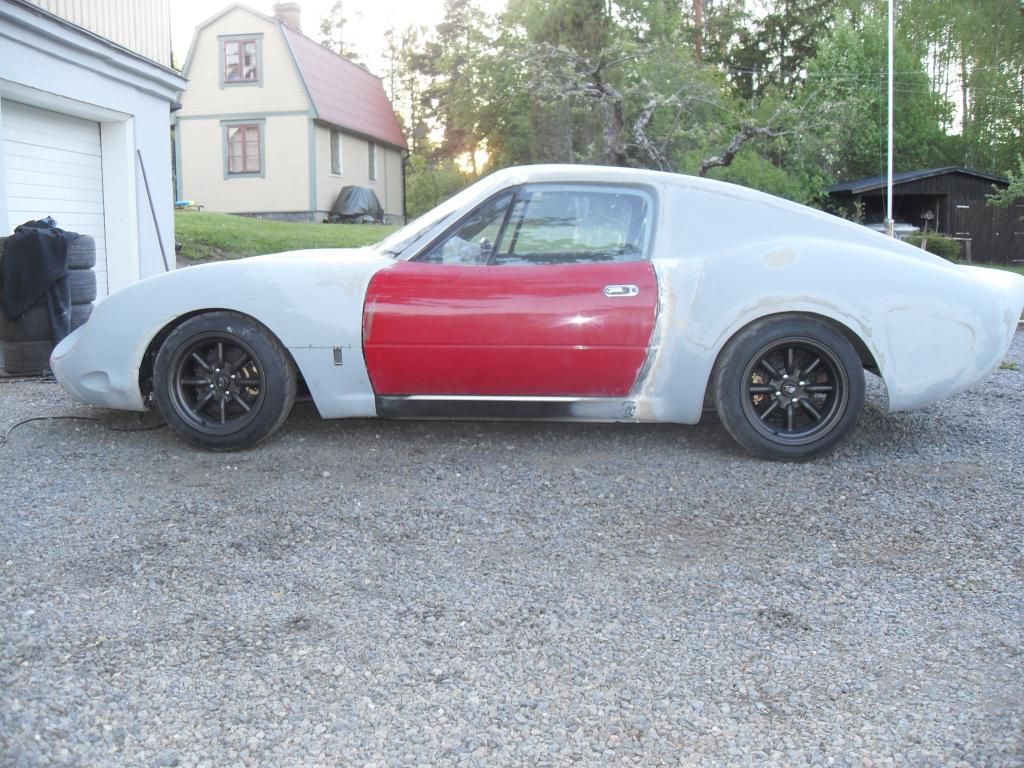
Oh, just saw your post Nick, glad you like it, but anyway i will be keeping the wide arches. Kind of like them so i fitted spacers instead. Later i will widen the rear wheels about 2,5-3 inches inwards. But i will have to rubb these tyres out first!

Ok Jones! Your absolutely right, i have to post some updates, been very busy with other stuff too, but "all" that stuff is sorted out now. So here they come!

Thanks and best regards from Andreas in Sweden!


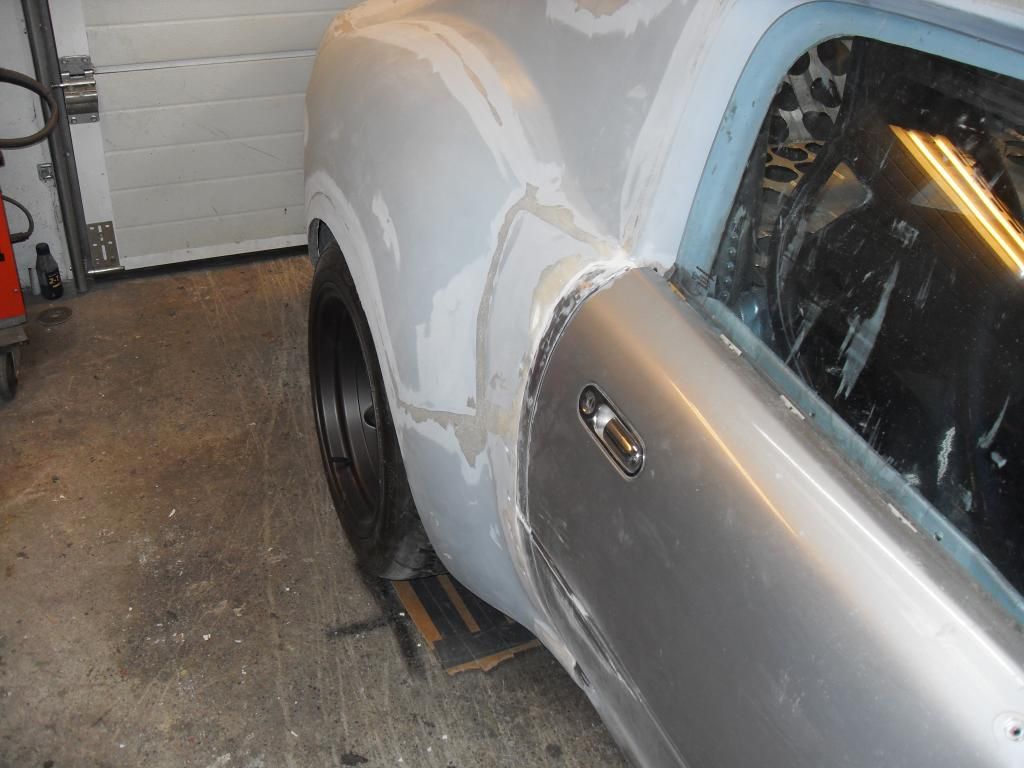
Rear wheels fitted with 38mm hubcentric spacers!


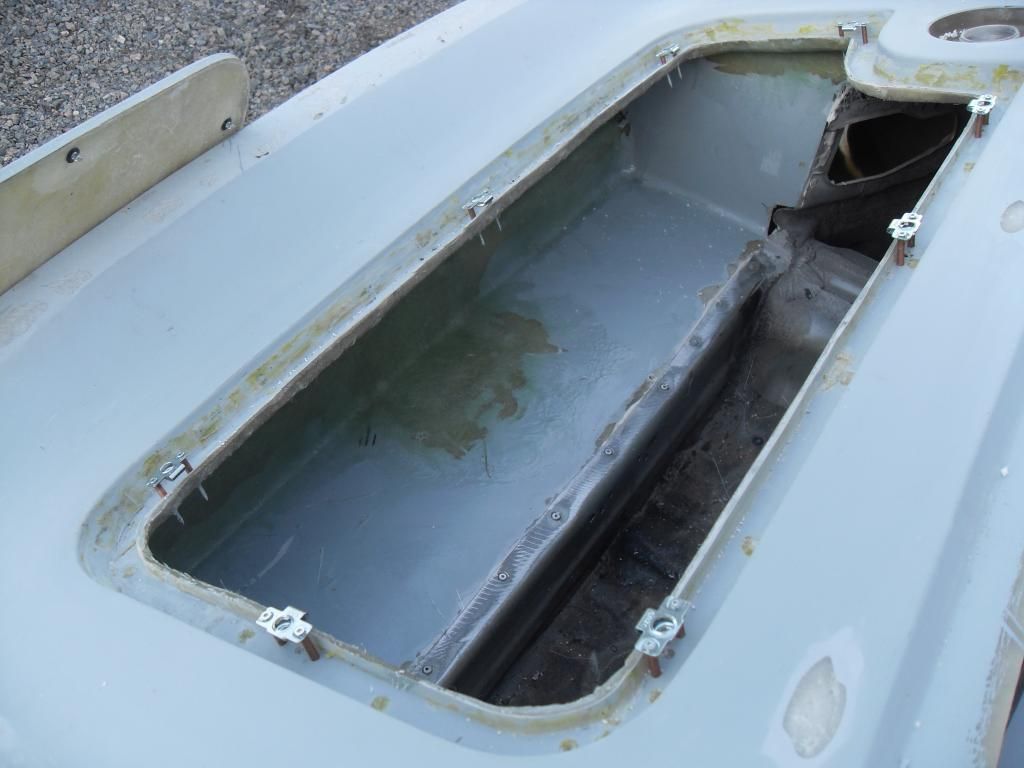
Have had the body bonded on to the car permanently. Also cut away the tailpanel from the miata and deleted the hatchbox as i´ll be using DZUS fasteners
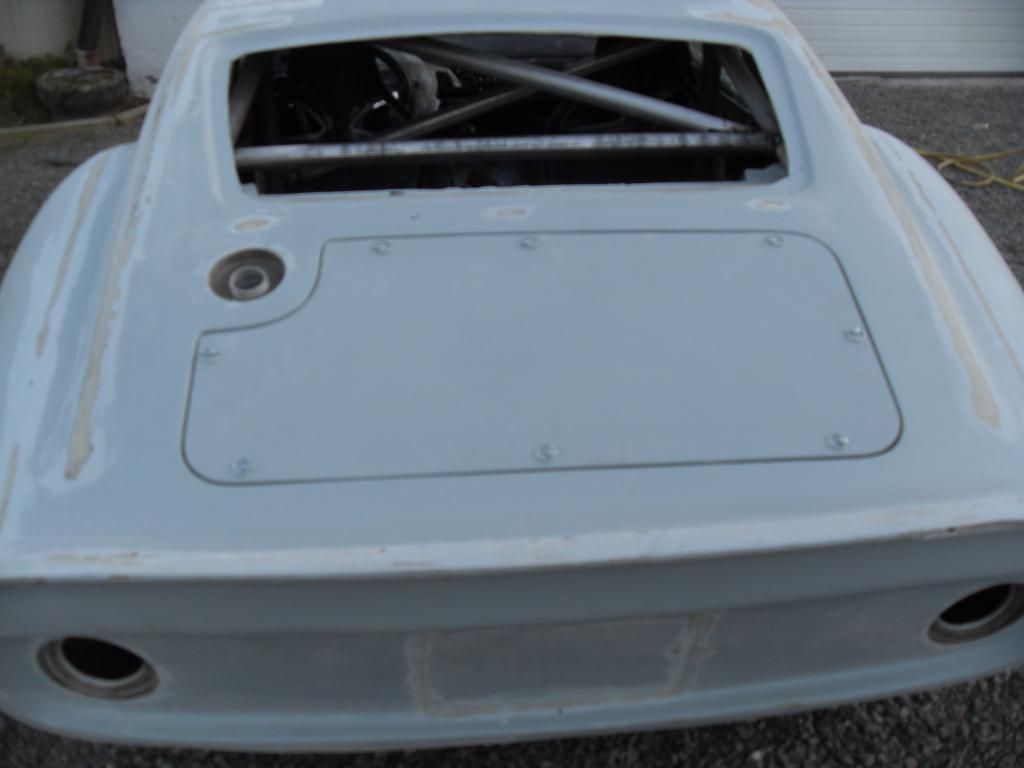


Lid is on


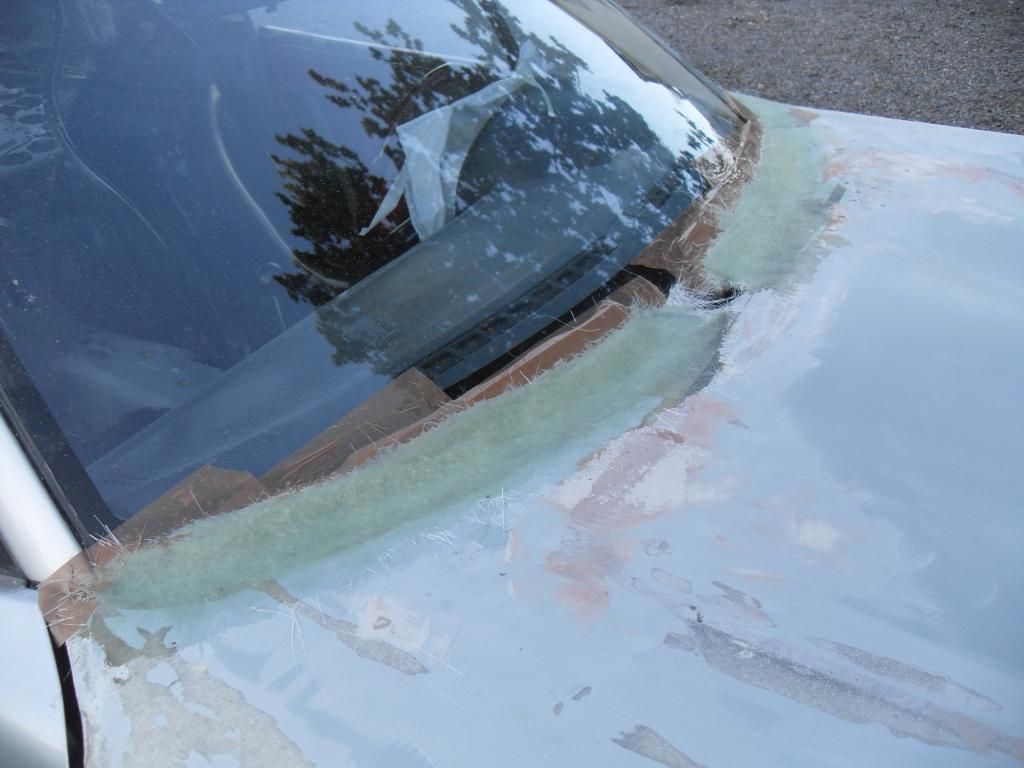
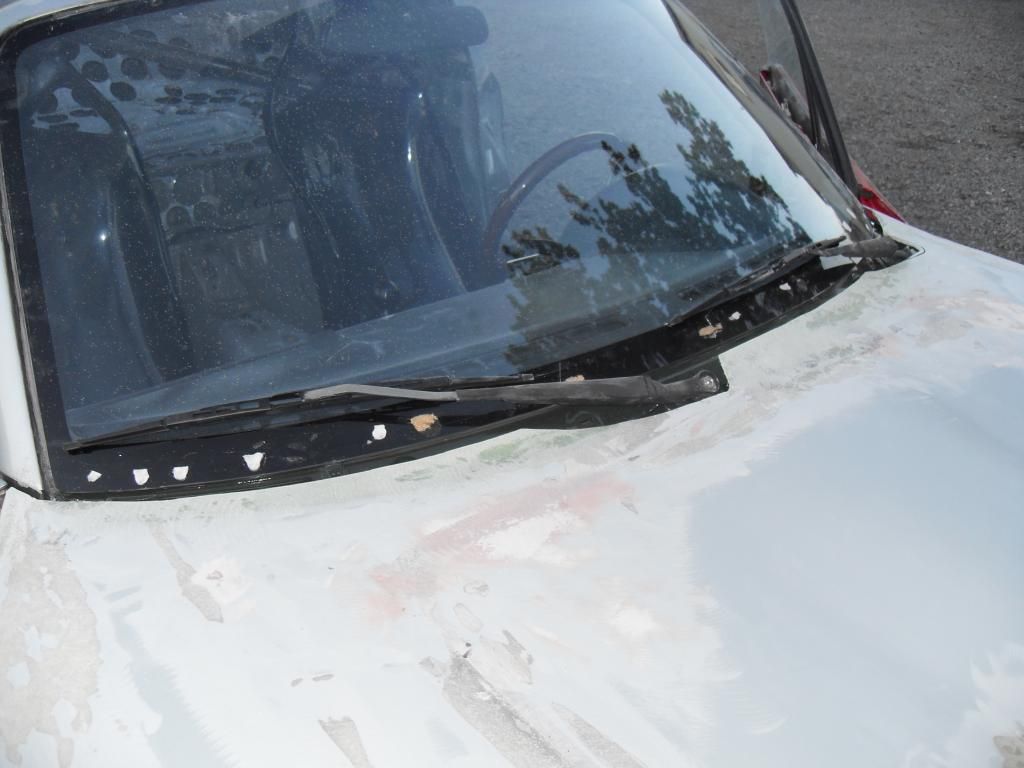
Extended the area against the screen as i got a bit wild with the anglegrinder earlier....


Raw finished


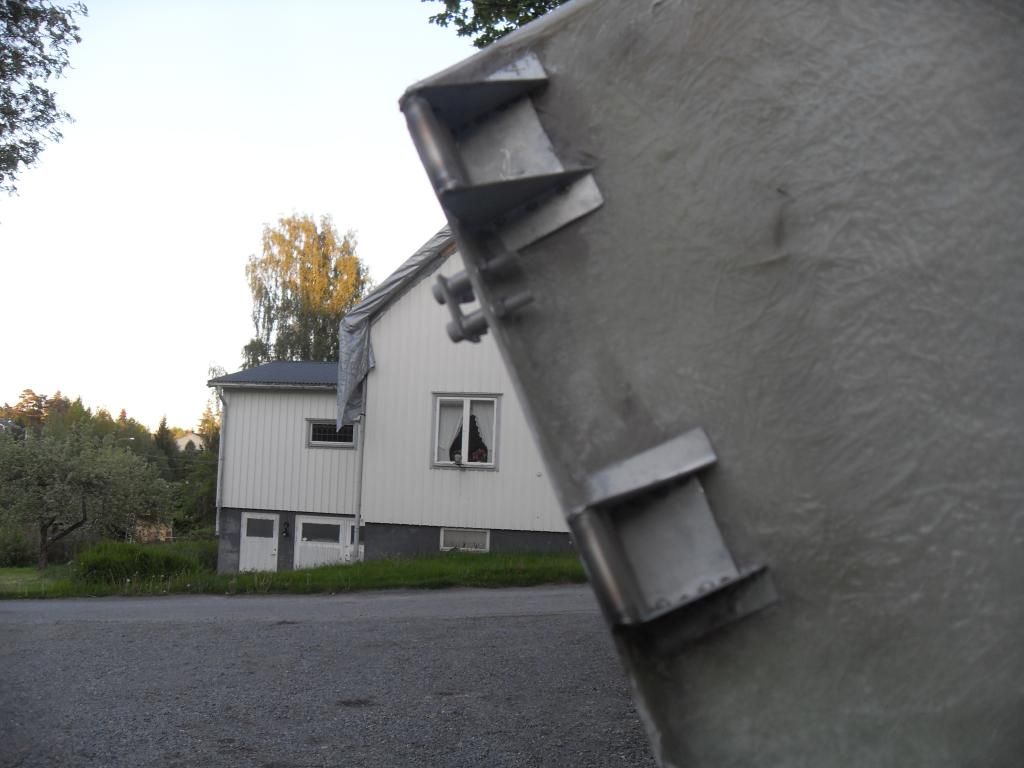
Some DZUS catches for the flip


Theese locates the flip lower rear parts so it always lines up when closed. Goes over pins


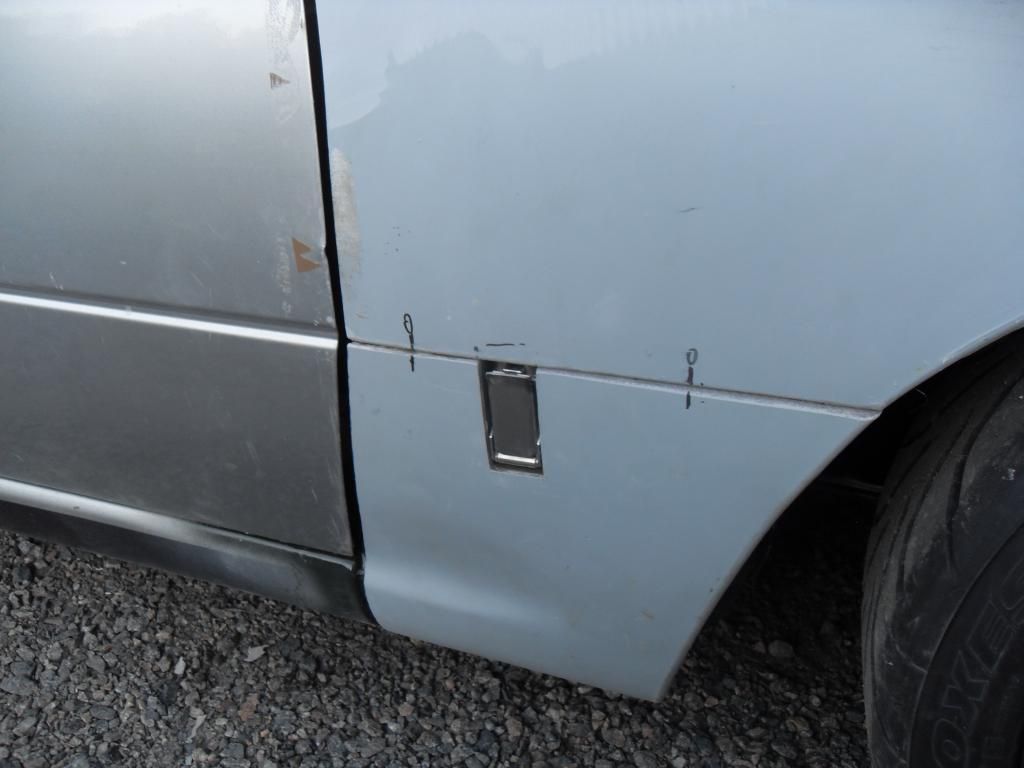
Also cut the wheel openings to get them symmetric, and molded new inward edges


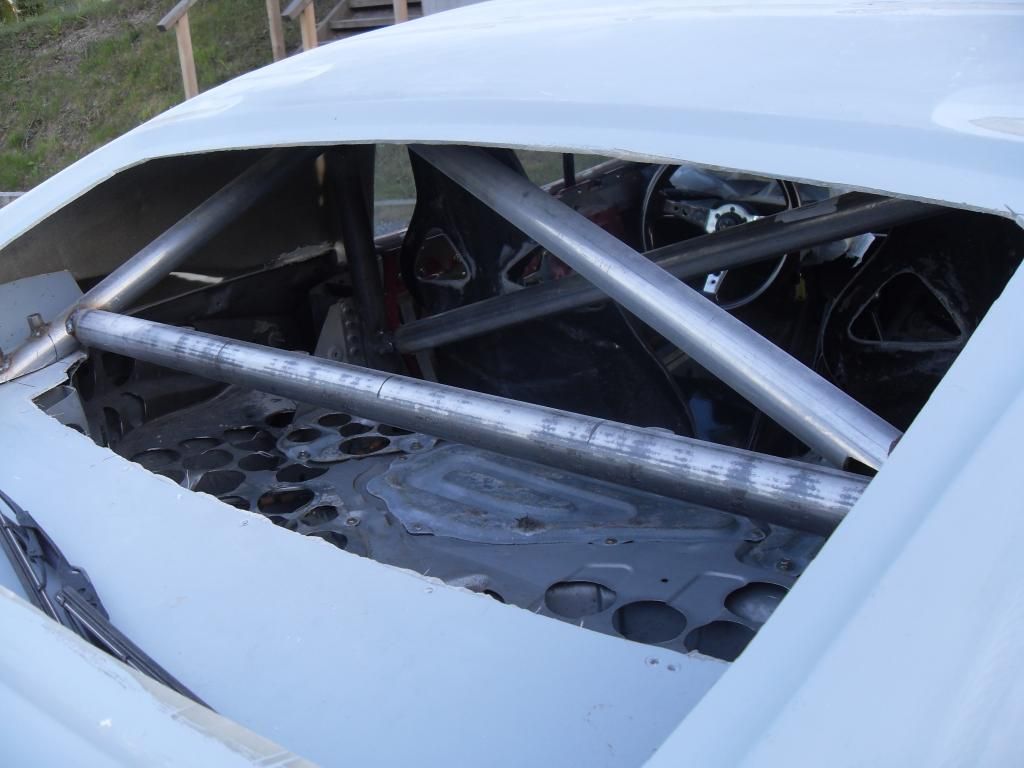
As it will be seeing some trackdays i made a rollcage. Bolted to the chassie


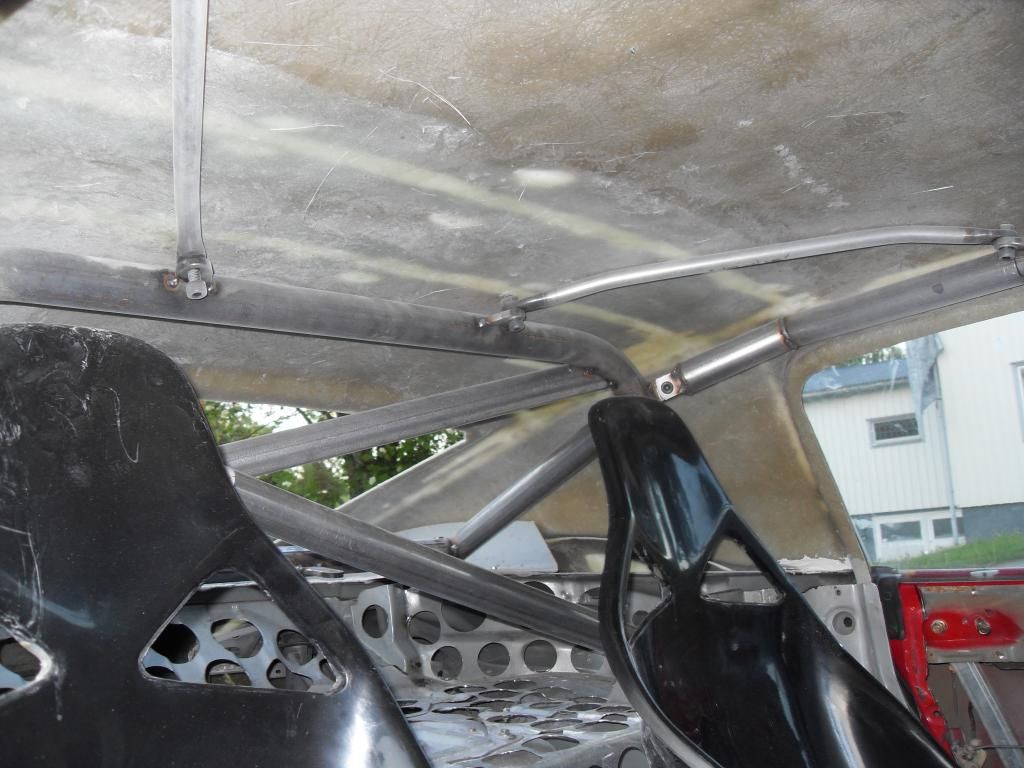
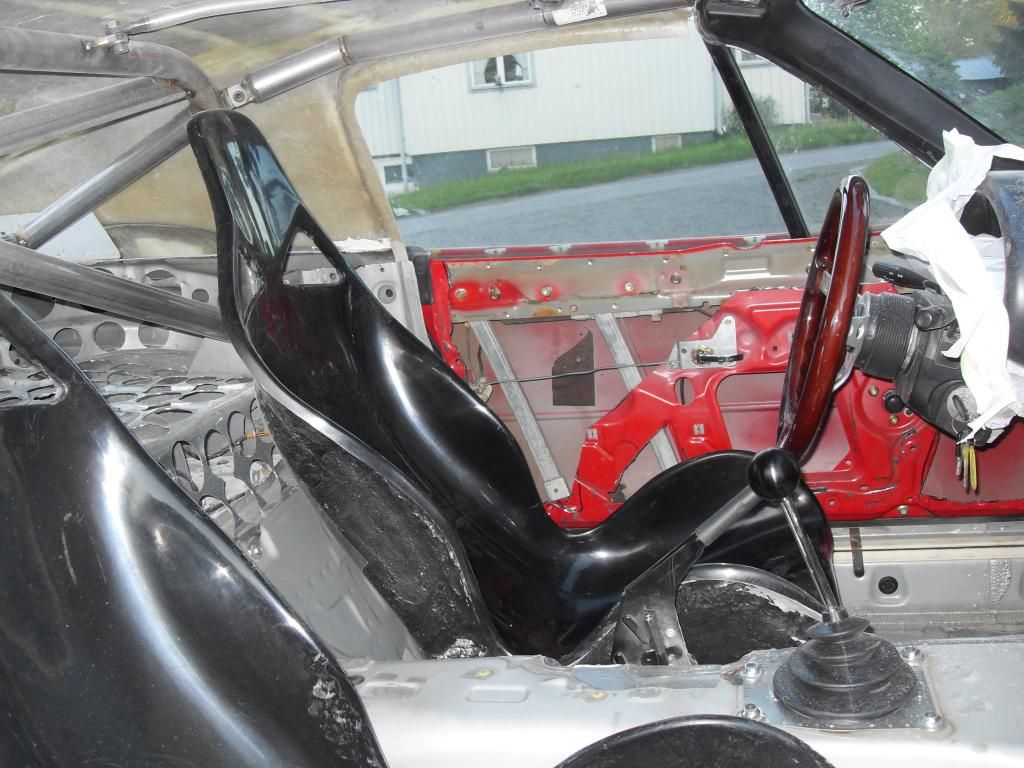
Theese very nice racing seats Chris made for me, they are very light and solid, about 3,5 kilo each. Saves up a lot of weight compared to stock ones. Made some brackets to fit them to stock mounting points. Chris has the moulds to the seats


Last edited by slangenracing; 1st June 2014 at 21:36..
Reply With Quote
  #100  
Old 1st June 2014, 21:28
slangenracing slangenracing is offline
Senior Member
 
Join Date: Feb 2014
Location: Sweden
Posts: 140
slangenracing is on a distinguished road
Default

Got this with the kit. I bonded the body with it and left it for a couple of Days. But when i pulled the fender it came loose!

Well said and done, i could pull and bend the whole kit of from the miata! I had prepared the miata metal with the anglegrinder and a 40 grit disc. So it was bare and clean. The "glue" came loose only from the metal, on the fiberglass is was a pain in the a** to get rid of.

So i cleaned it all off and bought ALOT of 2hour epoxiglue. It is now bonded with that and it is impossible to get off. Epoxi is a lot better to bond things together with than a polyester is.

So talk to Chris about it, it would be a shame to do a nice (and maybe expensive) paintjob just to watch it crack!

Reply With Quote
Reply


Currently Active Users Viewing This Thread: 1 (0 members and 1 guests)
 

Posting Rules
You may not post new threads
You may not post replies
You may not post attachments
You may not edit your posts

BB code is On
Smilies are On
[IMG] code is On
HTML code is Off

Forum Jump


All times are GMT +0. The time now is 06:09.

copyright © madabout-kitcars.com 2000-2024
terms and conditions | privacy policy