Thanks Paul and Roadster.
So I always intended on making my own dials, so lets start there.
I did a lot of research as to the best way to make them, and after finding a good guide done by the guy that started RevLimiter I went to work.
So I've always liked RevLimiter guages, I think his designs are beautiful. However I had a few reasons to make my own. Firstly, they're expensive. I'm trying to do my build on a budget. Secondly, there was a change i wanted to make to the standard design, and that coats additionally! Thirdly, and most importantly, I love the idea of doing it all myself. There's just something about having made it yourself, even if all my ideas are borrowed from others

So drawing up the dials took awhile, probably about 18 hours of drawing. The dials are made up of 3 layers. (although I actually ended up having to use 5) each of which are drawn up individually for each dial. The design is then printed.
Layer 1 is the "mask" layer. It's what you phisically see in everyday driving. It's printed on clear acetate.
Layer 2 is basically the "white/black out" layer. So everything you dont want showing up at night youmprint black, and leave everything else white. (I actually had to double up on layer 1 in the end, as the black turned grey when the backlighting came on).
Layer 3 is a "nighttime lighting colour" layer. I wanted everything amber, bar the redline, for that older look.
And finally Layer 4 was just a gradient layer. The test dial I did Was brighter in the middle, and darker towards the top and bottom. This layer helped to even it out.
I printed 5 sets of each, as I anticipated lots of mistakes in the gluing process.

I then cut each into it's individual dials ready for gluing up.
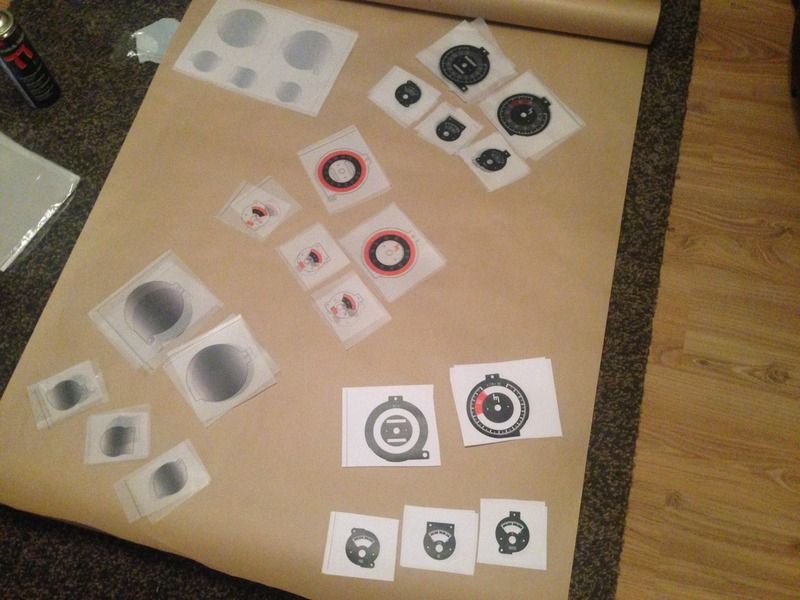
Then I began to glue them together. I found the easiest way was to use a clip at the top of the two, then align them up by holding them up to the light until everything seemed to merge perfectly. It was then a case of carefully lifting up and spraying a fine coat of spray adhesive inbetween, before pressing the two layers. Here are the first two layers glued together
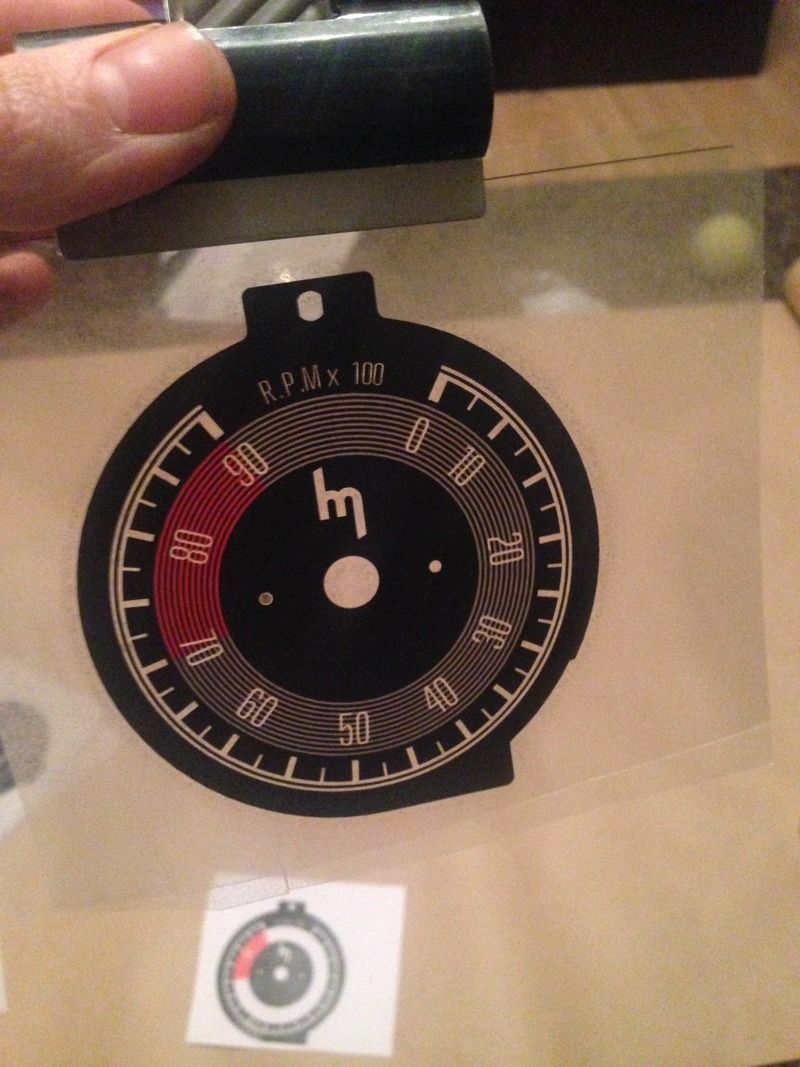
And once all layers are glued together
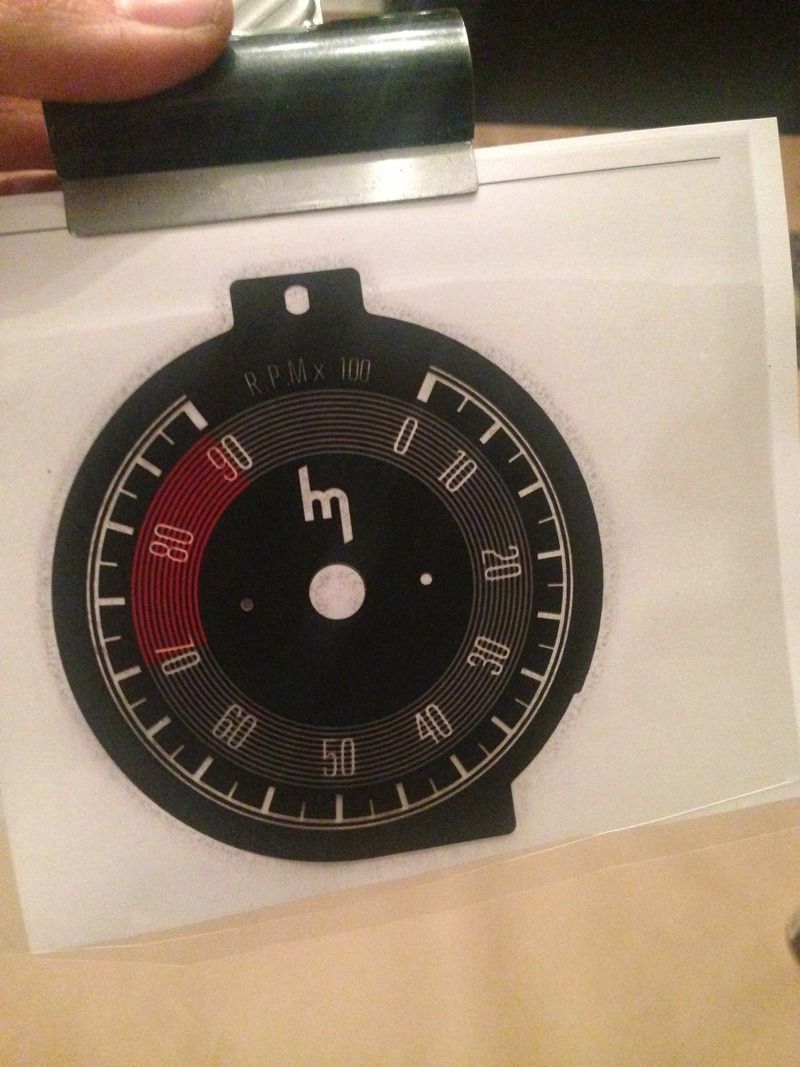
One down, 4 to go. Continue with the rest until they're all in the same position, then leave them to fully go off for a few hours before trimming. I trimmed them with a pair of Fiskars scissors, and a sharp stanley blade with a ruler for the cutouts.
Take note: The ink is delicate! Fingerprints are visible and hard to remove, and when cutting the first dial I did the ruler scratched the dial. I ended up using a piece of tissue under the ruler.
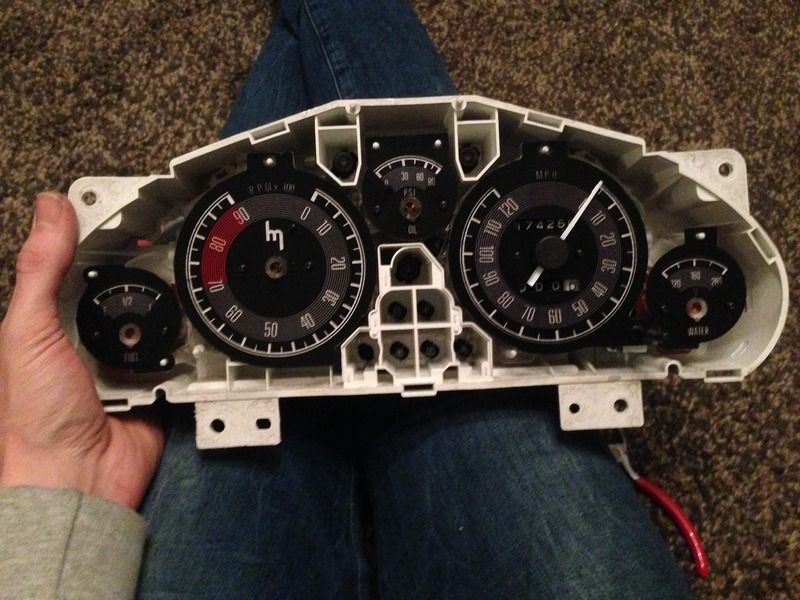
Here was my original test dial put into place in the instrument cluster. I picked the Speedometer to try first as the needle for the speedo is "self balancing". I.E you just drop the needle on 0 and it's good to go, no stopper or anything needed.
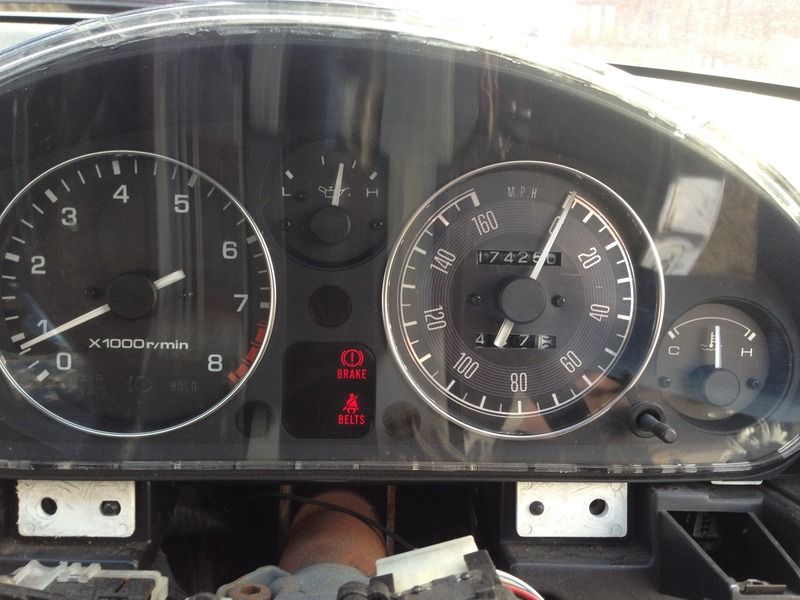
And many hours later, the finished guages in the cluster! You may notice the speedo numbers have changed position.... I actuslly bought a second instrument cluster from ebay to play around with so i could continue using the car in the meantime. I didn't notice that it was a different speedo design. So i scanned in all the images of each dial, drew to it and when I put it into my cluster the speedo lied, and said I was doing 50 when I was doing about 35!
And when lit up
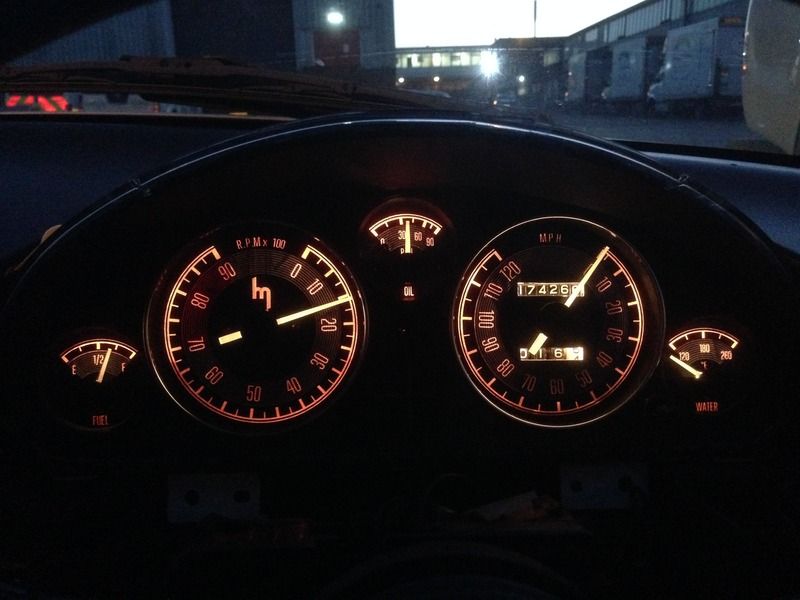
The photo actually isn't a very accurate image. The darkening in the top and bottom isn't so noticeable, and there is a large colour change between the amber and red which isn't really showing on the iphone camera!
I've had them in the car for a little while now, and I couldn't be happier. The only thing I would ammend is that RevLimiter suggests putting a layer of black behind the RED as it is otherwise 50% brighter than the amber, however with the black behknd the red is very dim. So eventually I will replace that dial with an ammended one.


 Linear Mode


