|
|
| Sammio Builds and discussions Sammio bodied car builds and specials |

8th December 2013, 16:30
|
 |
Senior Member
|
|
Join Date: Feb 2012
Location: Wembley, London
Posts: 5,056
|
|

Mac - Obviously I had to make the Trainspotting quote a bit more "family friendly". 
I did go through my box of bits and I couldn't find a spare for that hand brake nut you were looking for. 
- - - - - - - - - - - - - - - - - - - - - - - - - - - - - - -
Christmas Preparation Check List:
- Bulk of Christmas cards written - Tick
- Shopping trip with family - Tick
- Festive DVD watched with family ( Arthur Christmas) - Tick
Alternative Christmas Tree Chore:
The other day I had to clear all the branches overhanging into our neighbours garden...
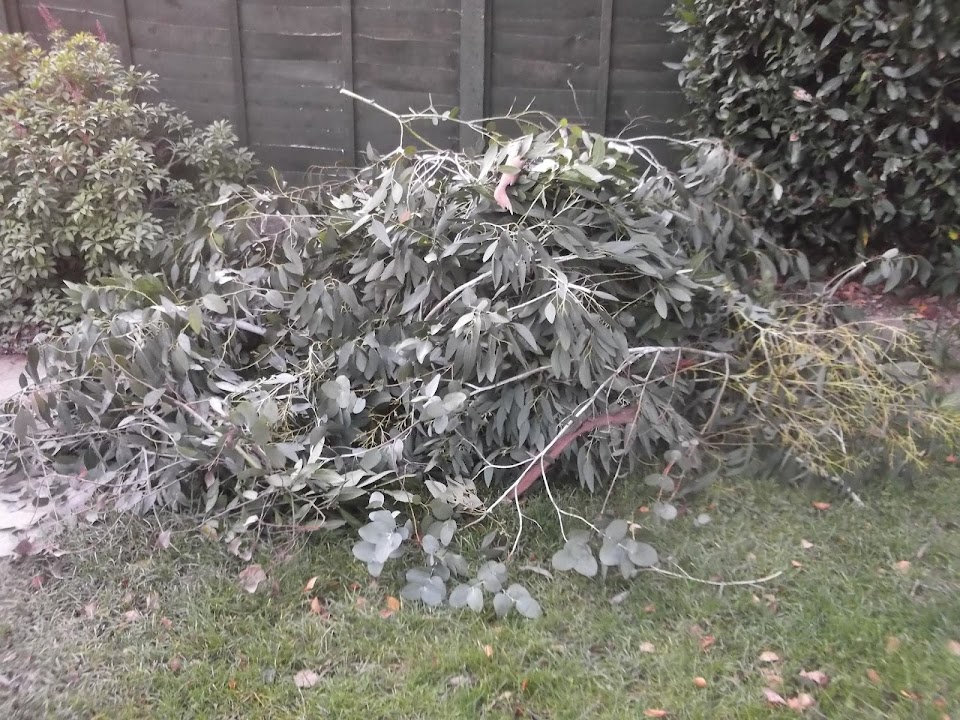
So somewhere along the line I need to get this mess sorted out as well.
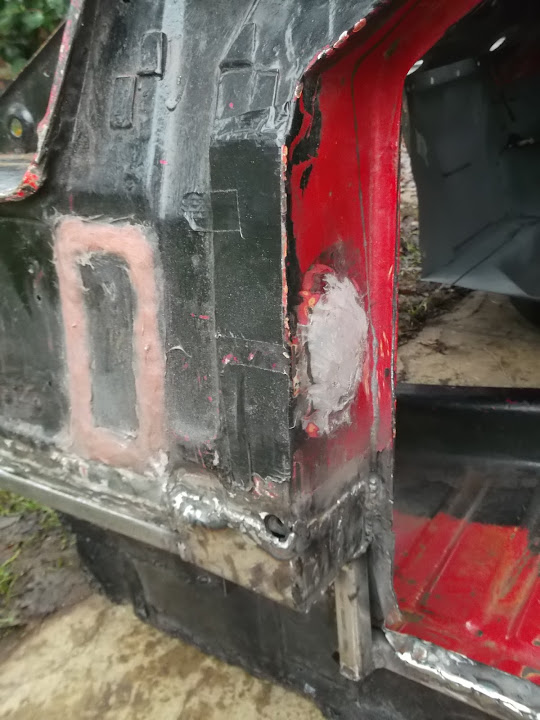
If you look closely on the left you will see filler dust from preparing the repair panel yesterday.
( I managed to cut the panel from the same filler caked wing as before.  )
Car Work:
Managed to get a bit of time outside just as the sun was starting to set.
Welded the external support arm in fully along one side.

I then hammered the edge of the bulkhead over to meet the box section.

Then that too was welded to the box section.


I didn't quite finish this line of welding as I ran out of wire.
The new welder was supplied with 6mm wire, but I have a spare reel of 8mm.
It will not take long to switch it over, but it was already dark, so I did something else.
I hammered the repair panel I cut out yesterday into shape.

And this is it resting roughly in place.

It will end up a better fit when it is clamped into position and welded.
Until next time, take care, Paul. 

|
8th December 2013, 21:22
|
|
Senior Member
|
|
Join Date: Mar 2012
Location: Doncaster
Posts: 116
|
|
Hi Paul, back on the forum after a very extended break. You've got so much on your build, I could do with a quick summary of where you are at now?
You seem to have made some mods along the way, but without reading it all I'm not sure what and why.
|
9th December 2013, 04:57
|
|
Senior Member
|
|
Join Date: Mar 2012
Posts: 159
|
|
You are becomming a hack of a welder Paul. The finish must be near as far as the bulkhead goes. Keep it up man.
Regards,
Michiel
|
9th December 2013, 08:44
|
|
Senior Member
|
|
Join Date: Feb 2012
Location: Wembley, London
Posts: 5,056
|
|
DonnySoutherner - Welcome back Simon, I often wondered what happened to you & your build.
As requested, here are my build highlights from the last 12 months...
Dec.12
- Managed to restart the engine which was great for morale
Jan.13
- Cut holes in the bonnet for the headlights & grille
- Discovered my optional seat belt mounts fouled the bodywork
- Played with front indicator & rear lighting layout options
- Started the beard scratching process about how to fit the doors
Feb.13
- Had first welding lesson
- Made and test fitted a battery box similar to your build
Mar.13
- Discovered the doors were junk as they came apart in my hands
- Bought a complete Spitfire body shell for the price I'd been quoted for just the rear arches
( I'd been on the look out for rear arches to copy that idea from your build for a while )
- Thanks to AndyP57 I took delivery of my final missing kit parts & some upgraded floors
Apr.13
- Removed a large section of the Spitfire body shell & test fitted the Cordite bodywork on top
( As Ribble had attempted to do this in a similar way to the Tribute A352 kit "next door" )
May 13
- Removed all of the Cordite framework and test fitted Spitfire shell & Cordite bodywork to the chassis
- Eventually abandoned this idea completely and opted to use the rear arches as originally planned.
- Then I came up with a Frankenstein build, which involves bolting the Spitfire bulkhead to the Cordite rear frame.
- This solved all the problems with pedals, steering column, foot wells, dual line brake master cylinder (after making a recess panel), etc.
- Started modifying the Cordite rear frame to take the new floors & rear arches
- I also made seat belt mounting brackets and welded them to the rear frame
Jun.13
- Rear framework was now complete
- Started modifying rear arches to fit around the framework so I could keep the hand brake panel intact
( This is a slight variation on the way you did it, a lot more work, but should be good )
Jul.13 & Aug.13
- Left my job and took some time off to re-group and take an epic family holiday to Florida
Sep.13
- Finished the rear arches
- Finally fitted the rear spring lowering block
Oct.13
- Test fitted the rear frame, rear arches & lowered floor pan "combo"
- Finally worked out that the original Cordite body used a Herald bulkhead, which was why stuff didn't fit properly
- Then had a "vision" that said rather than cut the bulkhead to fit the bodywork, I should cut the body to fit the bulkhead
- Started repairing the Spitfire bulkhead & found out it was a 1972 MkIV, not a 1500 as advertised
Nov.13
- Learning the hard way how to make repair panels & weld the bulkhead back together one step at a time
Dec.13
- Still working on the bulkhead, did I mention it was a rusty piece of junk?
Writing a quick summary like this makes me realise just how much work I have put in.
I know I still haven't reached the bonding the body to the framework stage yet.
But I have been down a number of blind alleys and struggled to make sense of it all at times.
The bulkhead restoration isn't really Cordite building as such, but it will be a big help in the end.
I have also learned a lot which should allow me to do all the other jobs the build needs.
Like fitting my new micro heater & modifying the dashboard which are next on my list.
- - - - - - - - - - - - - - - - - - - - - - - - - - - - - - -
Michiel - Cheers. 
There is still a lot of work to do on the bulkhead, but the end is within sight.
- - - - - - - - - - - - - - - - - - - - - - - - - - - - - - -
Hopefully I will get a chance to play with the bulkhead later on, as I am on sick child duty at the moment.
Take care, Paul.
|
10th December 2013, 18:42
|
|
Senior Member
|
|
Join Date: Feb 2012
Location: Wembley, London
Posts: 5,056
|
|
Monday:
Spent the day indoors as my daughter was off school, so no work on the car, but that's OK by me.
However, I was able to earn a few brownie points by doing some of the Christmas house cleaning.
I also wrapped my wife's present.
Can you guess what it is?

Obviously she told me what to buy & was happy with a second hand Ebay purchase (hence no big box).
Tuesday:
Very foggy this morning & bloody cold outside too, I could still see my breath at midday!
First job of the day was to re-set the welder for 8mm wire & get a new reel loaded.
This also meant changing some of the settings I'd just got used to with the 6mm wire.
But apart from being a bit hit and miss in places, it was all good.
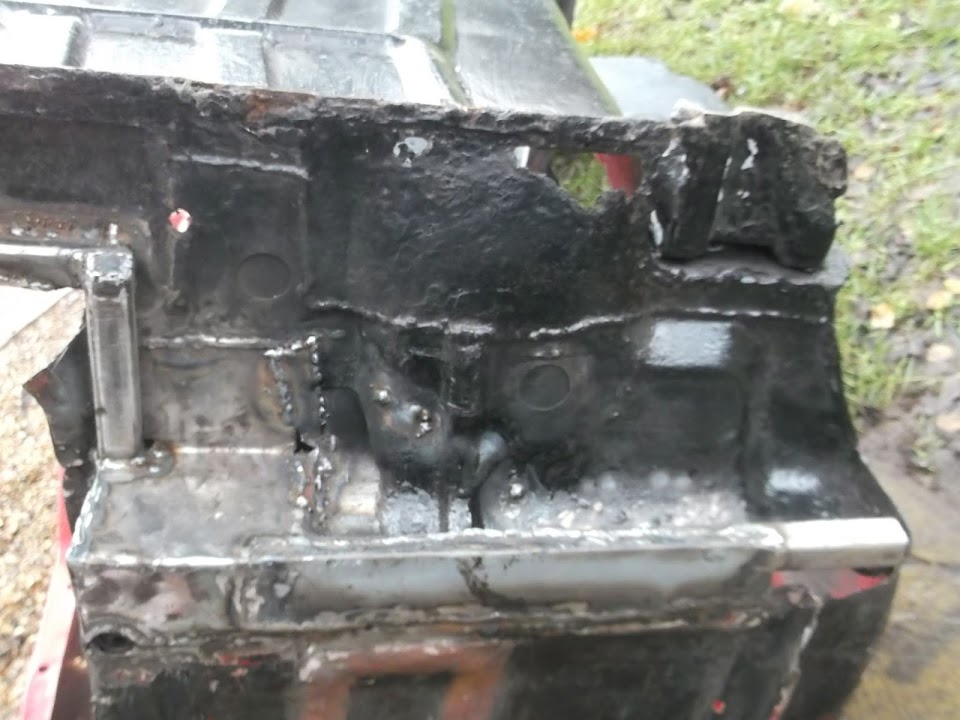
First Repair Panel:
I had already prepared this panel, so it was simply a case of clamping it in & welding it on.


And this is how it looks with the bulkhead the right way up.
 Second Repair Panel:
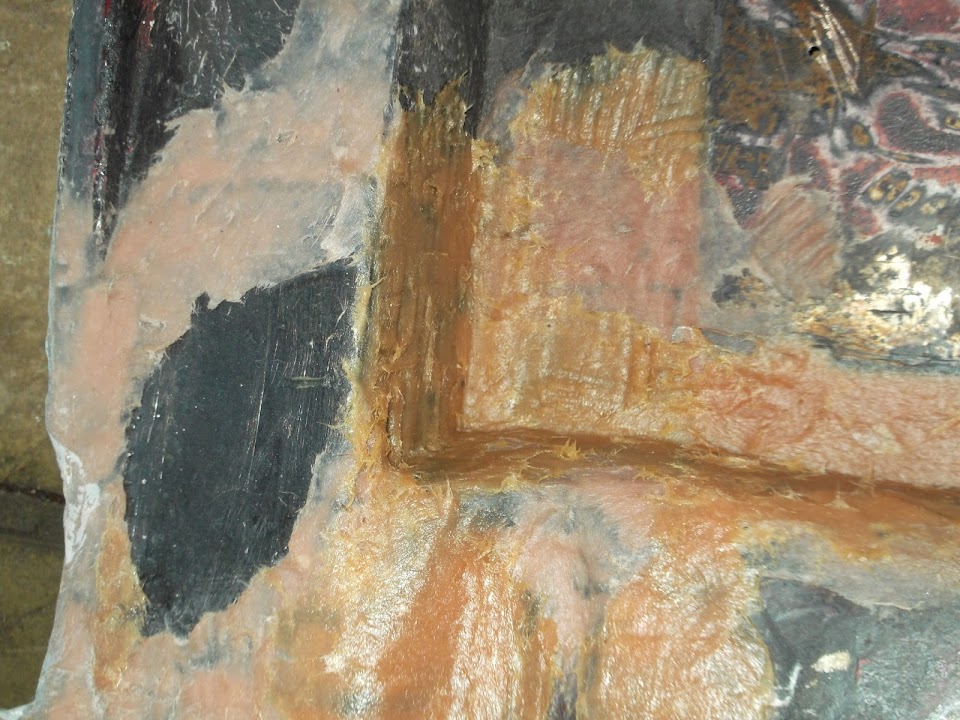
I discovered yet more rust around the front corner (I put some card behind just to help the photo).
So I will come back and sort out a separate panel for that whole area later.
In the mean time, I just made sure the next panel stopped short of this area.

As with the driver's side, I welded the bottom edge first, before hammering the top edge & welding that.
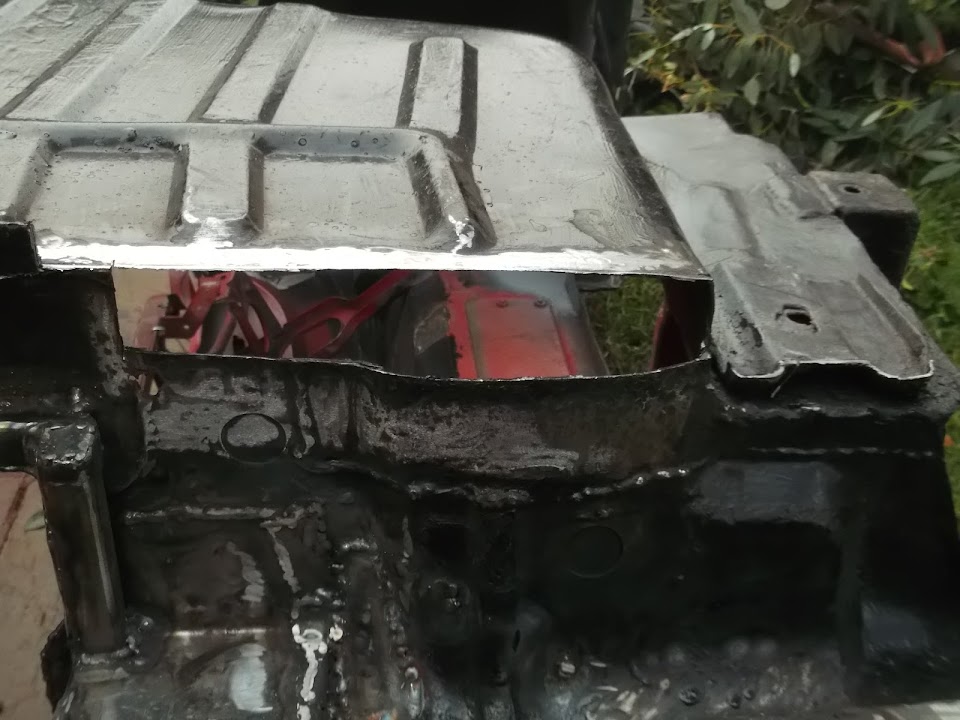
 Third Repair Panel:
This was to finish off the "A" pillar, that I couldn't do in one piece as there was nothing to weld it too.
This was the "hole" (not easy to see in the photo) and the surrounding area was given some anti-rust treatment.

This was the panel & where it would be fitted.

And this was it all welded into place.
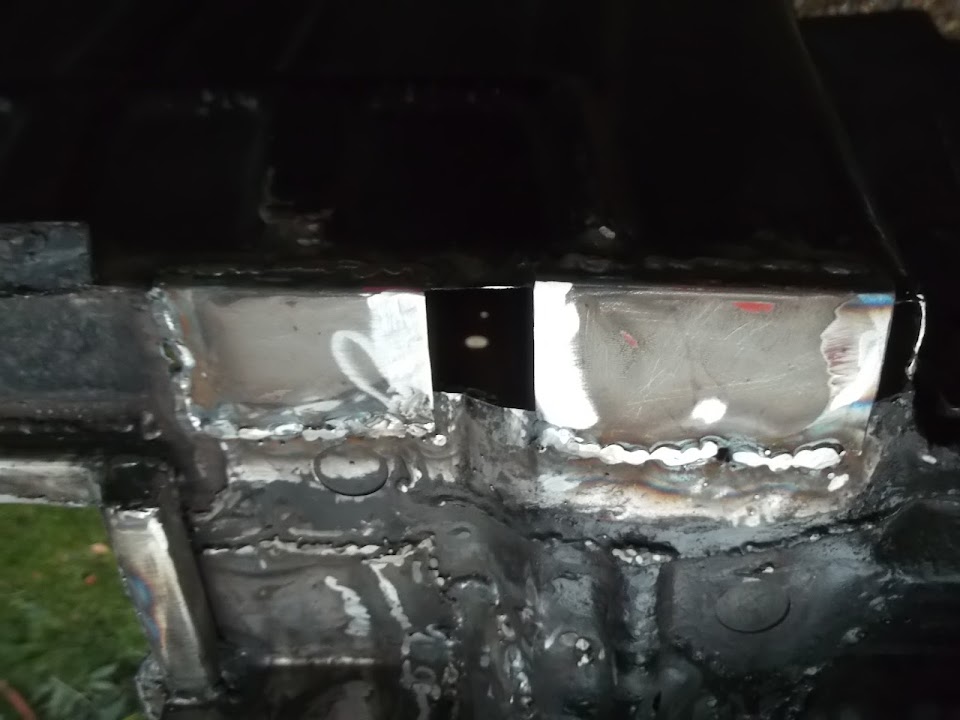
 Forth Repair Panel:
There was just one hole left next to the "A" pillar that I needed to cover.
As this needed a bit of shaping, I cut slits / tabs in the panel as before.

By now it was getting dark and as I was crawling inside the bulkhead to weld I couldn't see what I was doing.
So although I have started to get the panel in place, I will come back and re-do bits / finish the welding tomorrow.
The photos aren't great either, but hopefully you can still get the general idea.
The panel started off flat.

Then with one edge welded, it got hammered into shape and welded along another corner.

There is still a bit of fine tuning to do on the final shape, but this is how I left it.

Based on the work I did on the driver's side, I know this will look OK after I have applied some filler.
As before, the key for me is that all the repair work is solid metal and has all the strength required.
Although part of me actually quite likes the whole Frankenstein effect where the panels have been "stitched" together.
Until next time, take care, Paul.
|
10th December 2013, 18:59
|
|
Member
|
|
Join Date: Aug 2013
Posts: 76
|
|
hi yes i can guess....i also wrapped my wifes present today/?????????
a lovely set of new wire wheels tyres and adaptors..i hope she ikes them ....
and how much i spent on her ...merry christmas ikon
|
10th December 2013, 19:08
|
|
Senior Member
|
|
Join Date: May 2013
Posts: 2,161
|
|
More awesome stuff Paul, you surely must finish the welding soon!
|
11th December 2013, 07:58
|
 |
Senior Member
|
|
Join Date: Dec 2011
Posts: 656
|
|
Quote:
Originally Posted by Paul L

Monday:
I also wrapped my wife's present.
Can you guess what it is?
|
Looks to me like you've bought her half a rolling road so you can test your finished car. Is she getting the other half for your present? So lucky  |
11th December 2013, 10:01
|
 |
Senior Member
|
|
Join Date: Aug 2012
Location: Surrey/Sussex border
Posts: 169
|
|
A trouser press ......  ... how original.
Happy Christmas
Slarti |
11th December 2013, 16:45
|
|
Senior Member
|
|
Join Date: Feb 2012
Location: Wembley, London
Posts: 5,056
|
|
Clive, Andy & Slarti: - Cheers chaps, thankfully I've almost finished my Christmas chores.
Scottie - Thanks. After today's effort I am finally getting closer to the home stretch on the bulkhead.
- - - - - - - - - - - - - - - - - - - - - - - - - - - - - - -
Quick Christmas Quiz:
Can you spot the difference?
9am
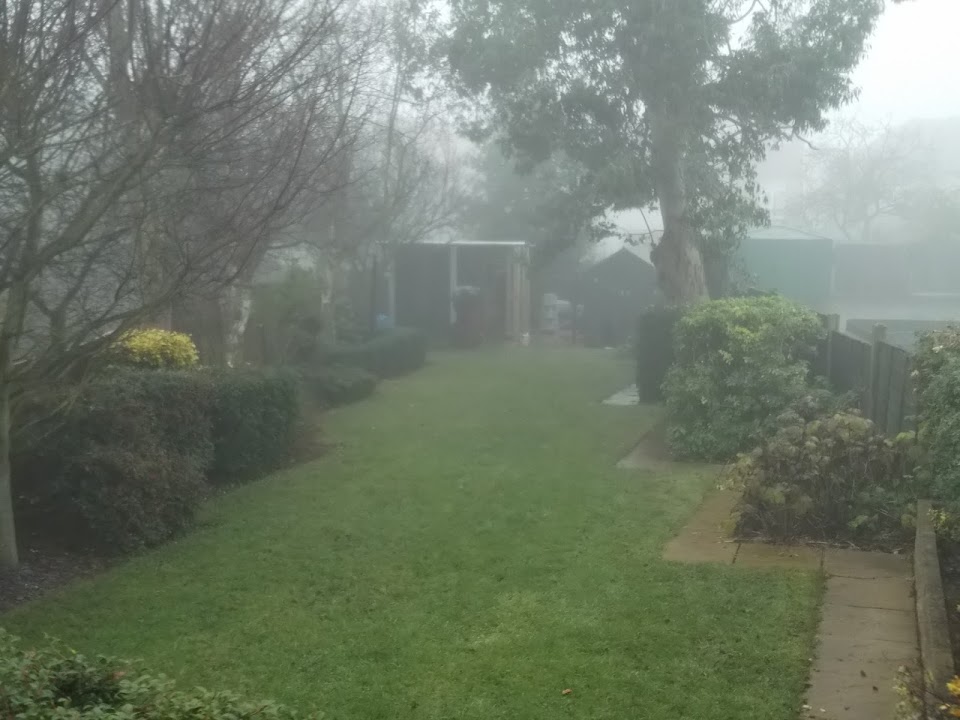 12.40pm
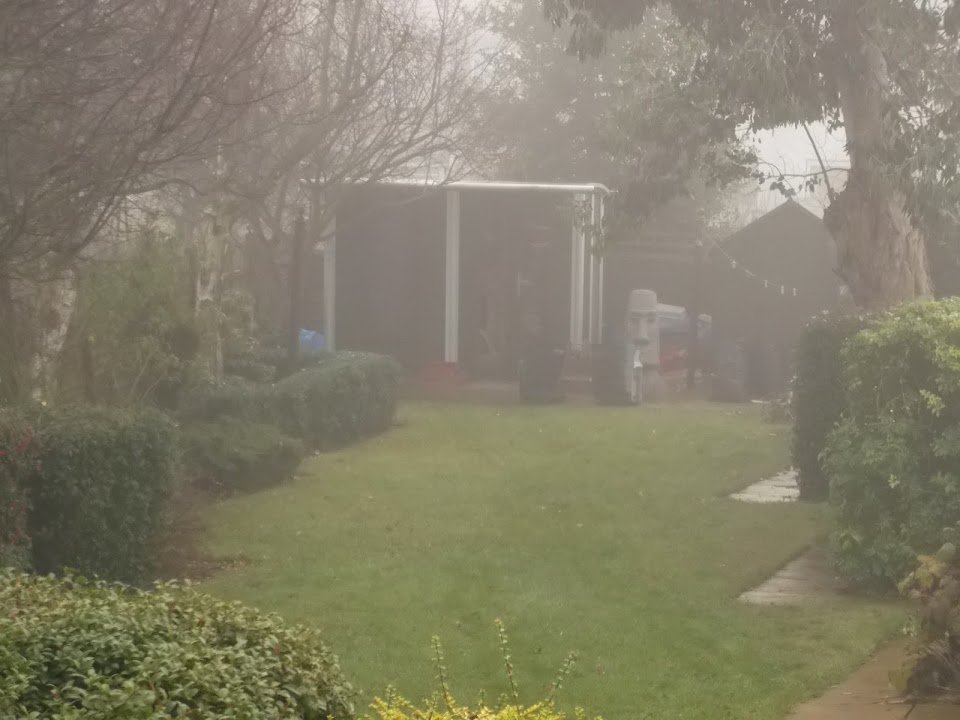 3.50pm
 Answer:
That's right, there is pretty much no difference, it has been cold and miserable all day long.
Pea Soup Anyone?:
I left the welder inside the summer house while I did my welding just outside, as there was so much moisture in the air.

Despite the "less than ideal" conditions, I did manage to make a bit of progress today.
I finished off the welding on the repair panel I started yesterday so the "A" pillar is complete on the inside.

I can't wait to get some filler over this patch work quilt of repairs (mine & previous owners).
There was still a small gap on the outside between the new panel & the old metal.

But I put a small repair panel over the top of the two edges to seal the area.

I also hammered over one remaining edge of the bulkhead to meet the box section.

I then welded those edges together and added a small patch to cover the gap.

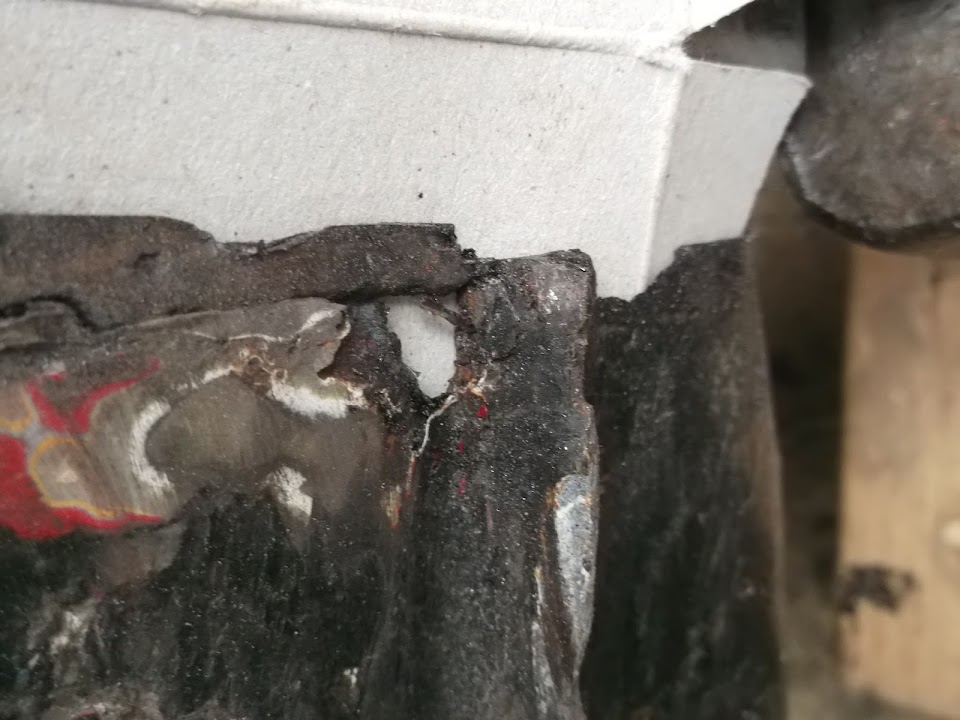
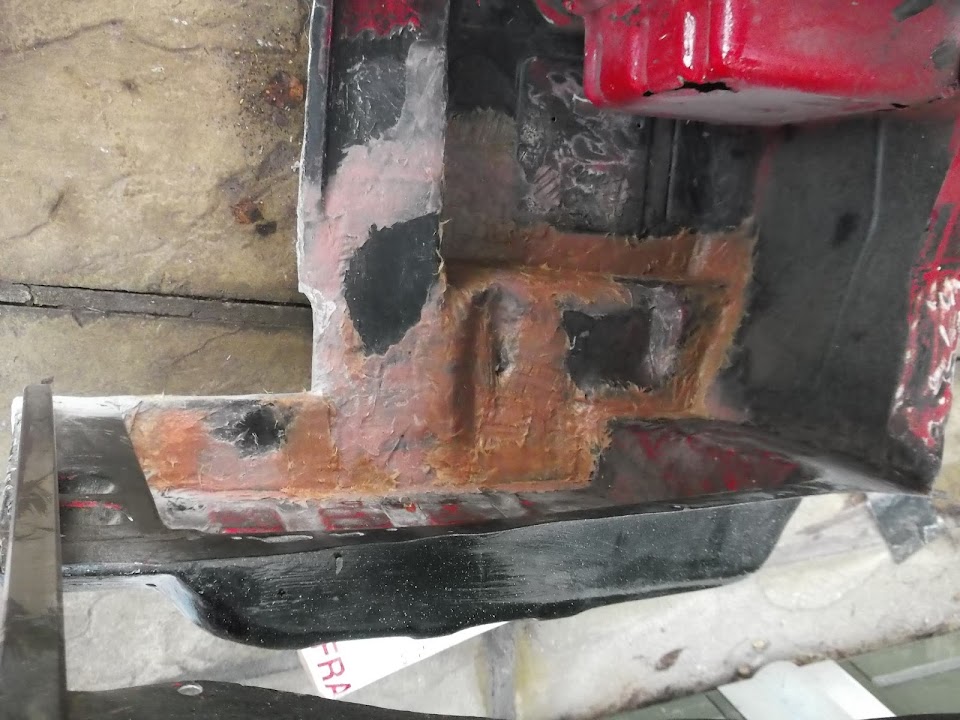
The more I looked at this bottom edge, the worse it looked with holes and rotten metal.
( Obviously the bulkhead is upside down for ease of access. )
So drastic action was called for and I cut the whole lot out.
Initially I was planning to run a single repair panel across the whole length.
But then I remembered that there was a curve in the bodywork that I couldn't match.
So I cut my repair panel into sections and welded the first two pieces in.
Then I cut the next repair panel at an angle that allowed me to hammer it into shape.

This is what the outside of the bulkhead looks like now, with more work still required.

Note: There is a rock propping up the bulkhead that makes the bottom edge look odd, but it is straight.
The final job for the day was to get some anti-rust treatment over the repairs, inside & out.

Whilst I have definitely broken the back of the bulkhead welding, there is still a bit to do.
As long as I can keep chipping away at it, the passenger side should be completely finished before Christmas.
( Touch wood. )
Cheers, Paul.
|
12th December 2013, 16:43
|
|
Senior Member
|
|
Join Date: Feb 2012
Location: Wembley, London
Posts: 5,056
|
|
Getting There...
Slowly, but surely, the bulkhead is returning to solid metal, one repair panel at a time.
I started with the lower edge at the rear of the bulkhead.

Then I removed the edges and some of the worst rust / rot.
( Some of the small holes were welded over. )
Before I used a repair panel to completely join the two sections together, I clamped them up.

Then ran some weld along the edge of join first (not a great photo).

Then the repair panel went in and this covered both the cut out sections and the "factory" hole.

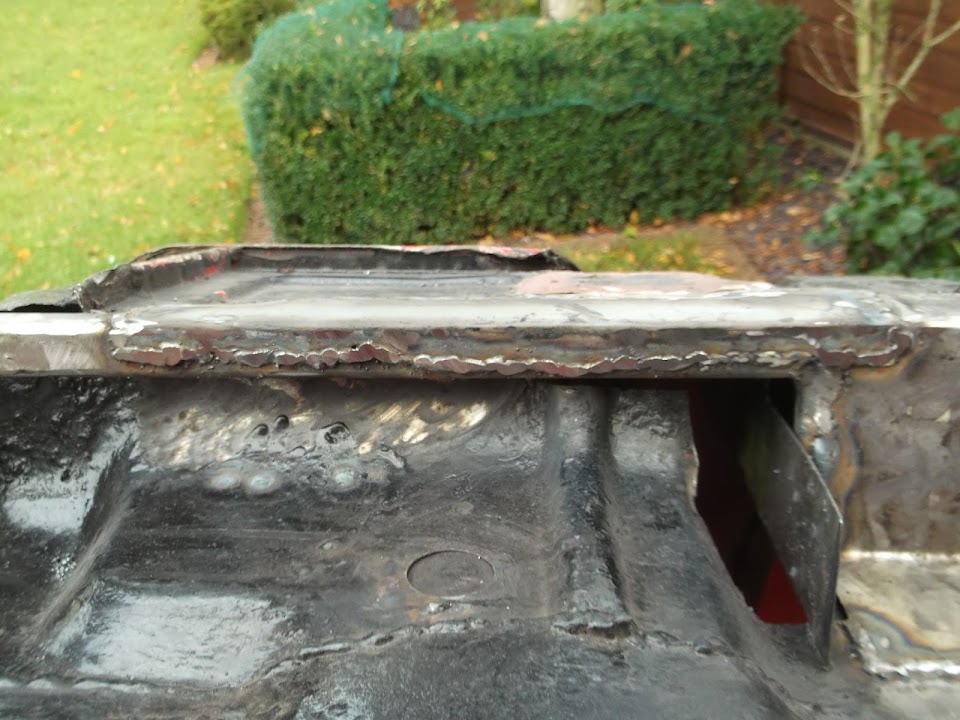
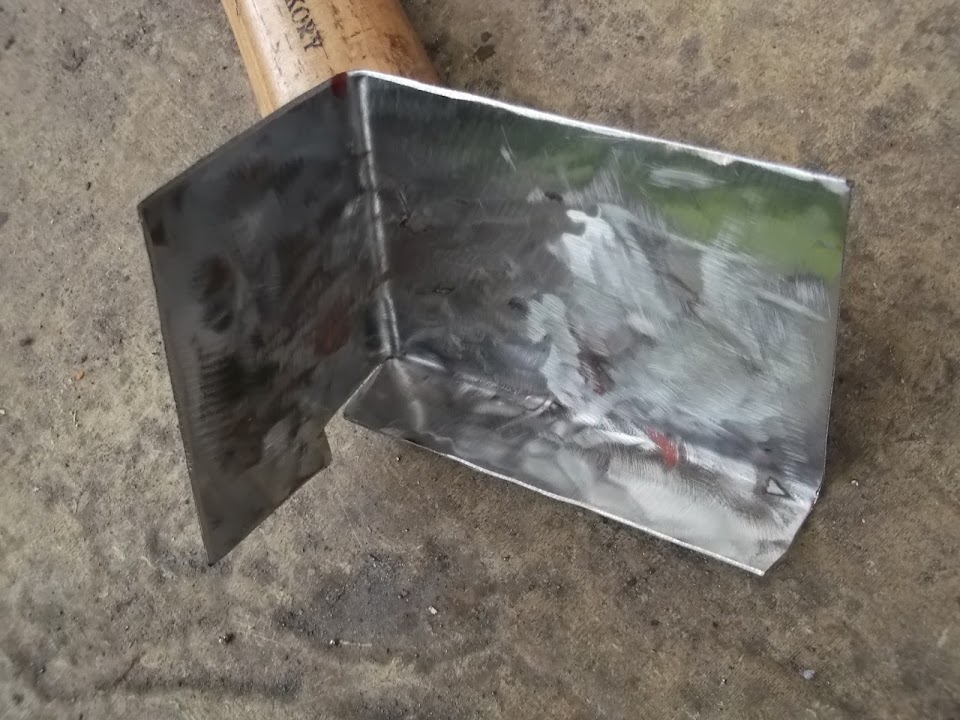
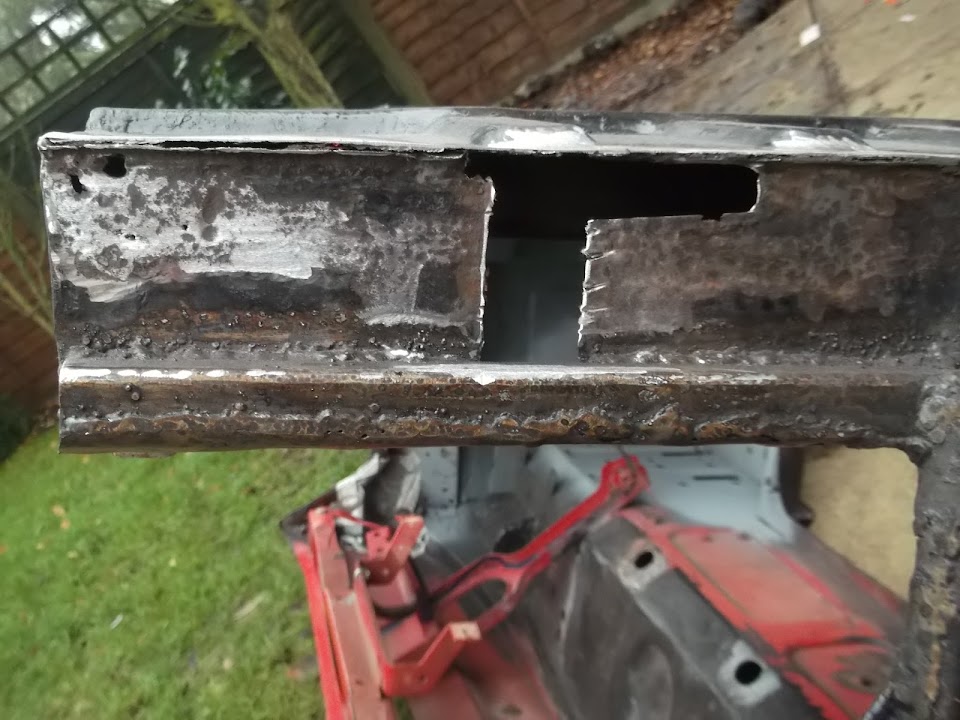
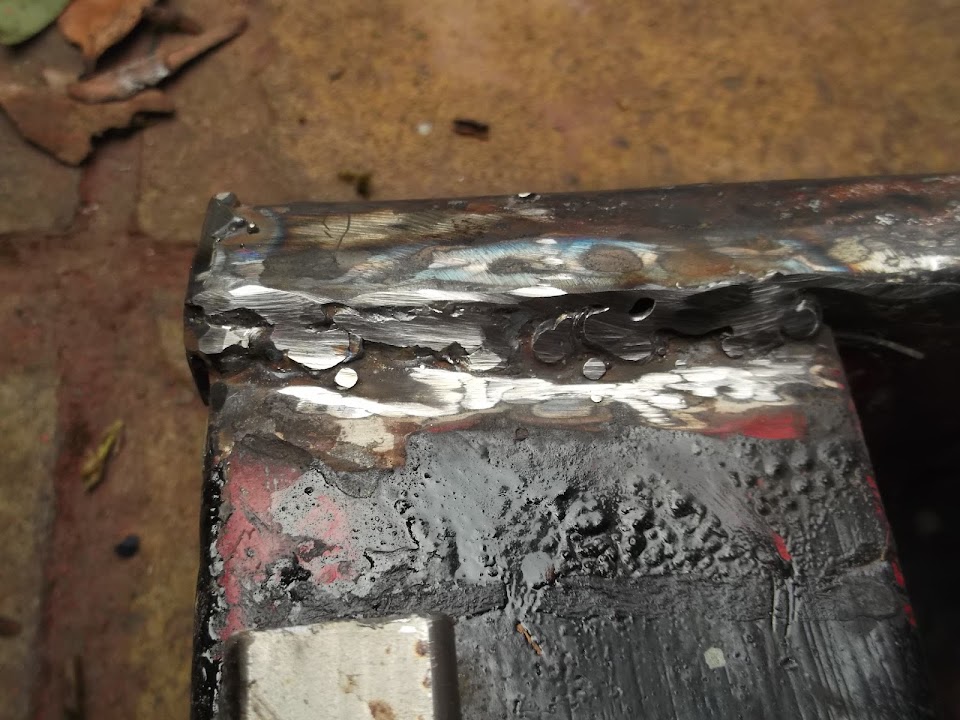
Capping the edge of the box section at the rear of the bulkhead was straight forward.


Then I tackled the front corner section on the lowest edge of the bulkhead.


At this point the entire lower edge of the passenger side of the bulkhead was complete.
There was a little run of weld required at the back of the bulkhead.

At this point I gave the newly welded in panels a coat of Kurust & re-did the surrounding area while I was at it.

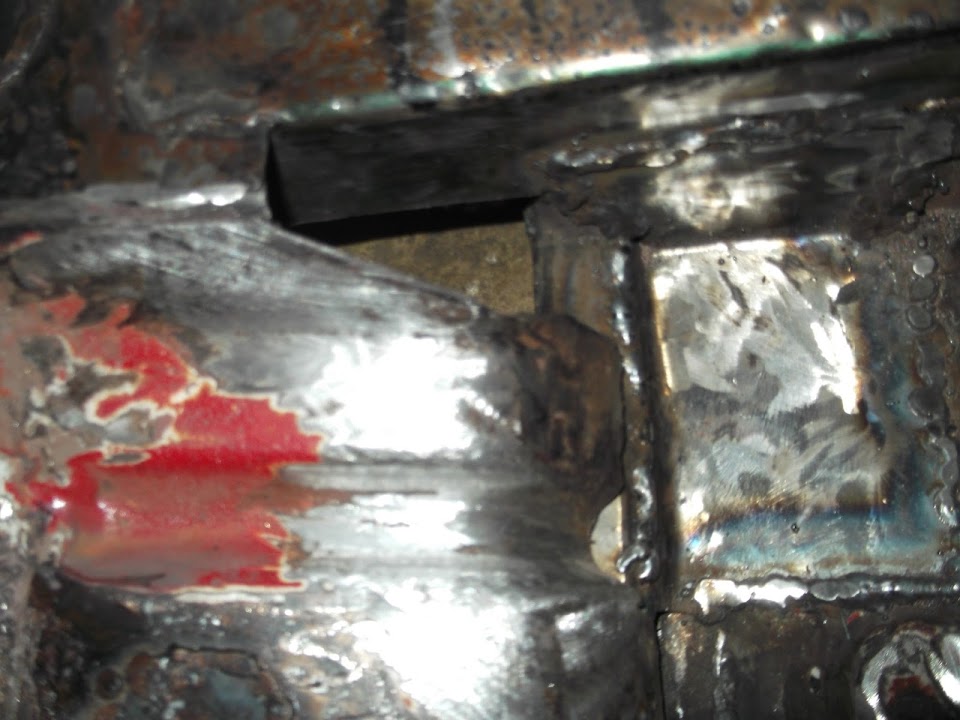
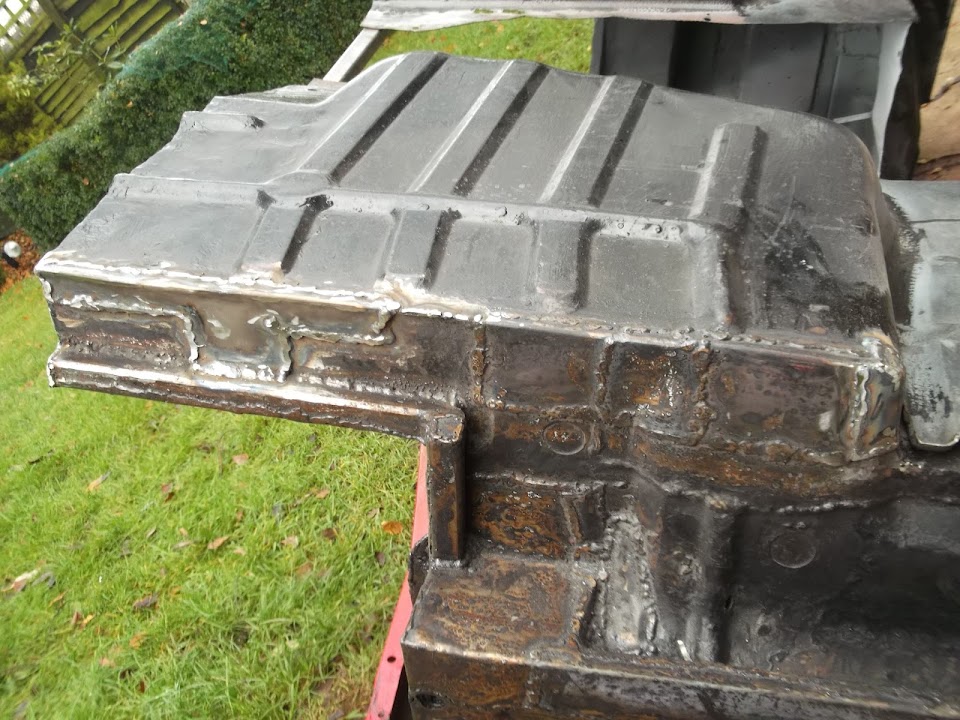
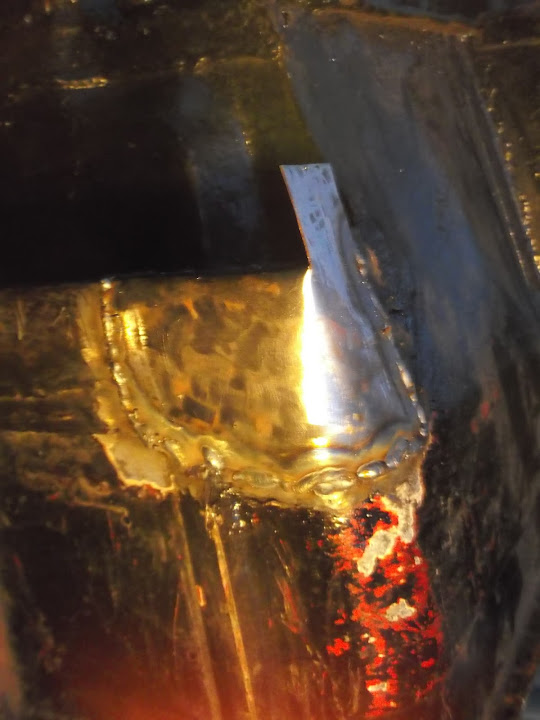
The last repair of the day was to the front corner where the external support arm ends.
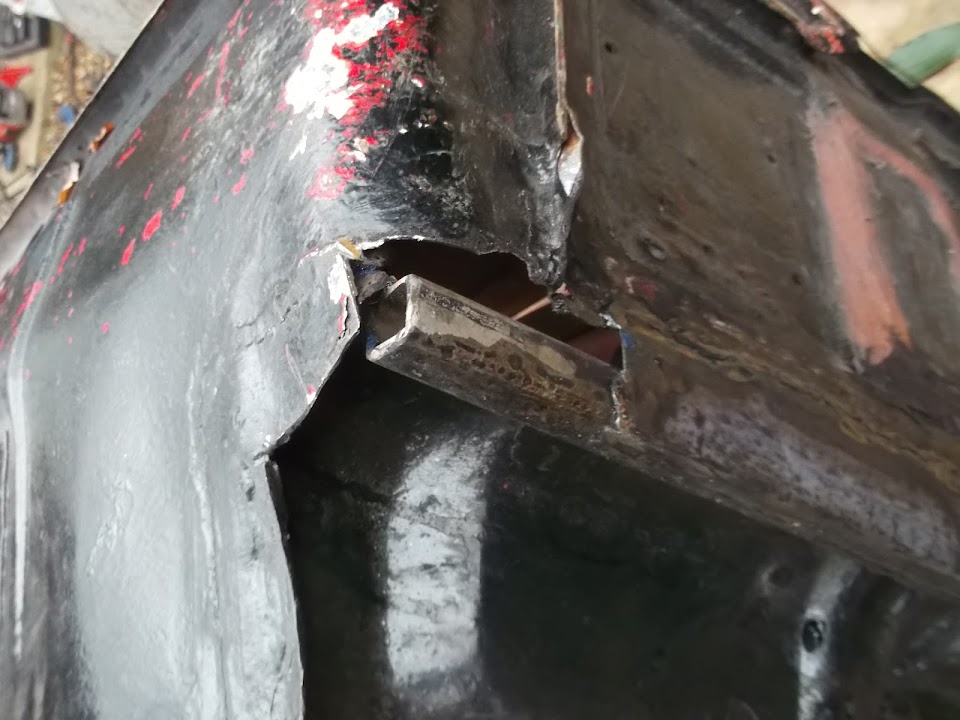
Obviously the first thing I needed to do was make it worse!

However, this allowed me to weld the edge of the internal panel to the box section.

Not a great photo, as the light was fading fast, but you can see I also capped the end of the box section while I was at it.

Then the repair panel was welded along the edge of the box section as a flat piece of metal.

Before being hammered around the corner and welded along the remaining edges.
By now it was too dark / cold / misty to continue, but still pretty good progress for the day.
The remaining passenger side welding jobs are:
- Finish off this corner
- Patch two small rust holes
( Well they are small now, but I have still to challenge them with the "screwdriver of truth"! )
- All the edges that overlap/meet the external repair panels on the inside of the bulkhead.
The remaining bulkhead welding jobs are:
- Inside edges of the bulkhead where the gearbox cover fits
- Support structures for the heater and dashboard
So still a bit to do, but the work can finally be counted in days, rather than weeks / months.
Until next time, take care, Paul.
Last edited by Paul L; 12th December 2013 at 20:03..
Reason: typo
|
13th December 2013, 18:37
|
|
Senior Member
|
|
Join Date: Apr 2012
Posts: 1,163
|
|
Keep plugging away mate the end is in site! Of this episode anyway!!!
 |
13th December 2013, 19:15
|
|
Senior Member
|
|
Join Date: May 2013
Posts: 2,161
|
|
Welding
[IMG]  [/IMG]
|
14th December 2013, 16:05
|
|
Senior Member
|
|
Join Date: Feb 2012
Location: Wembley, London
Posts: 5,056
|
|
Mac - Thanks, although I'm trying not to think about all the episodes that remain.
Scottie - Cheers, the fact I was welding on to the thicker box section really helps.
Unfortunately, I am still struggling when it comes to welding thin metal.
Working out what I am going to do with the micro heater and dash board is next on my list.
Well, that is after I have slapped on a ton of filler to this latest batch of bulkhead repairs.
- - - - - - - - - - - - - - - - - - - - - - - - - - - - - - -
Saturday:
I had to take it easy on Friday as I felt rubbish, no doubt working outside in the cold & mist hasn't helped.
Still, I was able to get a bit more done today which all helps.
I finished off the corner section that I started welding in on Thursday.
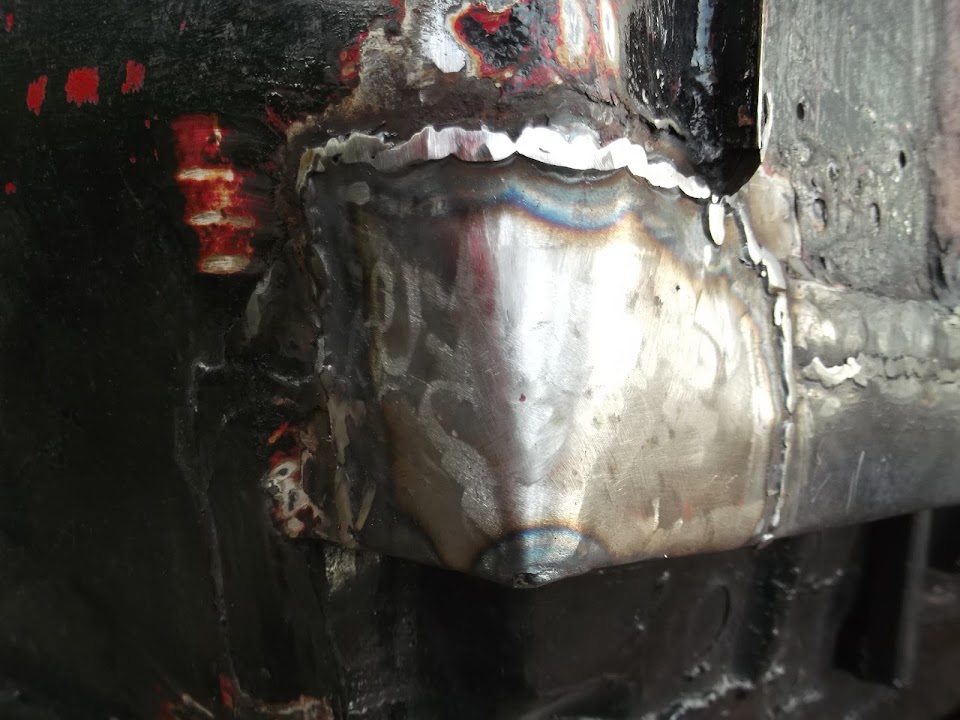
This left me with just two rust holes to repair.
Hole #1


Hole #2
( Sorry the first photo is a bit blurred. )


I then ran a line of weld along this edge where two panels join.

Which meant that the passenger side was now looking like this.

Note:
The bolts are in the door hinge mounts in preparation for my next welding job.
In the meantime, I gave a final coat of Kurust to both the inside & outside.


There were a number of small holes in the area of the hinge mounting plates.

I will weld up the biggest one and simply cover the other little ones with filler.
In order to weld the mounting plate into position I had to use one bolt to hold it in place.

That allowed me to weld two "holes", before removing the bolt and welding the third hole.

I did the same for the bottom bracket and this is the side view now.
( I did test fit all 6 bolts and they all went back in with no problems. )

I will have to build up the area around the bottom hinge as the repair panel is higher than the surrounding metal.
Final job of the day was getting some Kurust on to the bare metal.
( Sorry, yet another blurred photo. )
 I herby declare that all the welding work on the passenger side of the bulkhead is now complete!
With a bit of luck I will start the epic "fillerathon" tomorrow, subject to my Christmas chores.
Cheers, Paul.
|
15th December 2013, 10:55
|
|
Senior Member
|
|
Join Date: Feb 2012
Location: Wembley, London
Posts: 5,056
|
|
A Start...
Only had the chance for a quick session outside before the weather & Christmas stuff stopped play.
So the epic "fillerathon" has begun...

I just want to roughly smooth over the welds, not create completely flat surfaces.
So the overall effect will be quite "bumpy", but most of this will be covered by the Cordite bodywork anyway.
The scary thing is, that even after this short session I still have quite a bit of the repair work on the outside of the bulkhead to cover.
I want to complete all of the outside before I switch to the inside surfaces, some of which will be a lot harder to reach.
At least I will only be trying to get a bit of filler in there, rather than the welding touch, banging my welding helmet as I go.
Right, got to go, Paul.
|
17th December 2013, 15:34
|
|
Senior Member
|
|
Join Date: Feb 2012
Location: Wembley, London
Posts: 5,056
|
|
Visible Progress...
After a weather wash out yesterday, I made an early start today.
Thankfully mixing and applying filler doesn't disturb the peace.
I put some tape around the threads of the Spitfire door hinge bolts & screwed them in.

This allowed me to apply filler without clogging up the mounting plate threads.

Eventually all the required areas on the outside of the bulkhead were covered in filler.


I even managed to make a start on the inside of the bulkhead, but there is still more to do there.

However, given the weather forecast, I wanted to get some primer on the outside surfaces ASAP.
So after creating yet another mini snow storm of filler dust the outside edges were roughly sanded and cleaned up.

Again, the bolts went back into the mounting plate with some tape wrapped around them.

After a coat of etch primer, this is what the passenger side looks like now.
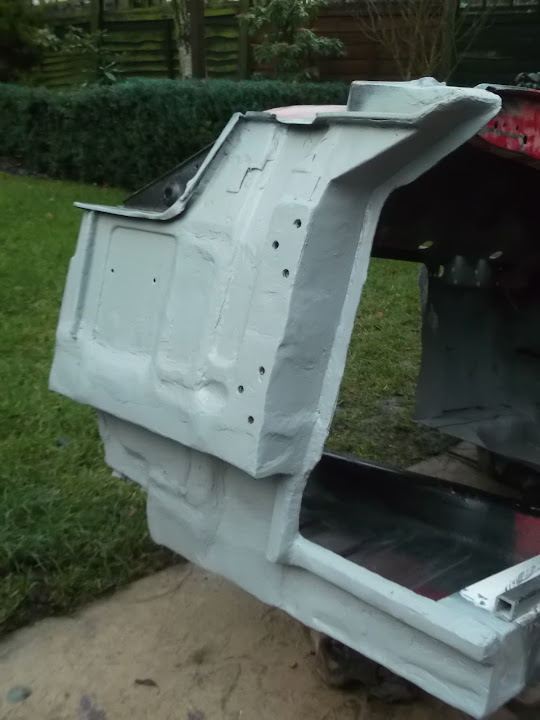


It was always going to be a bit bumpy in places, but as I am brushing the paint on over the top it isn't really a problem.
But there is certainly something about seeing it all in one colour that gives you a real boost.
Until next time, take care, Paul.
|
17th December 2013, 15:49
|
|
Senior Member
|
|
Join Date: Mar 2012
Posts: 1,152
|
|
It's all looking good and solid - like a 50 year-old race car that has been into the hay bales a few times in its life - perfect.
|
17th December 2013, 16:58
|
|
Senior Member
|
|
Join Date: Apr 2012
Posts: 1,163
|
|
Excellent progress Paul, that's a prime candidate for the bed liner I used on the inside of mine, chuck it on a trailer and bring it up and ill shoot a couple of coats, got a litre left over :-)
|
18th December 2013, 08:14
|
|
Senior Member
|
|
Join Date: Dec 2011
Posts: 656
|
|
Looking very good Paul,
With the bulkhead out of the way you will soon be filling all orifices with the white dust (No, Not like Nigella )
I can vouch for the truck bed liner, whether sprayed or brushed, it's great stuff and it seems Mythbusters agree too! http://www.youtube.com/watch?v=3JOXrpCLCJg |
18th December 2013, 15:02
|
|
Senior Member
|
|
Join Date: Feb 2012
Location: Wembley, London
Posts: 5,056
|
|
Oxford - Cheers, I think the whole battered race car look will work well for me.
Mind you, I think my 2nd hand body shell may have hit a few things in its time.
Given the rust it might have even have spend a little time at the bottom of a lake too.
Is there any progress to report on your own build? How is the framework going?
Mac - Thanks for the offer, unfortunately I don't have a trailer.
Although there is still quite a bit of work to do before I need to give it a final protective coat.
Andy - Cheers, I really hope that when the bulkhead is finished I can get back to building the car.
- - - - - - - - - - - - - - - - - - - - - - - - - - - - - - -
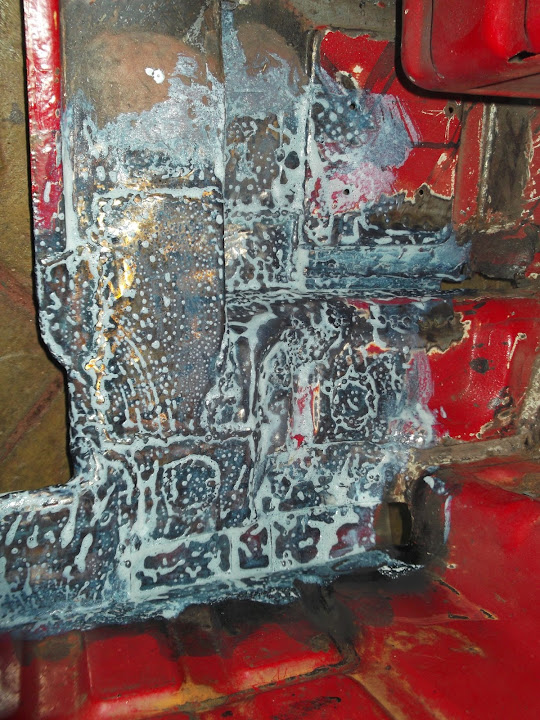
More Filler...
I managed to finish off applying the filler to the inside of the bulkhead.
In addition to covering up my welding, I added extra to help me get a better interior shape.


With rain forecast and the wind already picking up, I decided to call it a day and catch up with other domestic chores.
Once the filler is completely set I can start the sanding and hopefully get a coat of etch primer over the top too.
At this point I hope it will be easier to see the final contours, as some of the photos inside the bulkhead aren't great.
Some initial dashboard thoughts...
Just before I pulled the tarpaulin over the bulkhead, I quickly test fitted the left hand dash board panel again.

Unfortunately the area where one of the original mounting brackets is meant to be secured has been hacked away.


So I will add repairing this area to my long list of things to do.
Which actually lead me to a bit of beard scratching about strengthening the whole of the dash area in general.
I don't need the windscreen de-misting slits in the top of dash and closing them in would help reduce the current flex.
I could then make a repair panel with a 90 degree bend to tie in the face of the dash with the top of the dash.
But, one step at a time and I will spend some more time chewing this over another day.
Cheers, Paul.
Last edited by Paul L; 22nd December 2013 at 06:34..
Reason: Typo
|
|
Currently Active Users Viewing This Thread: 5 (0 members and 5 guests)
|
|
|
 Posting Rules
|
You may not post new threads
You may not post replies
You may not post attachments
You may not edit your posts
HTML code is Off
|
|
|
All times are GMT +0. The time now is 00:54.
|


 Linear Mode

