|
|
| Sammio Builds and discussions Sammio bodied car builds and specials |

27th January 2013, 12:07
|
 |
Senior Member
|
|
Join Date: May 2011
Location: Somerset
Posts: 1,671
|
|
You're coming on good Paul. I'd say what you've encountered is just a chance to personalise, rather than a problem!
As far as wet weather is concerned, I drove through rain and a sleet storm in my old Spyder and I found a sponge or microfible cloth tucked behind the seats is invaluable for bailing out. And having a pair of flying goggles to hand just in case is also a good idea as hail stones REALLY hurt! But then again, it was a laugh!  |
27th January 2013, 12:26
|
|
Senior Member
|
|
Join Date: Nov 2011
Posts: 3,558
|
|
Even in the south of France they use the umbrella solution


Yes, a golf umbrella is the best idea they could come up with for the Bugatti |
27th January 2013, 13:59
|
 |
Senior Member
|
|
Join Date: Feb 2012
Location: Wembley, London
Posts: 5,056
|
|

First of all, thanks for the feedback gentlemen, anything not covered below, I'll pick up in another post.
( As I have too many domestic chores to sort out today.  )
This is what remained of my thoughts on doors and other news from yesterday...
Door Hinges:
Mike's advice was to provide access to the hinges so they could be tightened up periodically if required.
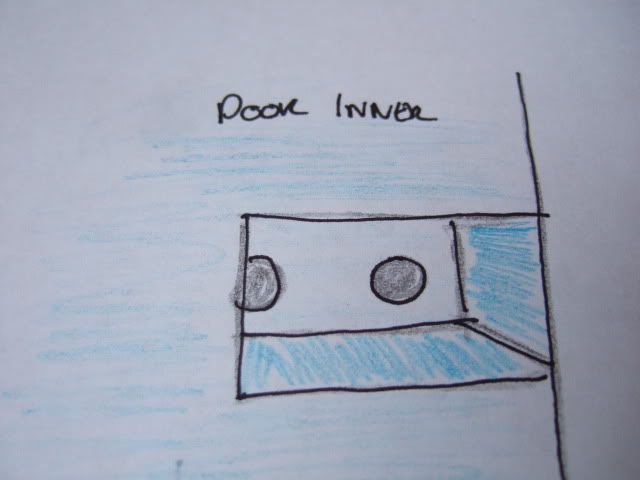
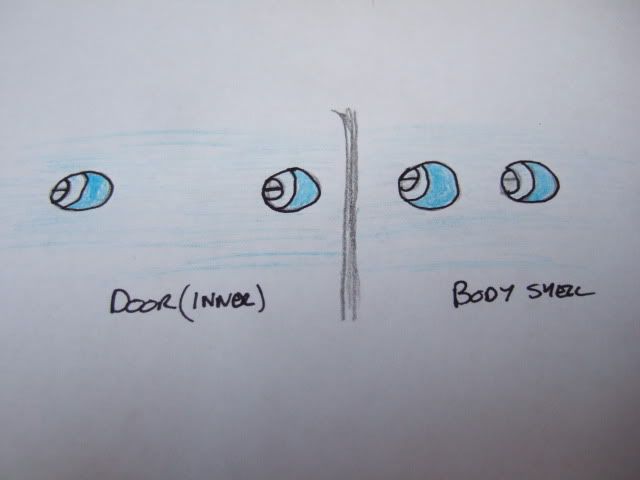
Initially, I intended to cut out sections of the inner door to expose the hinges bolted through the door.
( Please remember that these sketches are from the impressionist era, not tech drawings.  )
This was fine for the doors, but the bolts through the bodywork had the issue of the frame to deal with.
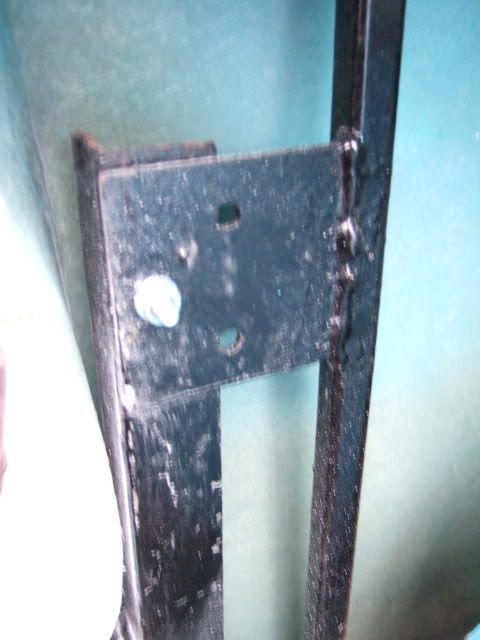
So I figured I would need quite a big access panel to get a spanner behind this framework.
However, I removed all the fixings for the hinges yesterday and noticed a few differences.
Not sure how they fit to a Mini, but there are 3 x 10mm nuts & 1 x slotted head bolt per hinge.
( I was planning to replace the original nuts with Nyloc ones. )
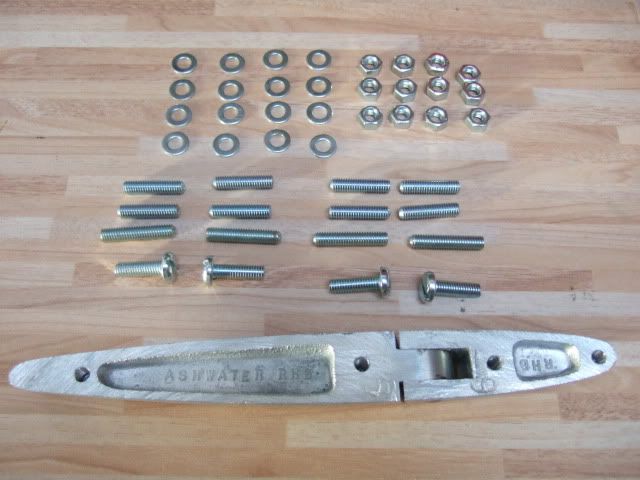
So the question is whether I could use 4 x slotted head bolts (with thread lock) per hinge?
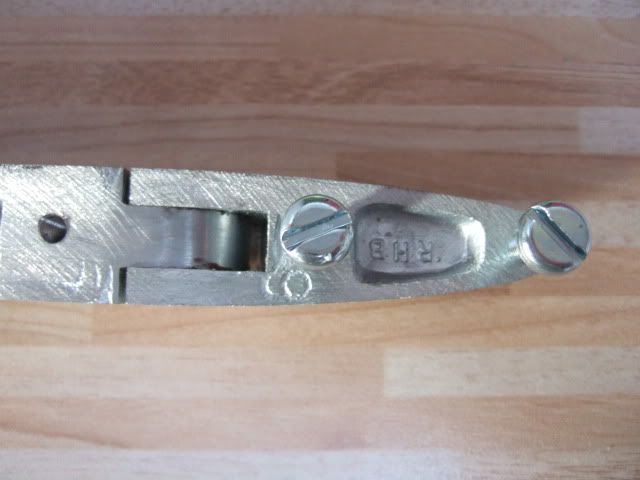
This would mean I would only need simple access "tubes" through both the body & doors.
I would simply need to drill holes straight through the frame if any part of it is in the way.
If these bolts are not suitable, then I would need slightly bigger tubes to accommodate a 10mm bolt tool.
I would look for a very thin T-Bar type tool as I only have a large socket set at the moment.
Door Cut Out & Door Profile:
There are two issues at play here, the first is connected to the doors (obviously).
But the second, is wanting to more the body forward to fix the rear cockpit's "hump" pressure point.
The bad news is the door cut out hits the frame, but the good news is the space "behind" the frame.
I couldn't get a decent photo, so here is my hand in between the back of the frame & side of the body.
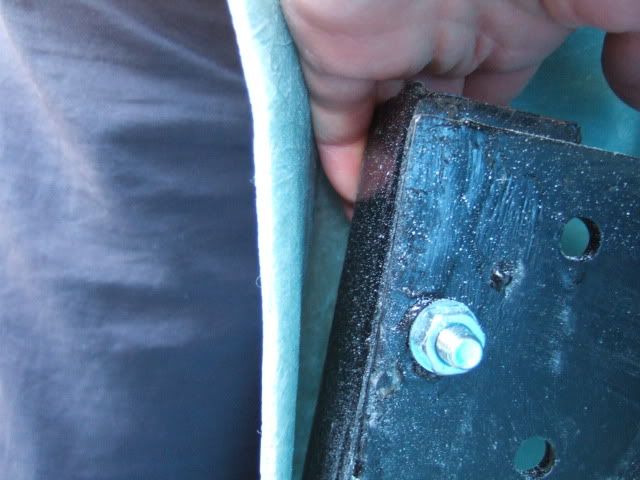
This means that I could retain the original line in the body shell that turns into the opening.
But then cut out the rest & build a new step in the opening to go around the frame.
This should allow the body shell to move forward & provide a better door closing "lip".
Hopefully these basic drawings might make more sense that the words above...
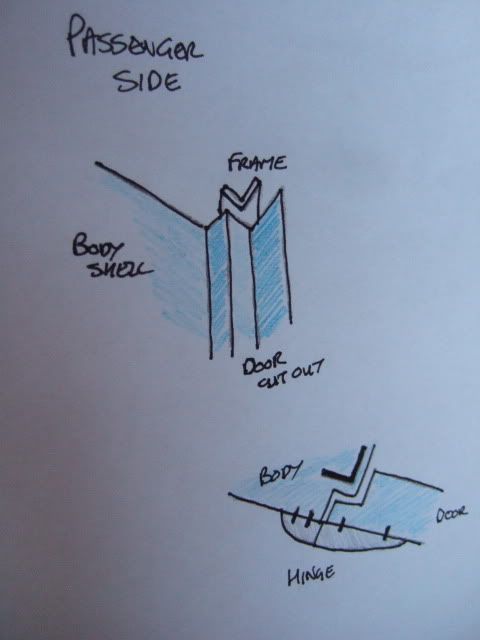
Clearly there is a lot to do to create matching "ying & yang" profiles between the door & opening.
I will need to think about the trailing edge of the door some more to take account of the latch required.
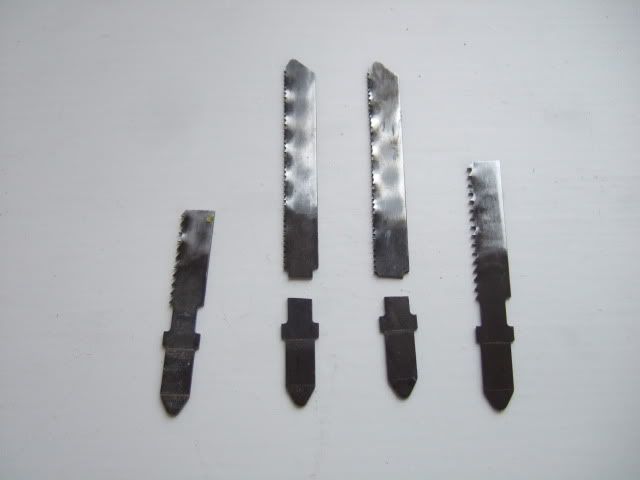
Cutting Fibreglass:
It looks like I need to either improve my jigsaw technique or get some heavy duty blades.
Removing the two door opening "lips" yesterday broke 4 blades designed to cut metal.
 Spitfire Rear Section:
I am now on a quest to follow DonnySoutherner's solution for the back of my car.
This also raises the possibility of a small "cubby hole" for storage linked to my rear cockpit access panel.
 Spitfire Graveyard:
They supplied the above section & I sent them some photos before I rang.
I figured the phone conversation would be easier if I knew we were both talking about the same thing.
Unfortunately, they had just been forced to clear their yard and didn't have anything I could use.
SpitBitz:
I've not used this company before, but gave them a try after missing out at the Spitfire Graveyard.
Again, I sent a photo ahead before giving them a ring and this worked out well as they can supply a section.
However, I need to visit them to check the condition & agree the final cutting points.
So that will be a job for next Saturday morning. 
Sorry for the flying visit, I'll be back either late tonight, or tomorrow evening, Paul.
Last edited by Paul L; 8th September 2019 at 10:00..
|
27th January 2013, 15:57
|
|
Senior Member
|
|
Join Date: Feb 2012
Location: Wembley, London
Posts: 5,056
|
|
Previous Replies:
Oxford - That which doesn't break you, makes you stronger. Well, at least I really hope so. 
SeaNick - Thanks for all the ideas & suggestions, there is certainly a lot to think about.
Although as I follow your build next door, I think your fabrication skills are in a different league to mine.
Andy - Cheers.
WCA & Viatron - I intend to add some metal strengthening to the fibre glass where the hinges bolt through.
Mr T - Initially the Cordite was going to be offered with doors as an option & I'd have gone without.
But final production was a door only deal, although your idea of a driver only door has some merit.
Dave - "Personalising it" is certainly one way to describe it!
General
Unfortunately, this will be a permanently open topped car, with all the problems that will bring.
I'm struggling with the doors, so there is no way I am going to be able to make a roof work!
As Mister Towed often says, this is building a car, not assembling a kit.
Although I wouldn't say no to some instructions and a few "Attach Part A to Part B" type jobs.
Right, I'm off back to my chores, Paul.

|
30th January 2013, 19:55
|
|
Senior Member
|
|
Join Date: Feb 2012
Location: Wembley, London
Posts: 5,056
|
|
Doors:
I'm still working my way through the various options suggested for sorting out my doors.
I'll try to knock up a few more sketches over the weekend, as a cunning plan is slowly forming.
In the meantime…
Cordite Specific Wiring Diagrams:
My new lighting arrangements (front & rear) will result in new wires being joined to the existing wiring loom.
So I always intended to produce an update to my wiring diagram to show which wire was connected to what.
After my first attempt at showing the lighting changes, I've decided to produce a number of wiring diagrams.
One for just the lighting, one for running the engine & one for everything else left over after the first two.
Initially, I wanted to show the wiring as it would be laid out in the car (bonnet, bulk head, dash board, etc.).
However, that proved to be a lot harder to do in practise, so I stuck with a similar style to a Haynes Manual.
I'd already modified the original wiring diagram to allow me to thin out the wiring loom last year…

And this is what my first draft of the new lighting wiring diagram looks like…

I used PowerPoint at work & have just been chipping away at it, a bit at a time, during my lunch hours.
You may notice I am slightly better at using computers than I am at building cars! 
I now need to cross-check this against the original wiring diagram to make sure I haven't missed anything.
I've still got to agree the wires needed for the side repeaters, as they came without any wires attached.
I'm recycling wires taken from the original loom, so the final colour will depend on the length of wire needed.
Welding Lesson:
With a bit of luck, and a fair wind, my first welding lesson will now be on Monday, 4th February. 
I am taking the day off work which makes things easier for my mate and I’m really looking forward to it.
Until next time, take care, Paul.
Last edited by Paul L; 8th September 2019 at 10:01..
|
30th January 2013, 20:22
|
 |
Senior Member
|
|
Join Date: Nov 2011
Location: Emsworth
Posts: 810
|
|
I like your computer generated diagrams. That sort of thing would drive me over the edge, although I would love to be able to do it!
Re your welding lesson, if its outside and you are MIG or Tig welding then prey for no wind at all. For a sammio frame an Arc welder is perfect. 2.5mm rods at about 75 amps and you can weld come wind or rain, though it may get a bit tickly in the rain! 
Have fun and watch the flow...... |
31st January 2013, 07:22
|
 |
Senior Member
|
|
Join Date: Jul 2011
Posts: 5,328
|
|
Agree with Seanick about the arc welder - I bought my stick welder for less than £60 from Amazon, and it came with gauntlets and a face shield (albeit a fixed tint one that I quickly replaced with an arc activated type).
It worked a treat repairing my chassis and modifying my frame, it took a little getting used to but within an hour or so I was getting strong, deep welds. It was a bit trickier welding the thin stuff - there's a fine line between insufficient power so no arc and too much so you just blow holes in the job - but I was able to weld in my new floorpans after a bit of practice.
Try one of these for welding on the cheap -
http://www.amazon.co.uk/Silverline-6...9620314&sr=8-1
http://www.amazon.co.uk/Silverline-4...9620314&sr=8-2
Good luck, welding's not as hard as the experts make out so have fun. |
31st January 2013, 07:52
|
|
Senior Member
|
|
Join Date: Apr 2012
Posts: 1,163
|
|
Whilst I agree that stick is Breyer for outdoors as it doesn't rely on a gas shield as mug and tig does I personally would recommend mig even if it means building a shelter sound you to stop the gas blowing away. Stick is fine for fairly heavy stuff but the right Mig will do that too and will really come into its own when you want to weld together things like small brackets. If you do gong then I can thoroughly recommend Rtech welding in Gloucester, I got both my mig and tig from them and there customer service is second to none and there machines are quality not just rebadged Chinese stuff rebranded.
Hth
Mac
|
31st January 2013, 12:45
|
|
Senior Member
|
|
Join Date: Nov 2011
Location: Emsworth
Posts: 810
|
|
I like arc welding but with DC, not AC. Smoother,and easier. So I bought one of theses second hand nearly ten years ago. It so light and portable. I would like a mig too for thin stuff......
http://www.fosterindustrial.co.uk/it...-240-volt.html |
31st January 2013, 13:14
|
|
Senior Member
|
|
Join Date: Jul 2011
Posts: 5,328
|
|
Both look like great choices, but really worth ten to fifteen times the price of a basic mma rig? I suppose it depends how seriously you take your hobby engineering.
|
31st January 2013, 13:21
|
|
Senior Member
|
|
Join Date: Nov 2011
Location: Emsworth
Posts: 810
|
|
Quote:
Originally Posted by Mister Towed

Both look like great choices, but really worth ten to fifteen times the price of a basic mma rig? I suppose it depends how seriously you take your hobby engineering.
|
Come and have a go, you may say yes!
Anyway, all tools tax deductable  |
31st January 2013, 15:23
|
|
Senior Member
|
|
Join Date: Jul 2011
Posts: 5,328
|
|
Quote:
Originally Posted by seanick
Come and have a go, you may say yes!
Anyway, all tools tax deductable |
I'm sure a decent mig welder would be a dream to use compared to my budget mma jobby, just as I'm sure a new Porsche would probably be more exciting to drive than my Primera. But one has to live within one's means, sniff. |
31st January 2013, 19:49
|
|
Senior Member
|
|
Join Date: Feb 2012
Location: Wembley, London
Posts: 5,056
|
|
It is funny how you always need to consider the knock on impact of one job on another job further up the line.
So sorting out my doors is now linked to the work required to get a better fit between the body shell & frame.
And issues with the body shell fit are also linked to my dashboard, which in turn, is linked to my electrics…
Dash Board Ideas:
Previous 'mock up' work showed that the 'wrap around' dash would need a lot of work before it would fit nicely.


Despite this, my original plan was to mount most of my donor's original dials & gauges into this dash panel.
Although I was considering mounting the choke level on a metal bracket to make it more solid to pull against.
( With similar considerations for fitting the hazard light switch and the trip milometer reset switch. )
So I'd knocked up another simple spread sheet to play around with some possible layouts (not to scale).
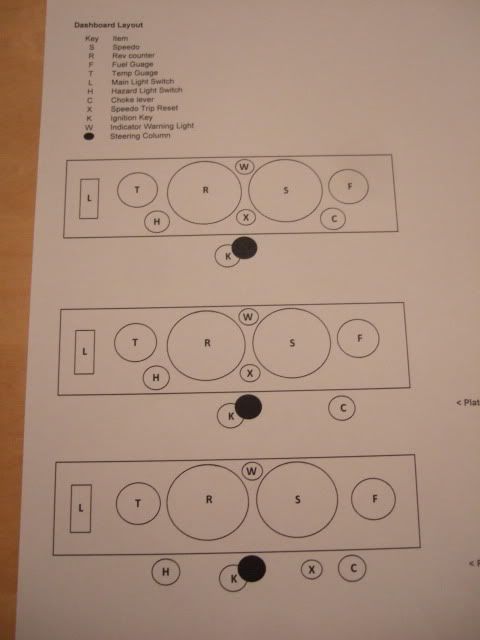
This was all pretty standard stuff, although I did swap the choke lever to the right of the steering column.
( I found it a pain start trying to start the car with both ignition key & choke on the left side of the column. )
I'd also taken on board Mister Towed's tip about moving the light switch towards the middle of the car.
But then Nike 55 put this photo on Mr T's build (relating to side mirrors) and I had a big re-think.
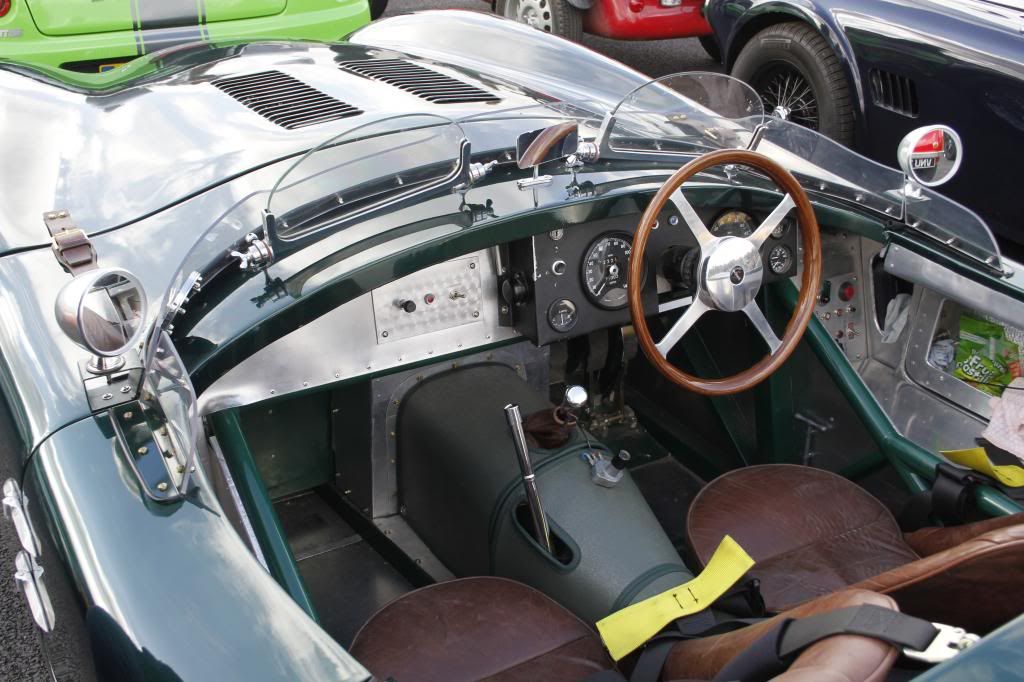
I think this approach would be easier to build below the existing dash board "lip" in the body shell.
Note: I mean the box section for the dials, etc. not the alloy finish (even though that does look great).
I have also decided to add a simple battery cut off switch to the dash as part of my security measures.
Although I plan to fit this on the passenger side of the dash to reduce the length of battery cable needed.

But before I can mock up a 'life size' dash on cardboard, there are other inter-connected areas to deal with.
I can't test fit the steering column (to arrange the dials around) until I modify the frame to accommodate it.
And I can't modify the frame until I've learnt how to weld and had some time to practise.
The final part of the dash puzzle is the position of the driver's seat, which in turn is linked to the floor pans.
If I make the seat runners work, then the seat will be higher than if I have to bolt it straight to the floor.
Pulling It All Together:
I know the above reads like some sort of never ending jigsaw puzzle that just wont fit together properly.
But I hope all of these long winded decisions will eventually make the final construction phase a bit easier.
AndyP57 has put a lot of effort into soring out my missing / damaged parts, which will also be a big help.
I abandoned any finishing deadlines a while back and that has actually taken a lot of pressure off me.
After all, this is effectively my spare time hobby, not my full time job, working around family commitments.
And that is before I start ranting & raving about my own dumb idea to build this outside & battle the weather.
But a key stage of my build is now approaching when I will be in a position to start modifying the frame.
I will post my framework "To Do" list separately, and thankfully they are all little jobs, just a lot of them.
Until next time, take care, Paul.
Replies:
Gentlemen - Thanks for all the feedback and links, I work through then at the weekend.
Unfortunately, I can't remember what sort of welder my mate has.
Hopefully I'll have a better idea of what I will be doing next week.
|
31st January 2013, 20:20
|
 |
Senior Member
|
|
Join Date: Jul 2011
Location: Marmande 47200
Posts: 501
|
|
Looks like you plan to fit the dash panel behind the tub lip, thats how I started out and the fit looked similar, however when I actually came to fit mine I ended up placing it in front of the tub and bolted it through the two parts with bonding paste sandwiched between them, its amazing how flexible the dash panel is and when tightened up with nuts and bolts it actually pulls into the contours of the tub, once set the bolts were removed and the whole thing remained rigid.
Maybe worth considering
Pops
|
2nd February 2013, 12:19
|
|
Senior Member
|
|
Join Date: Feb 2012
Location: Wembley, London
Posts: 5,056
|
|
SpitBitz
Made the 90 odd mile round trip to have a look at the back section of a Spitfire this morning.
Most of the rear section is in good condition...

The boot floor may have few issues, but not too bad...
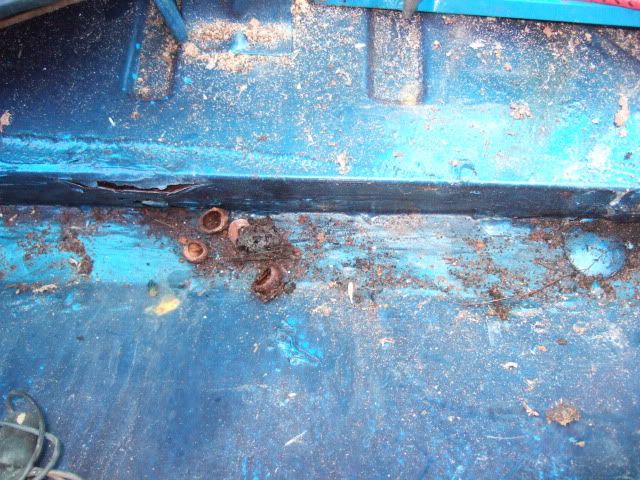
The only really rotten section is on the driver's side.
( Where the seat belt was mounted & further round the inner arch too.

The guy there was very friendly and helpful, but couldn't quote a price for delivery.
And it was going to be just a fraction too big to fit in the back of my Mondeo estate.
So I have come back to have a think about whether to "take it or leave it".
Rust Question:
If I cut out the rusty section, could I simply repair it with a section of fibre glass?
I was expecting to join the Spitfire inner wheel arch to the Cordite body shell with fibre glass.
So this would simply be an extension of the general bonding & 'glassing of body to frame, etc.
Cheers, Paul.
Replies:
Pops - Cheers, I've seen the progress on your dash, so I'll re-read that part of your build again.
Last edited by Paul L; 8th September 2019 at 10:03..
|
2nd February 2013, 20:11
|
|
Senior Member
|
|
Join Date: Jun 2011
Location: birchington, kent
Posts: 1,769
|
|
Evening Paul, nice to see a thread about building cars!
T fibreglassed his footwells, and they came out alright...
|
4th February 2013, 12:24
|
|
Senior Member
|
|
Join Date: Feb 2012
Location: Wembley, London
Posts: 5,056
|
|
Just taking a break while I sort out some lunch, so I'll be quick...
First Welding Lesson:
My best mate came around with his MIG welder and I've now had my first go at welding.
I started just working along a metal sheet so see what it was all about...
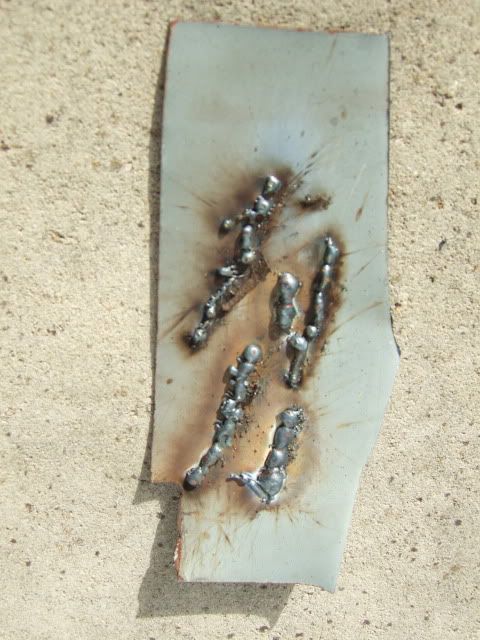
Then had my first go at joining two pieces of box section together...
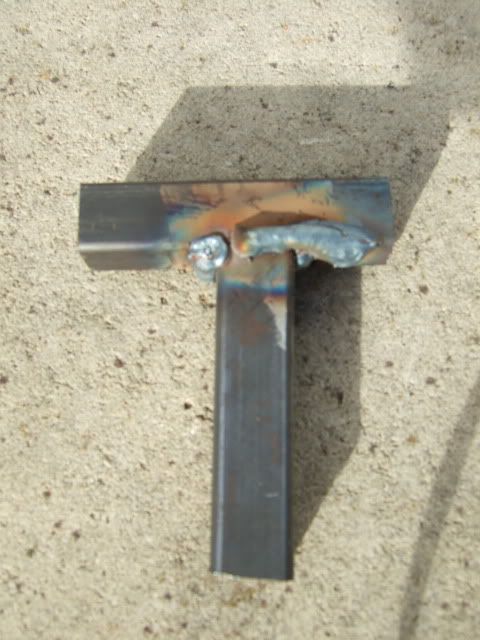
Some welds are certainly better that others, but it does seem a pretty solid join.
Although you can see where I kept going beyond the T join on one side.
I guess it takes a while to get used to using one of these...
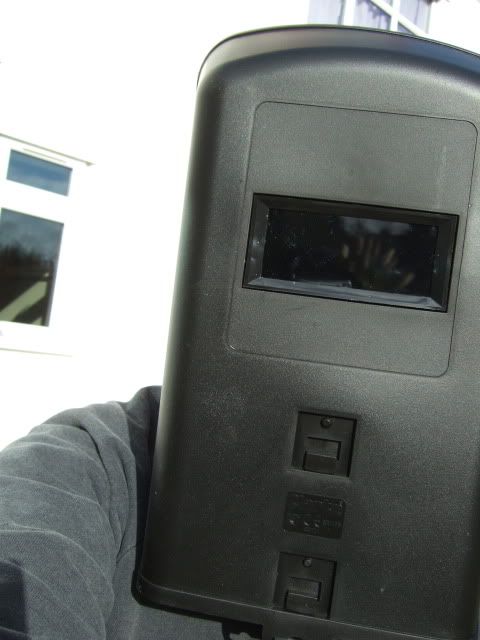
Excuse the dodgy self portrait, but my mate had left me to it by now.
It is pretty blustery outside at the moment, but at least it isn't raining!
The other thing I will bear in mind is this quote from the Ribble Frame Debate ...
Quote:
Originally Posted by seanick
... The difference between blobbing something together with a budget MIG and producing smooth fluid welds with the correct level of deposition and penetration. Unfortunately, you will only find out how good your welds are when you have crash, and your welds fail... I dont want to br prophet of doom here, but I did a City and Guilds welding course about 26 years ago, and after 26 years regular practice l know I still have room for improvement! ...
|
So I am not about to start modifying my frame until I have a bit more practise.
And even then I will accept my limits and get some one else in if required.
The good news is I am off work for a few days, so I will keep practising.
Cheers, Paul.
Replies:
GaryH - It is pretty depressing to see build photos & notes being deleted.
|
4th February 2013, 14:36
|
|
Senior Member
|
|
Join Date: Apr 2012
Posts: 1,163
|
|
stick with it, the ability to weld is probably the best skill you can develope whilst messing with cars. looking at you test t piece i would say you either need more gas flow or your working in a breezy location thats blowing the gas away. In addition the way your welds seem to sit on top of the piece would leave me to presume you need to try upping the power a bit as well.
HTh
Mac
|
|
Currently Active Users Viewing This Thread: 6 (0 members and 6 guests)
|
|
|
 Posting Rules
|
You may not post new threads
You may not post replies
You may not post attachments
You may not edit your posts
HTML code is Off
|
|
|
All times are GMT +0. The time now is 00:38.
|


 Linear Mode

