|
|
| Sammio Builds and discussions Sammio bodied car builds and specials |

8th February 2013, 16:04
|
 |
Senior Member
|
|
Join Date: Sep 2012
Posts: 192
|
|
 Got the Hump
 Kept looking at my seat position then the hump. I have taken a cast of the original hump. Make sure you put something on the original so it is easy to release! Out came the cutting disc and off it came now i can reposition and can also weld in some steel box to protect in case it rolls over(not that i intend to)
no working on car tomorrow defending my title in a f comp |
8th February 2013, 16:53
|
 |
Senior Member
|
|
Join Date: Oct 2011
Location: Surrey
Posts: 363
|
|
Quote:
Originally Posted by CarNoob

Kept looking at my seat position then the hump. I have taken a cast of the original hump. Make sure you put something on the original so it is easy to release! Out came the cutting disc and off it came now i can reposition and can also weld in some steel box to protect in case it rolls over(not that i intend to)
no working on car tomorrow defending my title in a f comp
|
So you could say "you put the hump to the sword" |
8th February 2013, 18:54
|
|
Senior Member
|
|
Join Date: Sep 2012
Posts: 192
|
|
[IMG]  [/IMG] new position for hump |
8th February 2013, 18:56
|
|
Senior Member
|
|
Join Date: Sep 2012
Posts: 192
|
|
[IMG] 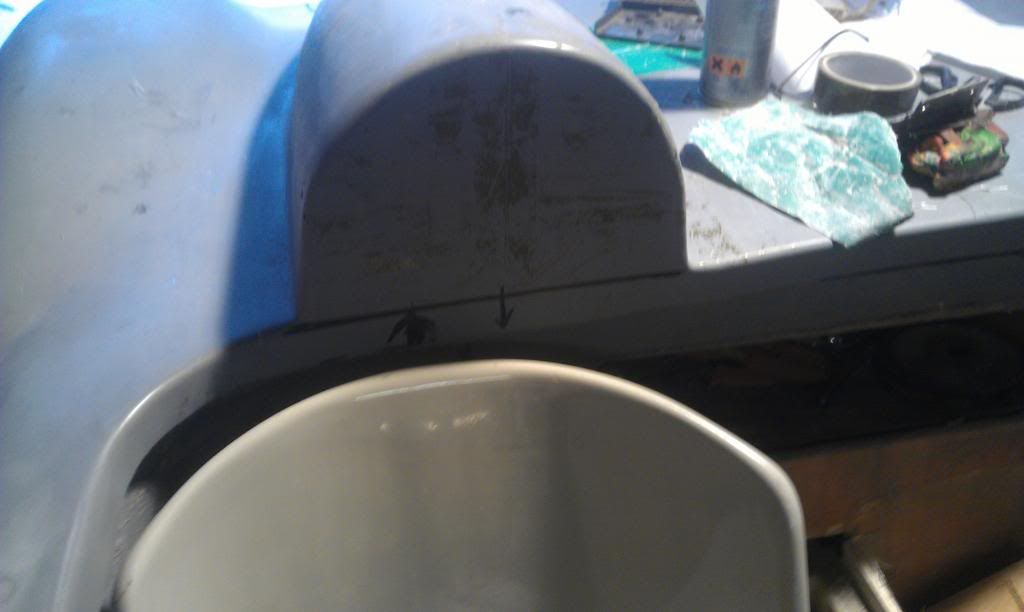 [/IMG] for me its too far off |
8th February 2013, 18:58
|
|
Senior Member
|
|
Join Date: Sep 2012
Posts: 192
|
|
[IMG] 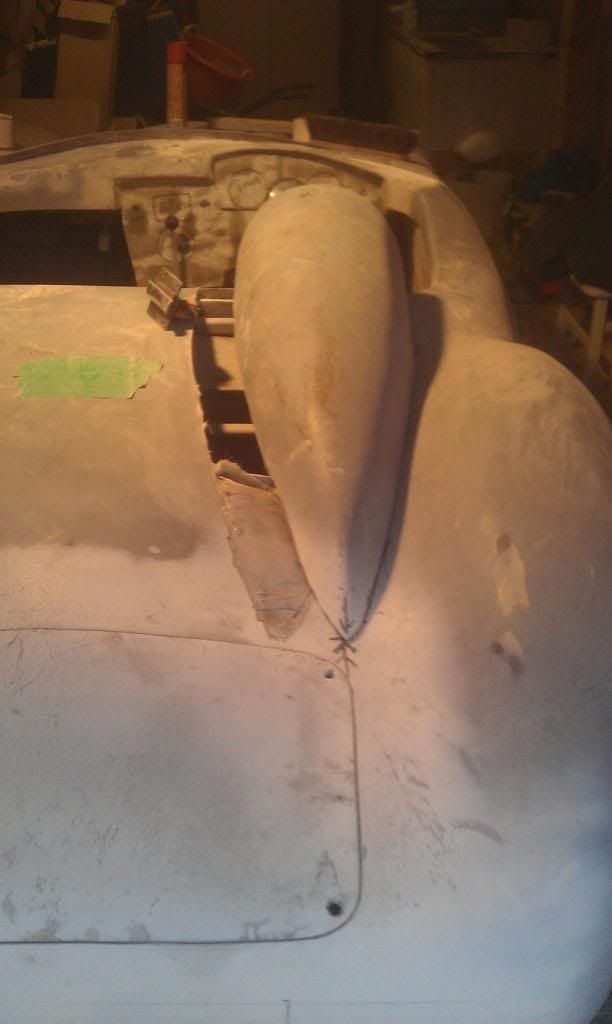 [/IMG] |
8th February 2013, 18:59
|
|
Senior Member
|
|
Join Date: Sep 2012
Posts: 192
|
|
[IMG] 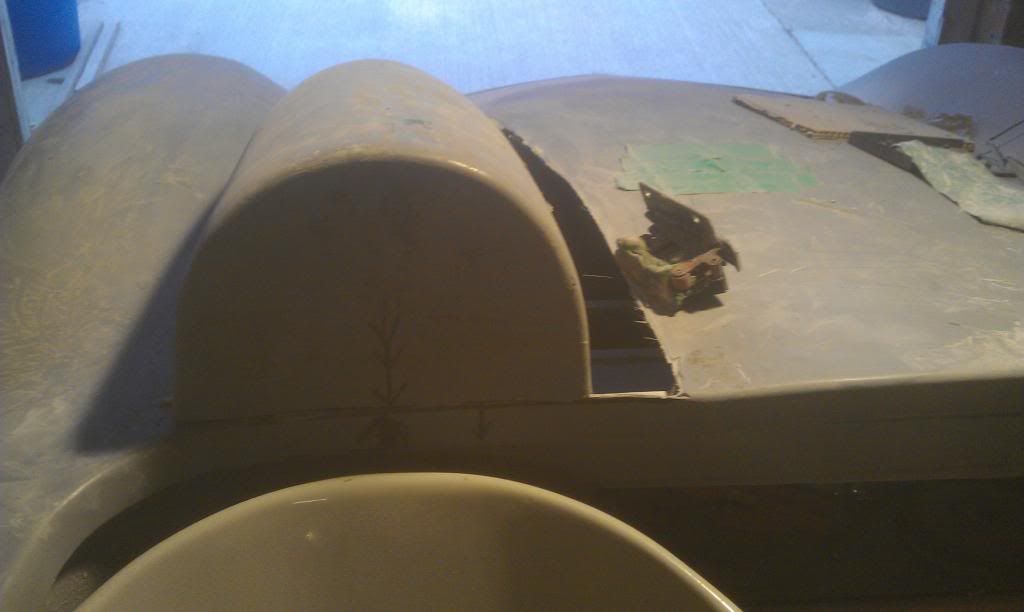 [/IMG] |
8th February 2013, 19:02
|
|
Senior Member
|
|
Join Date: Sep 2012
Posts: 192
|
|
may build it taller or add another[IMG] 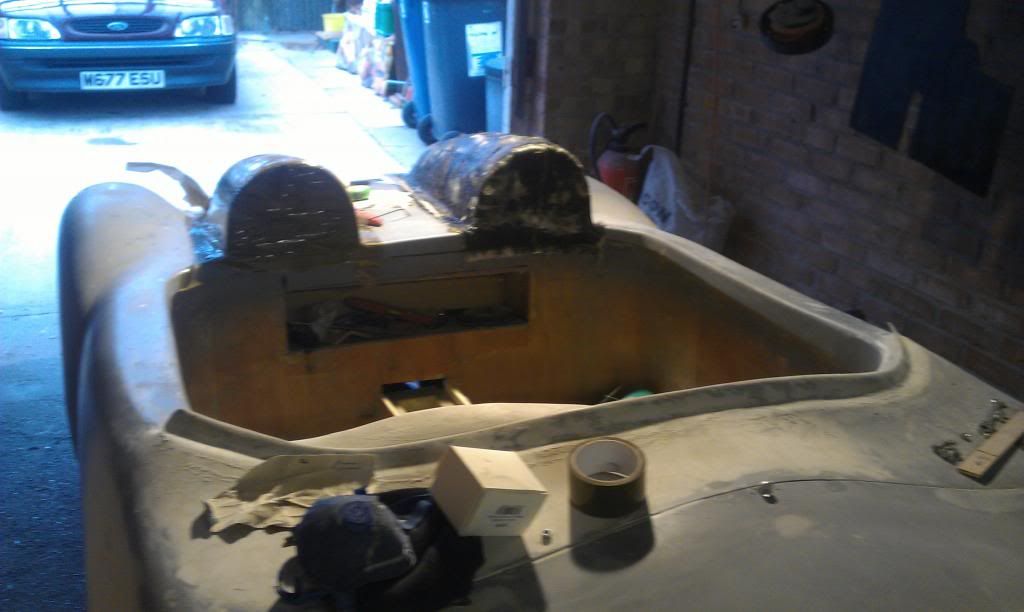 [/IMG] |
8th February 2013, 20:01
|
|
Senior Member
|
|
Join Date: Apr 2012
Posts: 1,163
|
|
Nice work, I have to agree that the offset humps always bugged me, now the humps come separate at least ill be able to position them as I want.
|
8th February 2013, 21:05
|
|
Senior Member
|
|
Join Date: Mar 2012
Posts: 1,152
|
|
Nice work, Noob. You are doing what I plan to do so I will be grateful for all pics and commentary. Do I see that you have marked a boot, and is that a ridge around the front of the cockpit?
|
8th February 2013, 21:15
|
|
Senior Member
|
|
Join Date: Sep 2012
Posts: 192
|
|
yes i decided to set back the the dash for rev counter and cut out then bent some 4mm bar to join over the top and welded to keep frame intact[IMG] 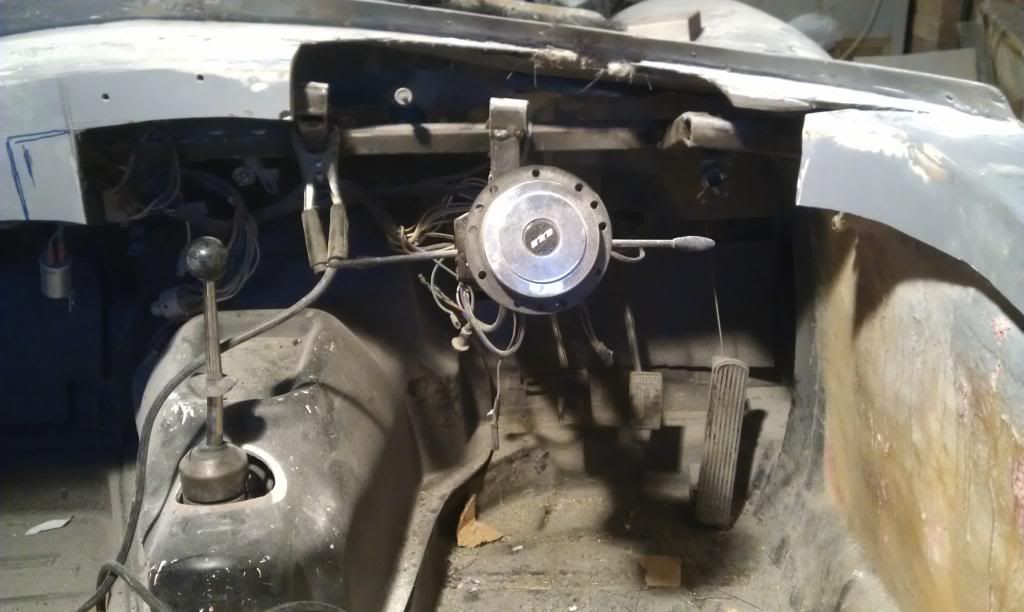 [/IMG] |
8th February 2013, 21:20
|
|
Senior Member
|
|
Join Date: Sep 2012
Posts: 192
|
|
still work in progress if i started again iwould have altered the frame to make plenty of room for all the dials  [IMG] 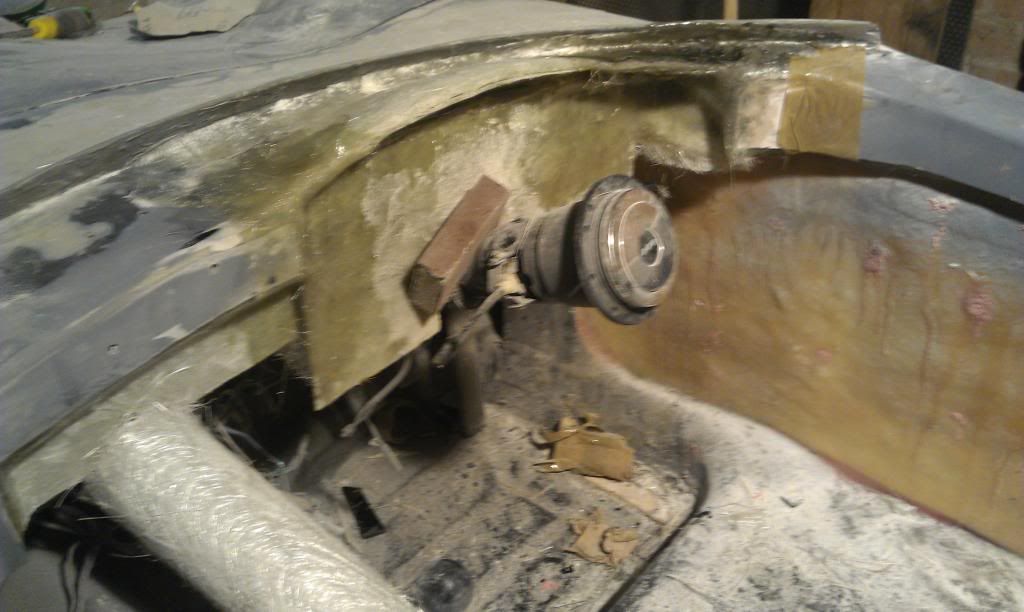 [/IMG] |
12th February 2013, 18:28
|
 |
Senior Member
|
|
Join Date: Feb 2012
Location: Wembley, London
Posts: 5,056
|
|
Your car is going to have some nice individual touches. 
Good luck, Paul.  |
14th February 2013, 17:39
|
|
Senior Member
|
|
Join Date: Sep 2012
Posts: 192
|
|
[IMG] 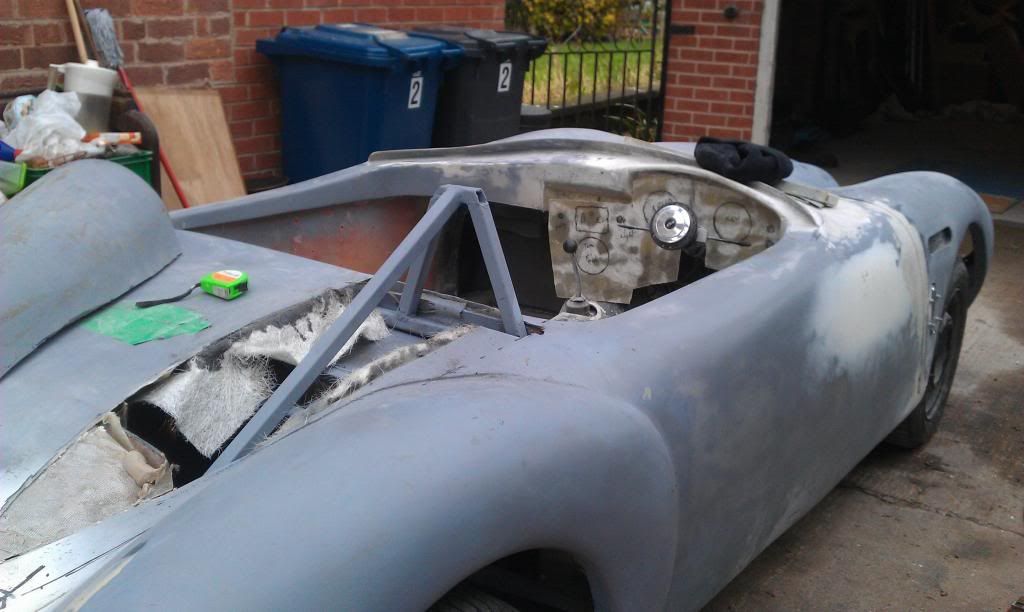 [/IMG]Going to make the hump a bit higher and added some protection for my head just in case. Hit with lump  hammer seems strong enough |
14th February 2013, 17:53
|
|
Senior Member
|
|
Join Date: Jun 2011
Location: birchington, kent
Posts: 1,769
|
|
What about the other hump!
|
14th February 2013, 19:47
|
|
Senior Member
|
|
Join Date: Sep 2012
Posts: 192
|
|
plan to have the other one removeable with a push on and lock system. not worked out how yet  |
3rd May 2013, 18:36
|
|
Senior Member
|
|
Join Date: Sep 2012
Posts: 192
|
|
progress on the removeable hump[IMG] 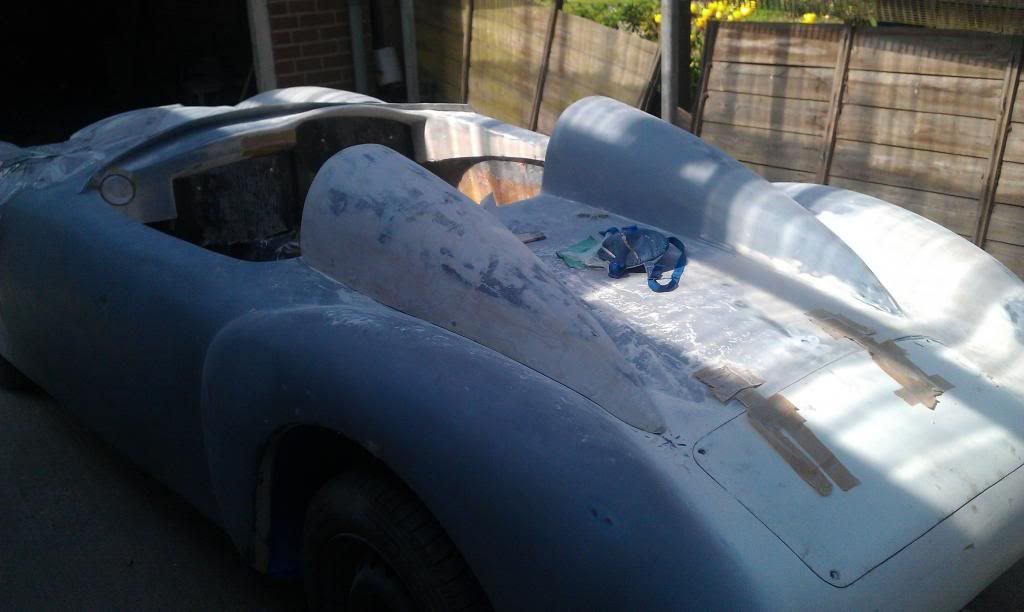 [/IMG] |
3rd May 2013, 18:38
|
|
Senior Member
|
|
Join Date: Sep 2012
Posts: 192
|
|
[IMG] 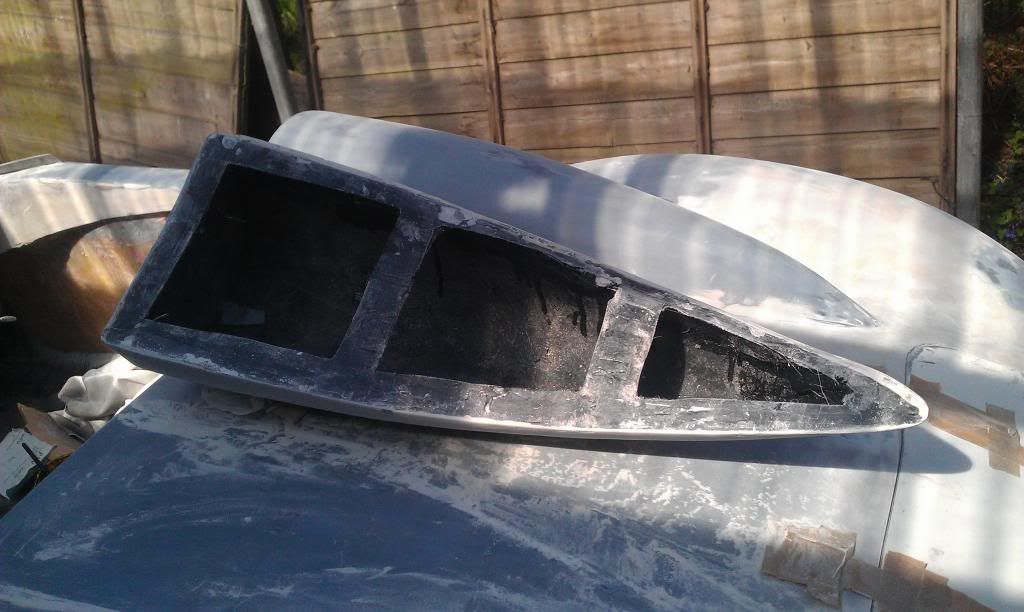 [/IMG] |
4th May 2013, 05:49
|
|
Senior Member
|
|
Join Date: Feb 2012
Location: Wembley, London
Posts: 5,056
|
|
Your second hump seems to be coming together nicely.
How did you get the hump's edges to match the contours of the body shell, was it just trial & error?
Also do you have any more details on how your boot / boot lid works?
Cheers, Paul. |
5th May 2013, 11:21
|
|
Senior Member
|
|
Join Date: Sep 2012
Posts: 192
|
|
I made a cast of the other hump [IMG]  [/IMG] [IMG] [/IMG] Then made a copy trimed to fit other side and marked the body. used poly vinal tape to stop resin sticking to the body and fibre glassed the outline i had marked out. placed hump over outline after triming. Used a level and wedges to match other hump and roughly filled to bond to the base. Finally glass fill and sand. The boot is still work in progress will need hinges that lift enough to clear curve in the body. |
5th May 2013, 15:42
|
|
Senior Member
|
|
Join Date: Feb 2012
Location: Wembley, London
Posts: 5,056
|
|
Thanks for the explanation.
Cheers, Paul. |
|
Currently Active Users Viewing This Thread: 1 (0 members and 1 guests)
|
|
|
 Posting Rules
|
You may not post new threads
You may not post replies
You may not post attachments
You may not edit your posts
HTML code is Off
|
|
|
All times are GMT +0. The time now is 00:43.
|


 Linear Mode

