|
|
| Tribute Automotive Builds Discuss your Tribute kit build |

29th October 2012, 08:39
|
 |
Senior Member
|
|
Join Date: Nov 2011
Location: Emsworth
Posts: 810
|
|
Sorry, I missed out the phrase drove it 'onto a mates trailer' before driving it to the workshop.  |
29th October 2012, 20:18
|
|
Senior Member
|
|
Join Date: Jul 2012
Location: Near Penzance cnwll
Posts: 146
|
|
 Nice start
Hey Nick
Like the wheels, I am doing a little custom job with my wheels , have the 3 eared spinners already . Will you need to adjust the GRP arch at the rear for those fat rubbers ?  |
29th October 2012, 20:23
|
 |
Senior Member
|
|
Join Date: Oct 2010
Posts: 1,622
|
|
Quote:
Originally Posted by seanick

[IMG] 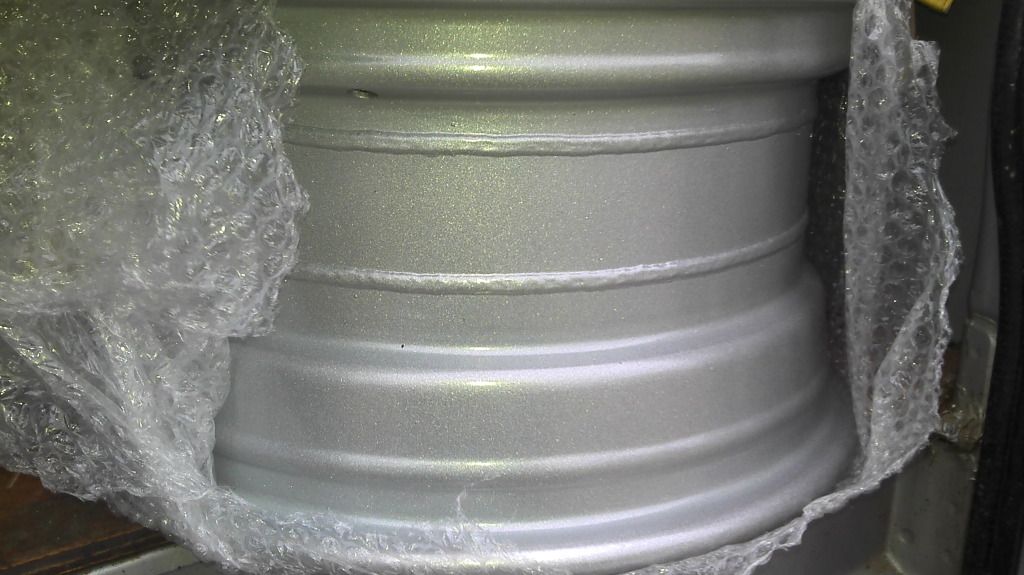 [/IMG]The rims are back from powder coatin
And a nice stack of rubber to stick on them.
[IMG] 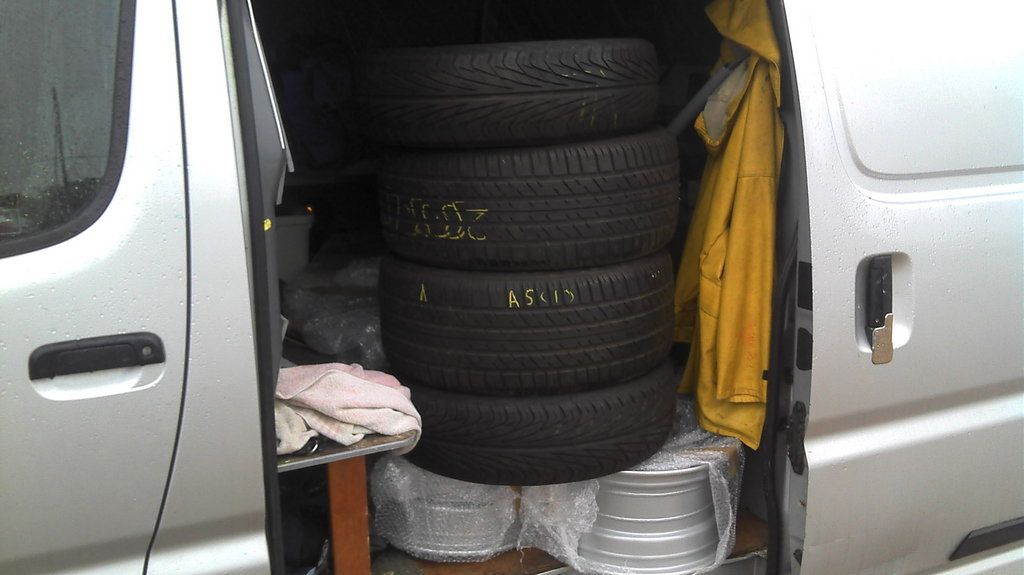 [/IMG] |
You are a lucky man with the condition of you base car How much was the powder coating? |
29th October 2012, 21:20
|
|
Senior Member
|
|
Join Date: Nov 2011
Location: Emsworth
Posts: 810
|
|
PEEPS- yes I will have to tweak the arch. Was going to be this eve, but then there was the programme on the Bond cars....so nothing has happened.....
I also have the spinners, plan to mount them on a ss disc that will cover the nuts.
Chris, wheels powdercoated, shotblasted first @ £25/ wheel. Half the price of ali wheels cos they dont need to be baked first, only afterwards.
|
30th October 2012, 17:59
|
|
Senior Member
|
|
Join Date: Jul 2012
Location: Near Penzance cnwll
Posts: 146
|
|
Arch adjustment
I have to cut my rear arches back about 25 mm. I think I will let u go first so I can get an idea how to go about it. Will put the cheque in the post.  |
30th October 2012, 18:25
|
|
Senior Member
|
|
Join Date: Nov 2011
Location: Emsworth
Posts: 810
|
|
Just putting the kids to bed then I am off down the workshop.....
|
30th October 2012, 18:27
|
|
Senior Member
|
|
Join Date: Oct 2010
Posts: 1,622
|
|
|
30th October 2012, 23:54
|
|
Senior Member
|
|
Join Date: Nov 2011
Location: Emsworth
Posts: 810
|
|
Done it.
Wheel arches tweaked and reglassed. More details on request!
[IMG] 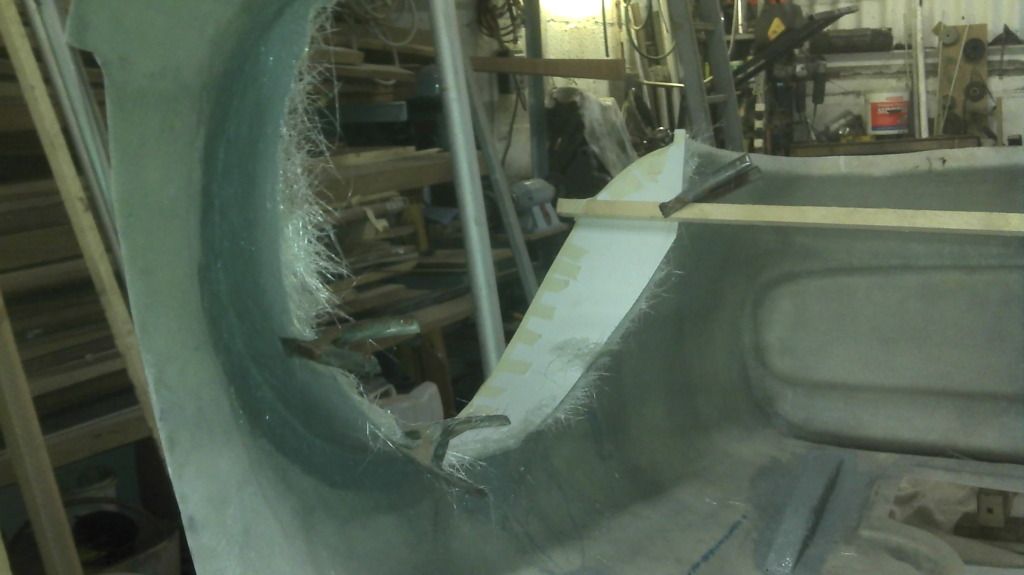 [/IMG]
Right now I off to bed! Zzzz |
31st October 2012, 09:16
|
|
Junior Member
|
|
Join Date: Jul 2012
Posts: 2
|
|
Hi Nick great to see your progress so far, I am building the body before yours I think # 16. I am keen to know how to contact James the wheelman I am thinking of having a set of 15 inch steels banded cheers .
|
31st October 2012, 17:23
|
|
Senior Member
|
|
Join Date: Nov 2011
Location: Emsworth
Posts: 810
|
|
Quote:
Originally Posted by tom911
Hi Nick great to see your progress so far, I am building the body before yours I think # 16. I am keen to know how to contact James the wheelman I am thinking of having a set of 15 inch steels banded cheers .
|
I have pm'ed you. |
31st October 2012, 19:56
|
|
Senior Member
|
|
Join Date: Nov 2011
Location: Emsworth
Posts: 810
|
|
Heres how I marked out the new arch shape, using a square set to match the inner wing/ max suspension travel, up against the rim.
[IMG] 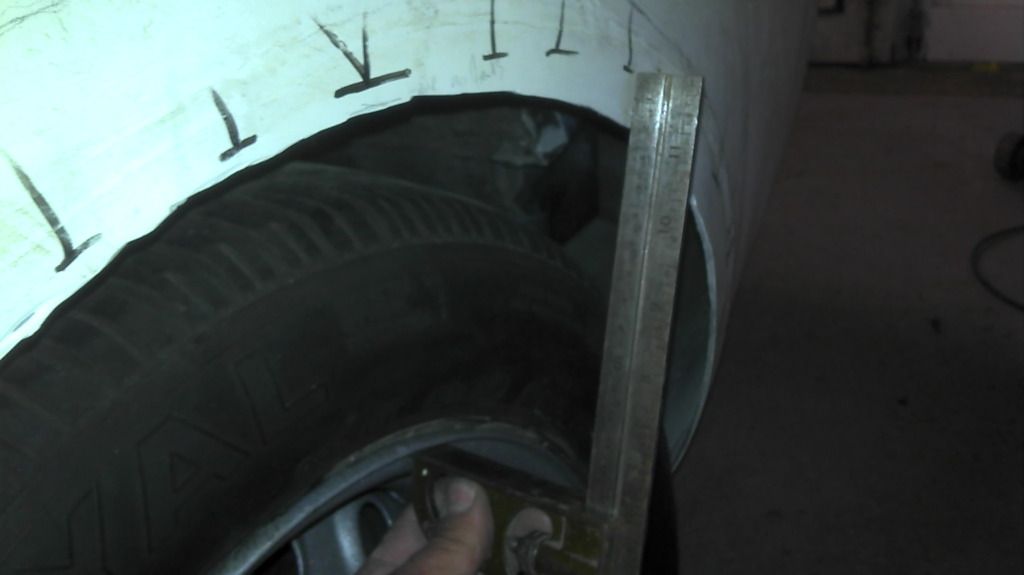 [/IMG]
then a fairing batten to check the shape.....
[IMG] 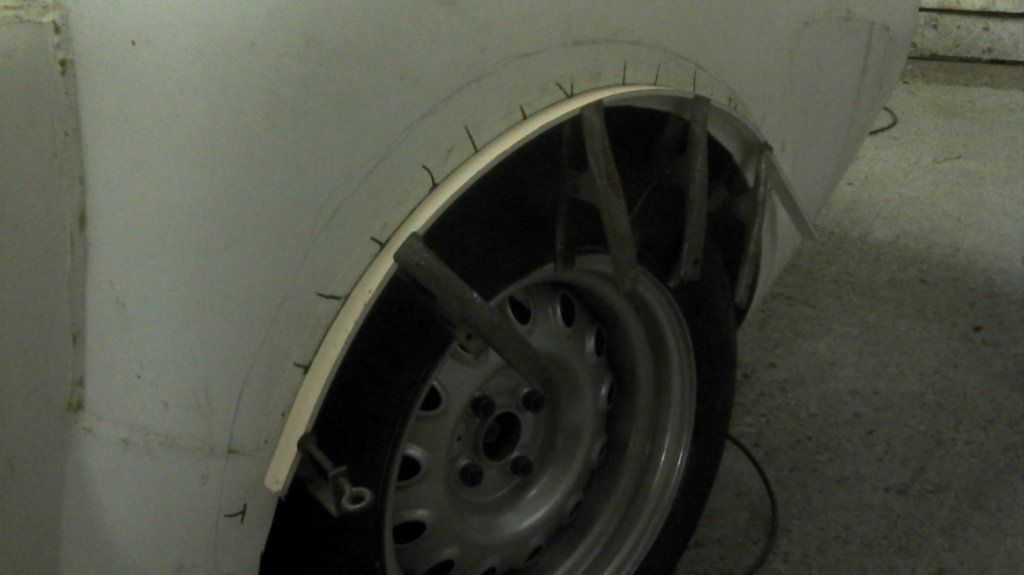 [/IMG]
Blocked up some flexi plastic stuff to form a mould and marked of the outer gtp wing.
[IMG] 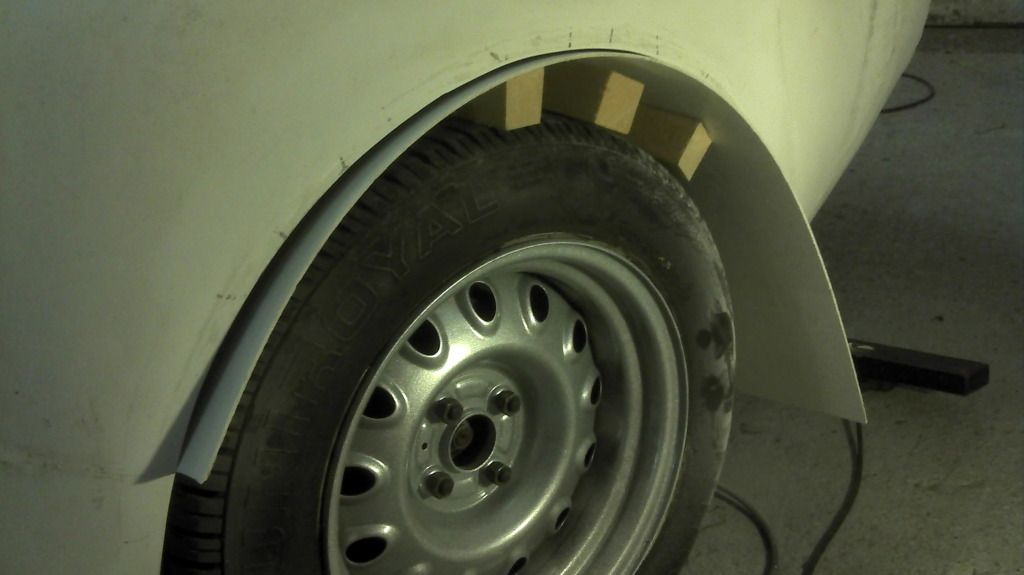 [/IMG]
marked the distance in to the inner steel arch and cut out..
taped in position, batten to make it run square across, the a layer of gell coat the t[IMG]  [/IMG]hree layers of 2oz csm.
[IMG]  [/IMG]/Seanick_bucket/104034610_photobucket_159182_.jpg[/IMG][/IMG]
[IMG] 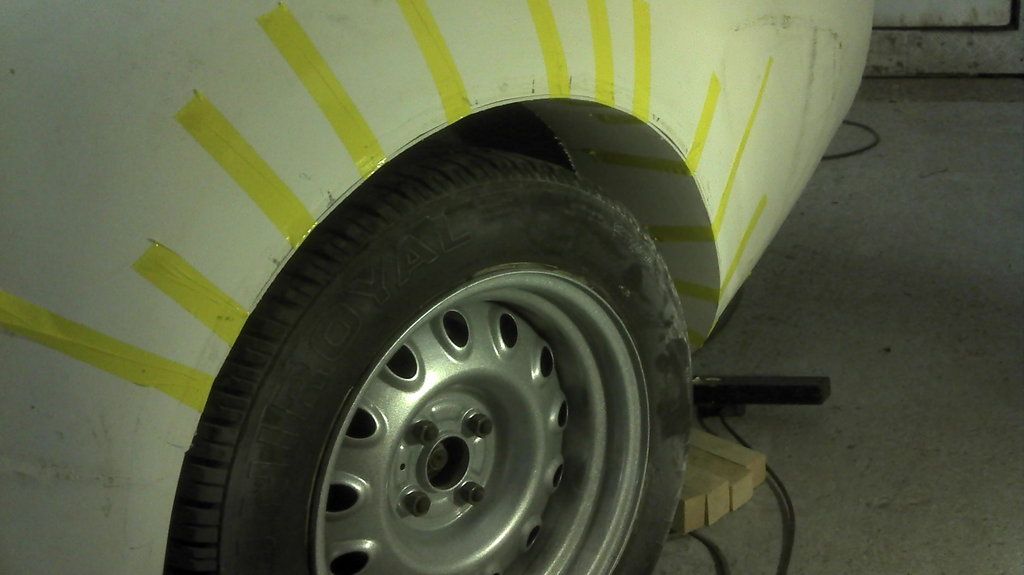 [/IMG][IMG] 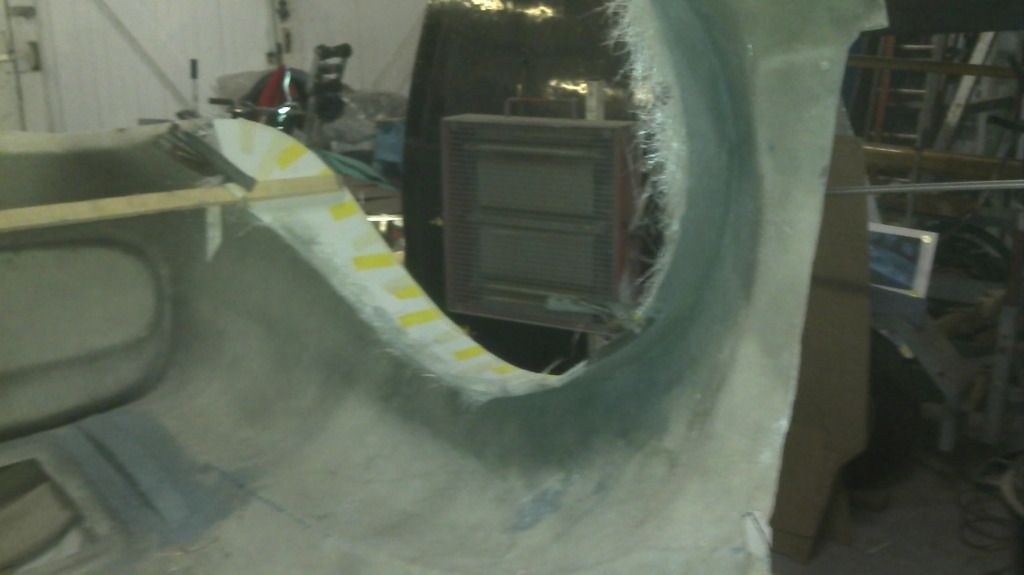 [/IMG]
[IMG] 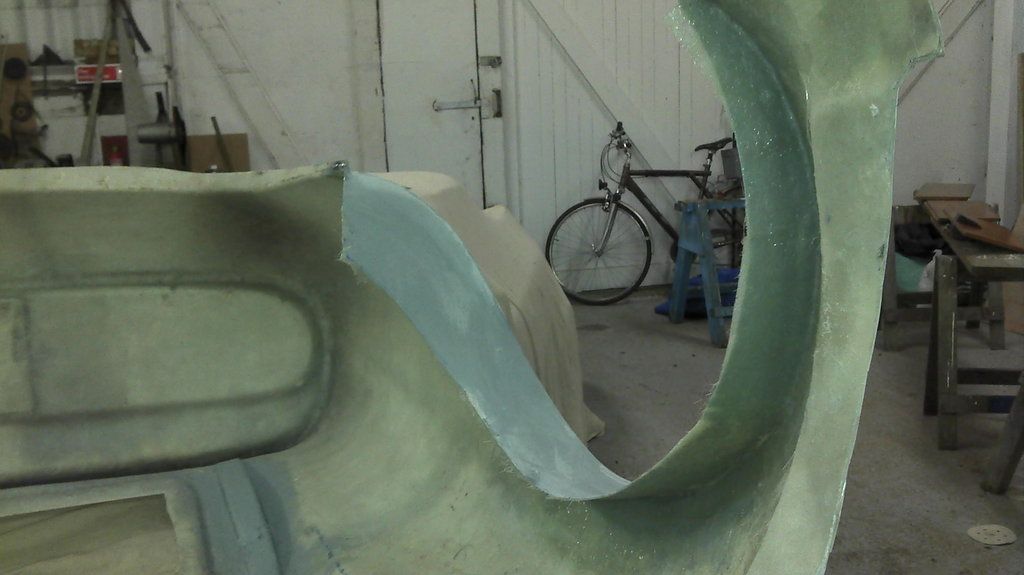 [/IMG] |
1st November 2012, 19:20
|
|
Senior Member
|
|
Join Date: Nov 2011
Location: Emsworth
Posts: 810
|
|
Put the body back on this eve. It was a right pain as of course Chris beautifuly fitting kit now took loads of trimming and tweaking to get it to sit right again.
Not sure its worth the hassle of changing the rear arches from the original kit as supplued
|
1st November 2012, 19:22
|
|
Senior Member
|
|
Join Date: Oct 2010
Posts: 1,622
|
|
Quote:
Originally Posted by seanick
Put the body back on this eve. It was a right pain as of course Chris beautifuly fitting kit now took loads of trimming and tweaking to get it to sit right again.
Not sure its worth the hassle of changing the rear arches from the original kit as supplued
|
Welcome to the world of kit (re)designing!  |
1st November 2012, 19:23
|
|
Senior Member
|
|
Join Date: Nov 2011
Location: Emsworth
Posts: 810
|
|
[IMG] 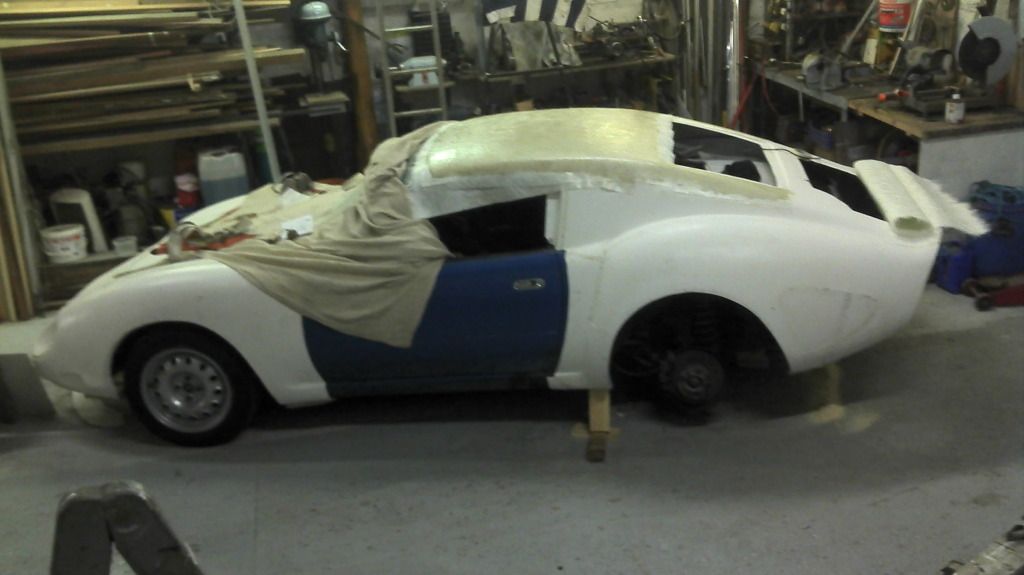 [/IMG] |
1st November 2012, 19:27
|
|
Senior Member
|
|
Join Date: Nov 2011
Location: Emsworth
Posts: 810
|
|
I also laminated what I hope will become the headllining. Waxed up the roof. And laminated two 2oz layers of csm.
I HOPE IT COMES OFF TOMORROW! !!!
[IMG] 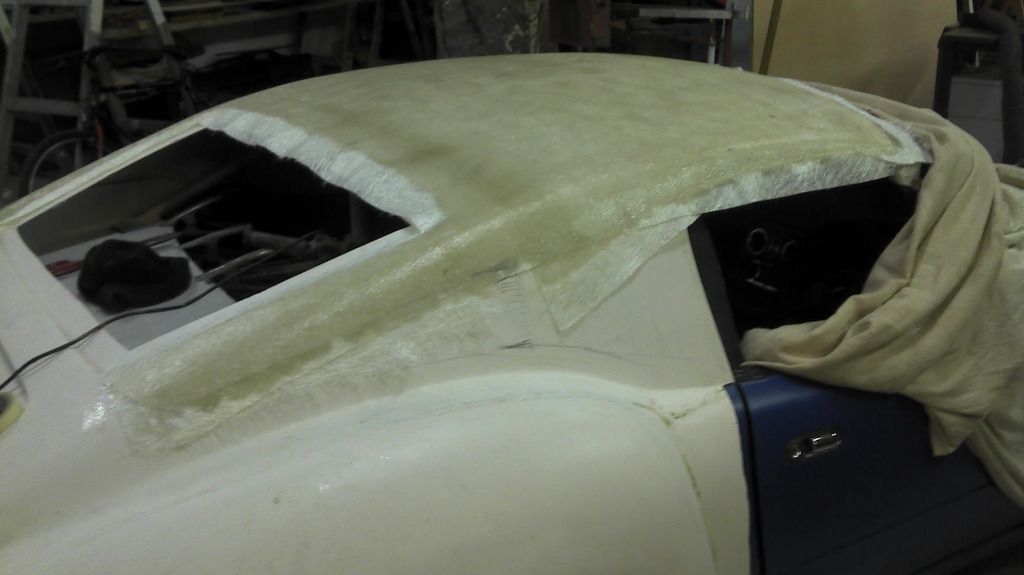 [/IMG]
Last edited by seanick; 8th November 2012 at 10:36..
|
1st November 2012, 19:35
|
|
Senior Member
|
|
Join Date: Nov 2011
Location: Emsworth
Posts: 810
|
|
 Free fibreglass dispenser!
[IMG] 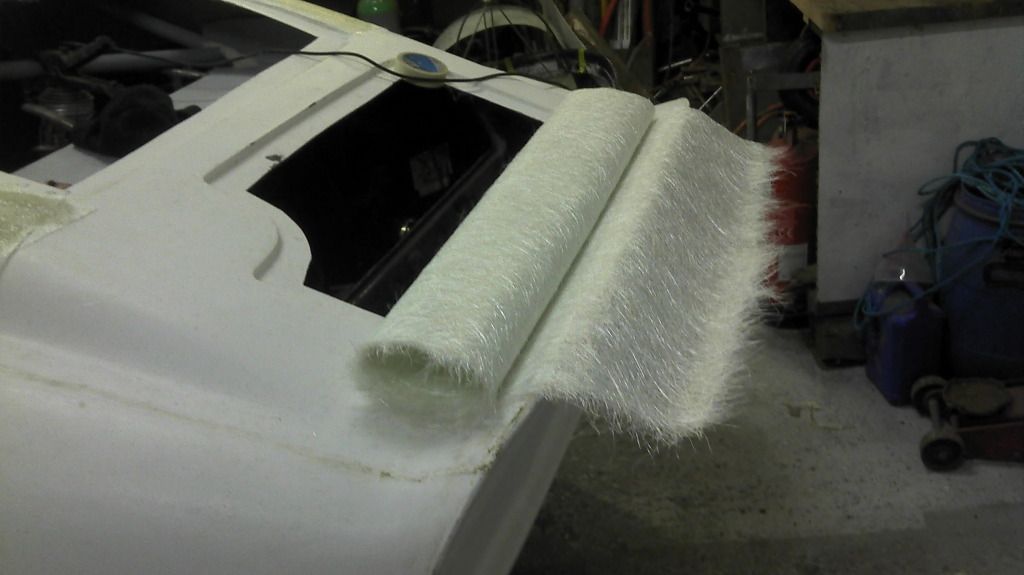 [/IMG] Is this the only body that comes with a fibreglass roll holder, with raised lip for when you need a torn edge??
HANDY!! |
1st November 2012, 19:40
|
|
Senior Member
|
|
Join Date: Oct 2010
Posts: 1,622
|
|
Quote:
Originally Posted by seanick
[IMG] [/IMG] Is this the only body that comes with a fibreglass roll holder, with raised lip for when you need a torn edge??
HANDY!! |
Why have we never used it for that? |
2nd November 2012, 17:40
|
|
Senior Member
|
|
Join Date: Nov 2011
Location: Emsworth
Posts: 810
|
|
The new former for the headlining came of really easily (phew!)
trimmed up the edges and thats all I had time for this eve.[IMG]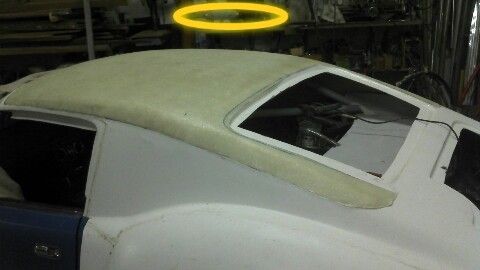 [/IMG] [/IMG]
|
3rd November 2012, 17:32
|
|
Senior Member
|
|
Join Date: Nov 2011
Location: Emsworth
Posts: 810
|
|
I have sourced a fuel filler, so scoured the kitchen and workshop for something to use as a mould to make a recess for the filler. Found an old paint lid, screwed it to a bit of plastic on the bench. Covered it in release wax then gave it a thick coat of gell coat.[IMG] 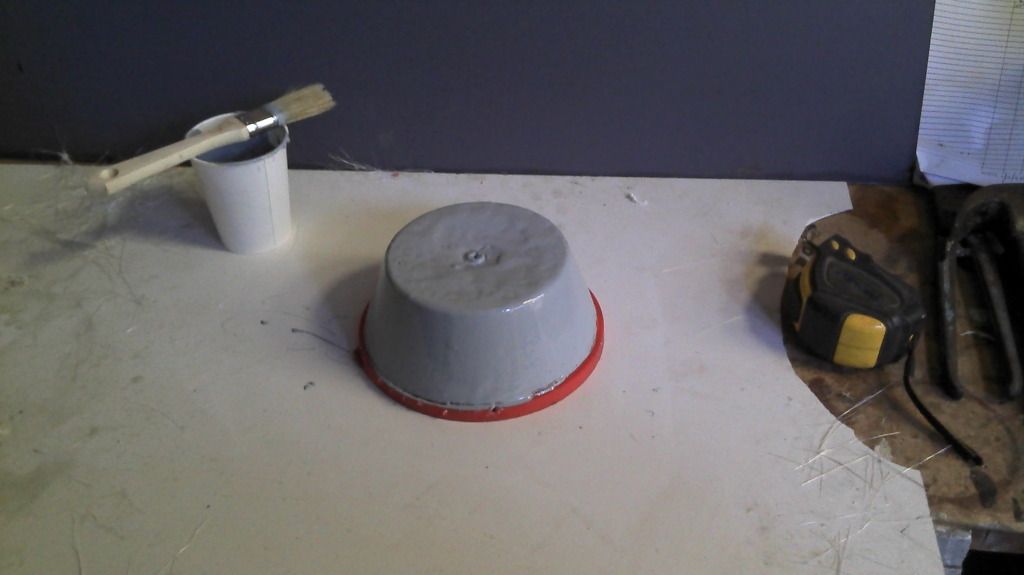 [/IMG]
When that was dry, added a drain tube and built up some layers of grp.
[IMG] 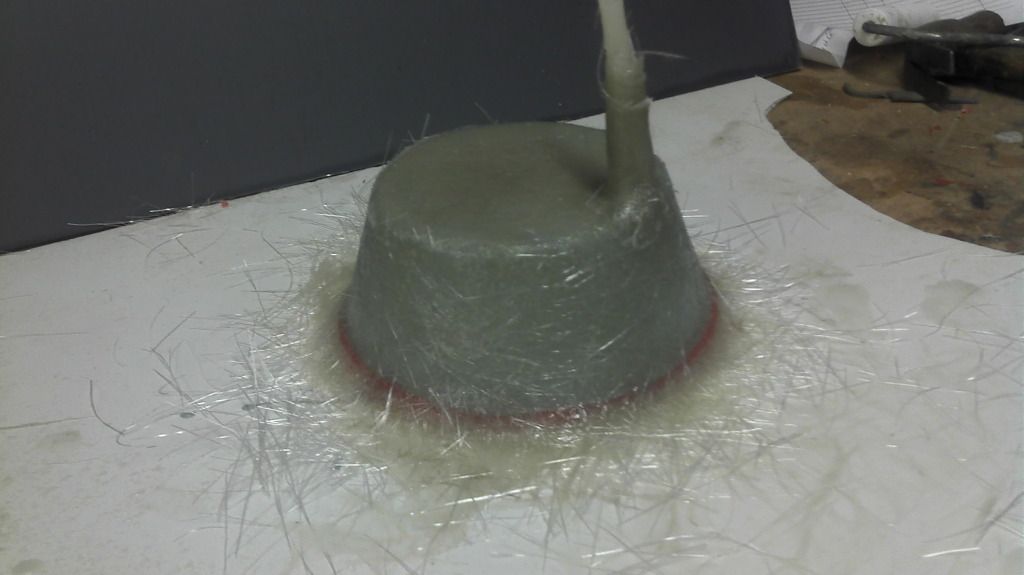 [/IMG] |
4th November 2012, 21:20
|
|
Senior Member
|
|
Join Date: Nov 2011
Location: Emsworth
Posts: 810
|
|
Just back from a rather nippy workshop, brrrrrr
Anyway, popped the filler recess off the mould, trimmed it, cut a hole in the body, fitted it and glassed it in lightly from underneath. I do a bit more glassing when I take the body off again.[IMG] 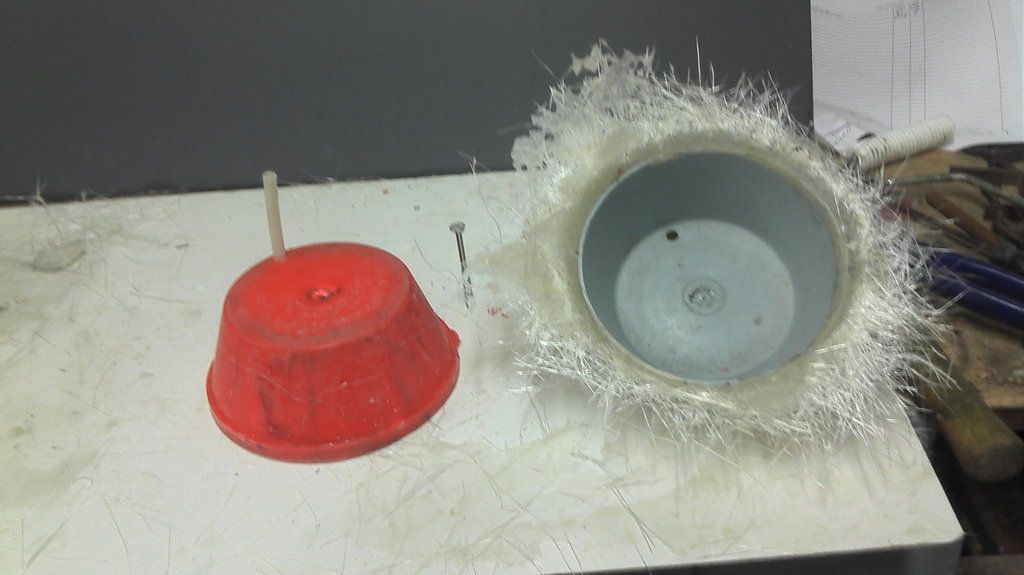 [/IMG]
[IMG] 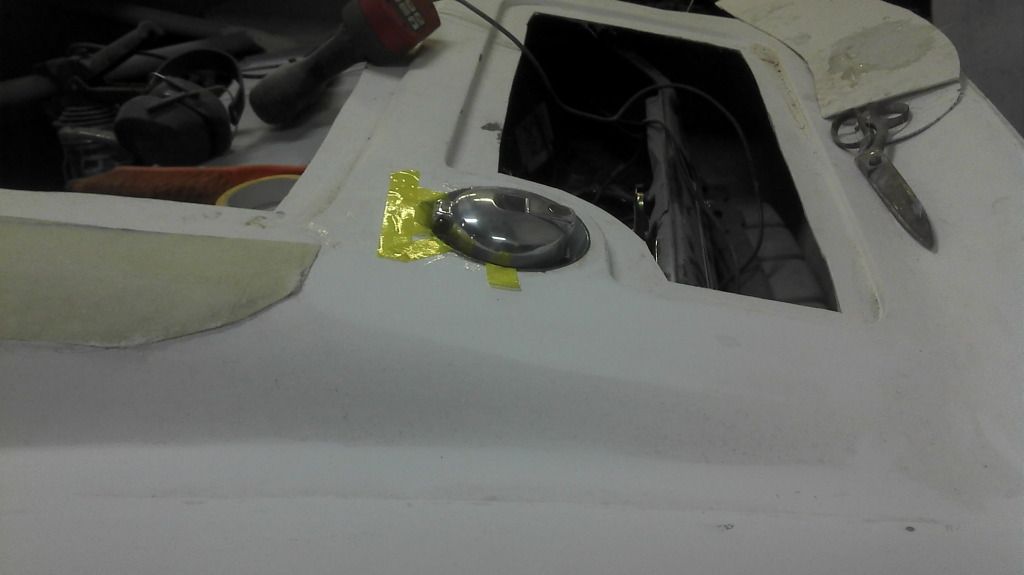 [/IMG]
[IMG] 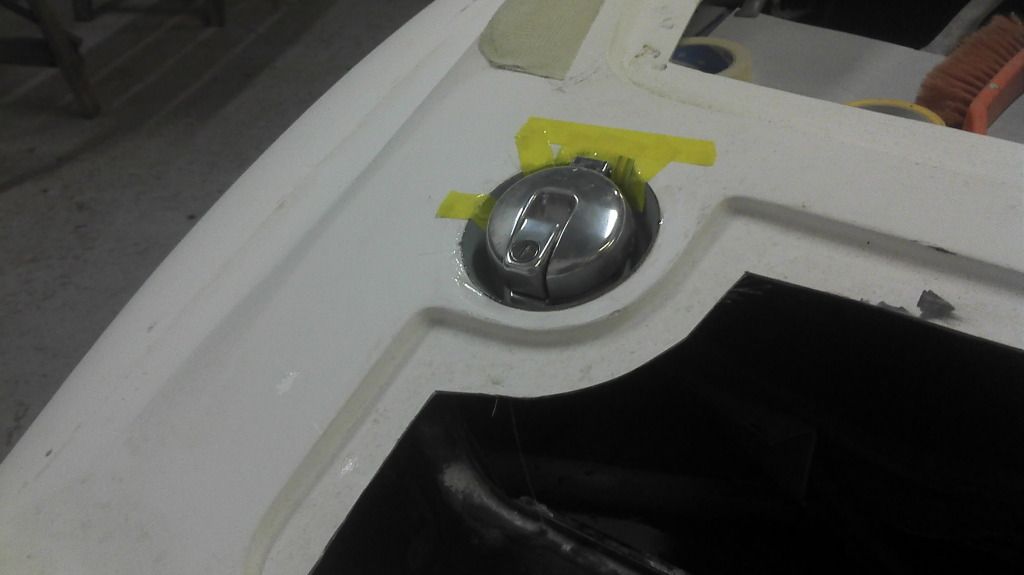 [/IMG] |
|
Currently Active Users Viewing This Thread: 2 (0 members and 2 guests)
|
|
|
 Posting Rules
|
You may not post new threads
You may not post replies
You may not post attachments
You may not edit your posts
HTML code is Off
|
|
|
All times are GMT +0. The time now is 17:27.
|


 Linear Mode

