Are you madabout kit cars      
 "We've Got Kit Cars Covered" Information about Madabout-Kitcars.com Contact Madabout-Kitcars.com         Home of UK kit cars - madabout-kitcars.com Various kit car write ups All the latest kit car news Kit car related and general discussion

Search
Manufacturers
Kit Cars
Kit Car Data sheets
Picture Gallery
SVA Knowledgebase
Clubs & Communities
Build cost estimator
Kit cars for sale
Knowledge Base 
KitcarUSA.com
Classic-Kitcars.com
 

Go Back   Madabout Kitcars Forum > Mad Build Area > Sammio Builds and discussions

Sammio Builds and discussions Sammio bodied car builds and specials

Reply
 
Thread Tools Display Modes
  #1641  
Old 22nd February 2015, 08:54
garyh garyh is offline
Senior Member
 
Join Date: Jun 2011
Location: birchington, kent
Posts: 1,769
garyh is on a distinguished road
Default

I think you should put a beveled edge on each of the holes to attract the air... Or a couple of traffic cones, stuck on the front (may need adapting).
Reply With Quote
  #1642  
Old 22nd February 2015, 10:17
Scottie22 Scottie22 is offline
Senior Member
 
Join Date: May 2013
Posts: 2,161
Scottie22 is on a distinguished road
Default

Well Paul, at least now you are aware that a problem may exist, and that more re-search is required!

Now you know, and I'm sure you will sort it out ,traffic cones or not!!
Reply With Quote
  #1643  
Old 22nd February 2015, 10:55
reneanglia reneanglia is offline
Senior Member
 
Join Date: Jan 2015
Posts: 168
reneanglia is on a distinguished road
Default

Perhaps i should'nt have mentioned the grill..........now your sunday is ruined..............
Good luck with the search of traffic cones...........
Reply With Quote
  #1644  
Old 22nd February 2015, 11:05
Paul L's Avatar
Paul L Paul L is offline
Senior Member
 
Join Date: Feb 2012
Location: Wembley, London
Posts: 5,056
Paul L is on a distinguished road
Default

I'm just taking a short break after my morning's chores, so I'd better be quick...

KISS
Thanks for all the replies, links, explanations and suggestions chaps, as this is why I love this forum.

Having recently been monologuing about keeping this build simple, the least I can do is follow my own advice.

So I hereby declare that I am abandoning the idea of using the "holey" grille altogether.

This isn't the first blind alley that my lack of knowledge has lead me down on this build.

But hopefully there will not be too many more.

I've just had a very quick look at the mesh grille that AndyP57 supplied.


This was to replace the "beer crate" grille that Sammio Gary never send, no doubt lost in the "Poole Triangle".

Just for a short period of time I considered fitting this to get me through an MOT.

However, the simply reality is that I just don't like it.

So I have shamelessly stolen the grille idea that Mac had and just bought this.

Given that I would have needed to spend money to anodise the "holey" grille, this is only a marginal cost.

Then I can simply fit and forget it and more on to something else.

Cheers, Paul.

PS
My research did throw up some "interesting" photos.

The first seems to be following GaryH's traffic cone advice.


The second seems to be taking non standard pipe work to an extreme.


Well, that is until you find out the "engine" is a helicopter turbine!

Reply With Quote
  #1645  
Old 22nd February 2015, 12:00
redratbike's Avatar
redratbike redratbike is offline
Senior Member
 
Join Date: Sep 2011
Posts: 1,446
redratbike is on a distinguished road
Default

""As I am rapidly heading towards my build's 3rd birthday and, to be frank, there is absolutely no end date in sight. "

Are you sure??.

Take a look at the progress you have made on the body...get that bonded on and I'll bet the build will move a heap quicker as you'll see the light at the end of the tunnel.
Reply With Quote
  #1646  
Old 22nd February 2015, 14:07
garyh garyh is offline
Senior Member
 
Join Date: Jun 2011
Location: birchington, kent
Posts: 1,769
garyh is on a distinguished road
Default

Paul, if you wanted a 'tea crate' grill, you can have mine.
Reply With Quote
  #1647  
Old 22nd February 2015, 16:36
Paul L's Avatar
Paul L Paul L is offline
Senior Member
 
Join Date: Feb 2012
Location: Wembley, London
Posts: 5,056
Paul L is on a distinguished road
Default

Well my daughters and their friends are still having a good time, so all is well here.

Although I don't envy the poor pizza delivery guy who will shortly be heading our way in this weather.

But before he arrives I have a bit of time to write a couple of replies...

- - - - - - - - - - - - - - - - - - - - - - - - - - - - - - -

RedRatBike - Cheers, I really appreciate the vote of confidence. :

Ironically, writing down all the major modification work I'd done was starting to get me down.
As with so many things to fix, it has often felt like I have been trying to walk up the down escalator.
I have thrown a HUGE number of hours into this project just to get to where I should have started from.

But the good news is I have finally reached the point where the back of this build has been broken.
So once the weather starts to pick up I can strip it all back to the chassis for the final bits of prep. work.
Then I will really be able to say I am building the car and can finally bond the body shell into place.

Re-visiting Mister Towed's build was also a good boost to morale.
Clearly things like lining the internal cockpit walls can only be done when the body is bonded on.
However, once you sort out the cockpit sides, that's it, job done, no more mocking up, fitting, removing, re-fitting, etc.

- - - - - - - - - - - - - - - - - - - - - - - - - - - - - - -

Gary - Thanks for the offer.

Unfortunately, the thick mesh grille has now been paid for, so that will be my final design choice.
( Famous last words I know. )

Also I get the impression that the Cordite has a bigger opening than the Spyder.
( As it looks like a Spyder bonnet hoop was cut in half to be factory fitted to my car. )

- - - - - - - - - - - - - - - - - - - - - - - - - - - - - - -

Grille - Final Thoughts:
It has turned out to have been a bit of a roller coaster weekend since I posted a photo of a D type replica on Friday morning.

Even though some might view the change in direction for the grille as a step back for the build, I view it as a very positive thing.

I love the fact that people who know what they are talking about are prepared to step in to try and save me from myself.

I am also happy that the stubbornness that has kept me chipping away at this build doesn't extend to ignoring the facts.

I also glad I stuck to KISS and didn't work out a system of extra vents & ducts to compensate for fitting the wrong part.

So despite the fact the some total of my weekend's work was a bit of shopping, this was still a good day.

Until next time, take care, Paul.
Reply With Quote
  #1648  
Old 22nd February 2015, 18:41
swifty's Avatar
swifty swifty is offline
Senior Member
 
Join Date: Dec 2013
Posts: 839
swifty is on a distinguished road
Default

Good to see you have made a decision about the grill, its easier to rectify now, it's a nice looking grill you have decided to buy.

Paul at the rate you have been going since i arrived on the forum i suspect it will not be too long before you are finished so keep plugin away as the light at the end of tunnel is getting brighter by the day.
Reply With Quote
  #1649  
Old 23rd February 2015, 07:28
Paul L's Avatar
Paul L Paul L is offline
Senior Member
 
Join Date: Feb 2012
Location: Wembley, London
Posts: 5,056
Paul L is on a distinguished road
Default

Swifty - Thanks for your support & encouragement.

I think the recent long run of perpetually wet weather has just left me a bit stir crazy.
Hopefully I will get a decent dry day soon, which will no doubt be just what I need to lift my spirits.

The other thing that is good for my morale is seeing the great work you and Mac are doing on your builds.
As there are so few Cordite / Navigator builds on the go, I have to steal my ideas for somewhere.

Although at the moment I am desperately trying to keep alloy panels in the "nice to have" pile.
As the more panels you, Scottie & DaveCymru add to your builds, the more I like the look it gives.

But for now, I will try to focus on the enormous "need to have" pile of things to do.

Cheers, Paul.
Reply With Quote
  #1650  
Old 23rd February 2015, 18:43
jones jones is offline
Senior Member
 
Join Date: Apr 2014
Location: Midlands
Posts: 405
jones is on a distinguished road
Default

Hi Paul, you and I have both been over the weeks commenting on each others threads sympathising on our respective builds that have been thwarted by the weather. Again this weekend I found myself with car scheduled time but the rain or drizzle stopped play...

...I did find a way for octane fun though - cut back some shrubs, climbers and over hanging tree not wanting to stuff in my car to in my car I was left with one option. BURN so petrol can in one hand...


Good luck with the build, it looks to really be coming along well, when the sun shines

Last edited by jones; 23rd February 2015 at 18:56..
Reply With Quote
  #1651  
Old 23rd February 2015, 23:43
scimjim's Avatar
scimjim scimjim is offline
Senior Member
 
Join Date: Mar 2013
Location: Gloucester
Posts: 247
scimjim is on a distinguished road
Default

You actually need a small intake area for a rad (approx 30% of the rad area) - ideally shrouded into a divergent duct on the way in (to slow the airflow down at forward speeds - otherwise it goes through the rad too fast and doesn't have time to cool it) and a convergent duct on the back to accelerate the hot air out and create a low pressure (sucking effect) to bring more air in (although older cars tend to just empty into the engine bay and rely on the airflow below the car to extract engine bay heat).

Having said that, I agree with 8V Ed that the original stuff risked a build up effect.

love the new grille material - I have a roll of something similar that was donated to me years ago and has done 4 Scimitars so far!!

Last edited by scimjim; 24th February 2015 at 00:03..
Reply With Quote
  #1652  
Old 24th February 2015, 21:14
Paul L's Avatar
Paul L Paul L is offline
Senior Member
 
Join Date: Feb 2012
Location: Wembley, London
Posts: 5,056
Paul L is on a distinguished road
Default

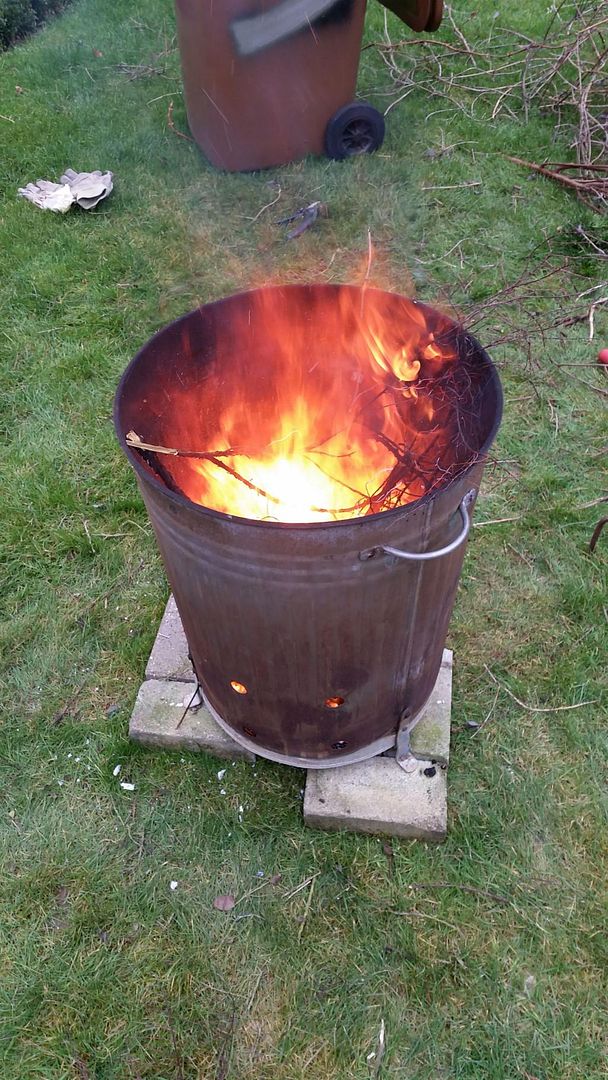
Jones - Just looking at those flames makes me feel warmer.

As I look back, I think this has been the longest run of wet weather I've had this Winter.
Because I was still able to get some work done even when others were snowed in.
So overall, I've got to be happy with just how many jobs I have managed to tick off.

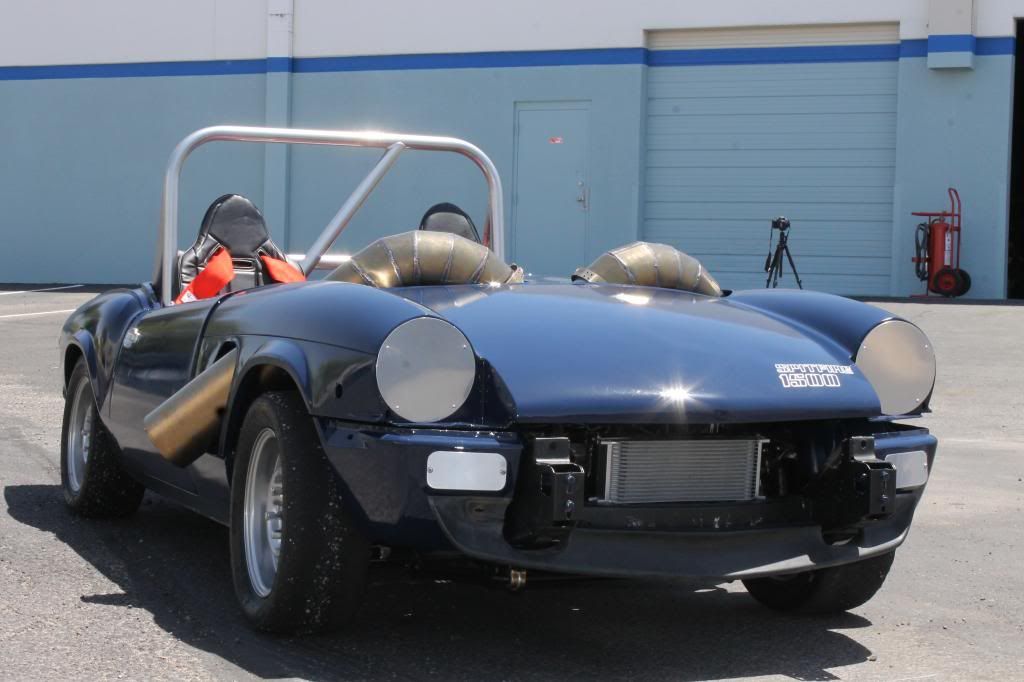
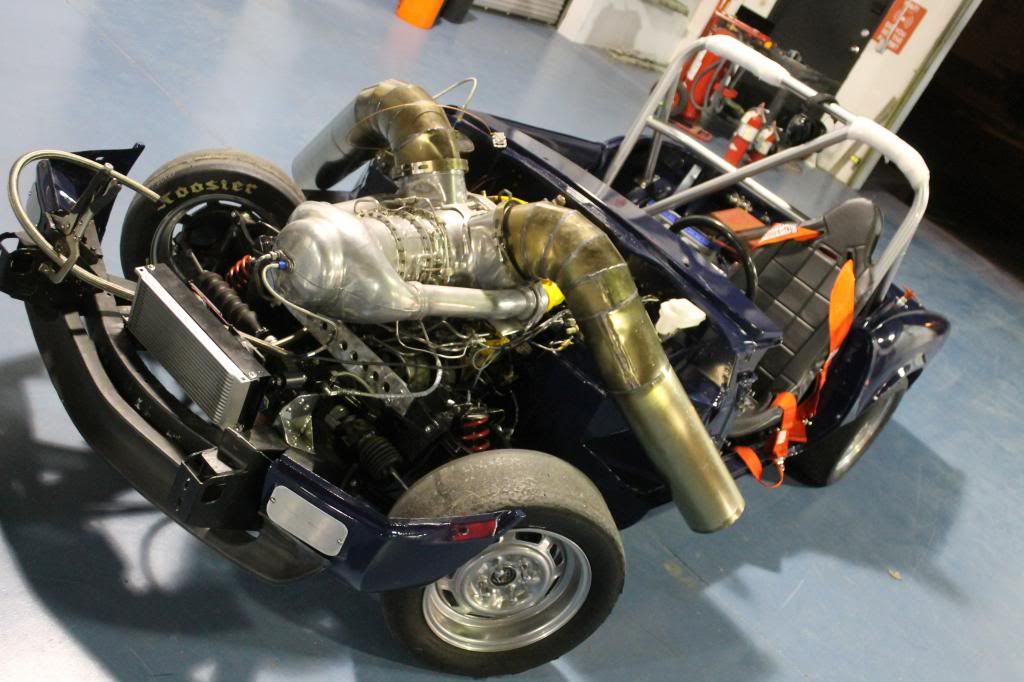
scimjim - I think it is fair to say I know more about air flow today than I did last week.
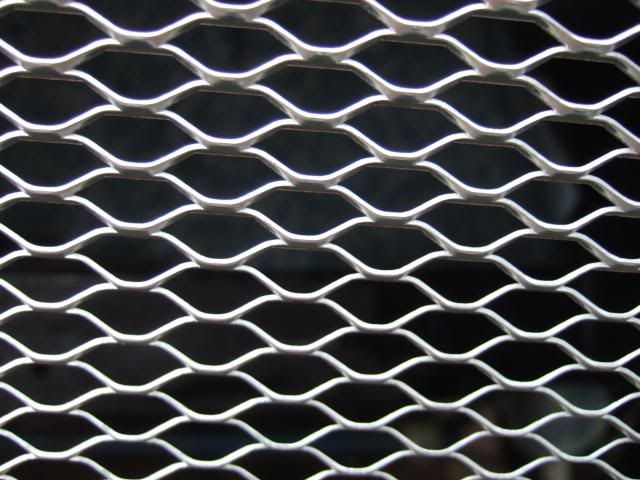
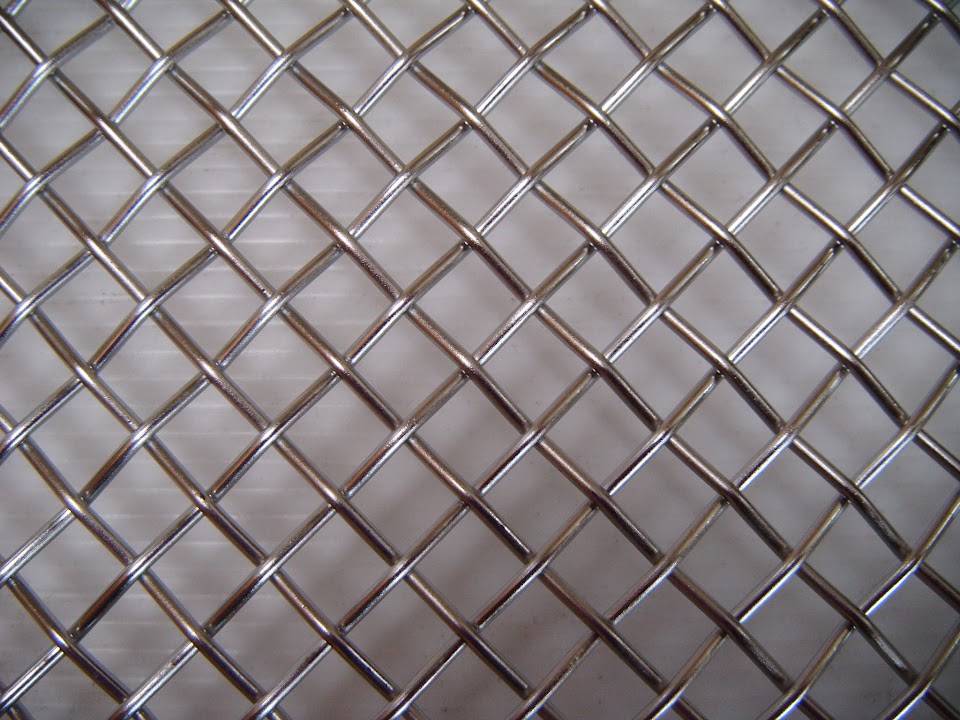
I also think the new grille mesh is going to give the car a more traditional look.

- - - - - - - - - - - - - - - - - - - - - - - - - - - - - - -

A Mixed Day - Part 1:
Lots of other things to do today, but with a decent weather forecast, I really wanted to squeeze a few car jobs in too.

But rather than follow a strict time line, I've grouped the jobs together for convenience.

I quickly roughed up the area along the main repair between the wing and bonnet.


It is not easy to see in the photos, but I am dealing with a couple of issues:
- Obviously the first is due to the way I re-joined the cut
- But there are also some unrelated "dips" in the bonnet too

This last point links in with the vast amount of filler work that Swifty has done on his bonnet.


So I added yet another layer of normal body filler.


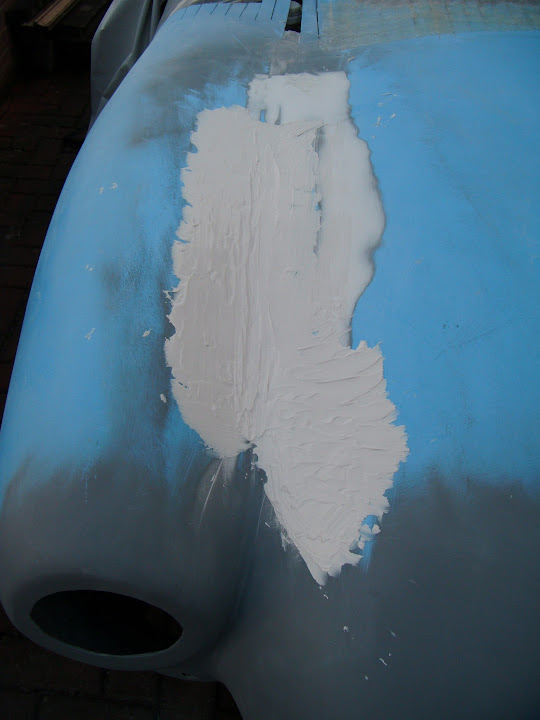
When the filler was set hard enough I stared sanding it down.
( I am not trying to get the final finish for painting at this stage, just ensure that the overall shape is OK. )


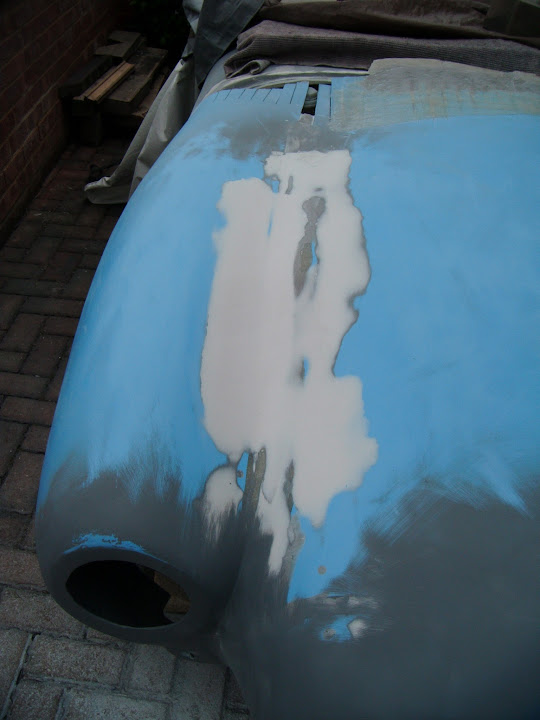
I know the 'after' photos do not look very different to the 'before' ones, but this is actually a big improvement.

Then I sanded some more of the bonnet in preparation for a dusting of etch primer.


As getting the front of the bonnet in one colour would give me a better idea of where I was.

Although the gusts of wind were not making it easy to spray outside.


I am not trying to create a mirror image either side of the bonnet, just a smooth transition over the repair work.
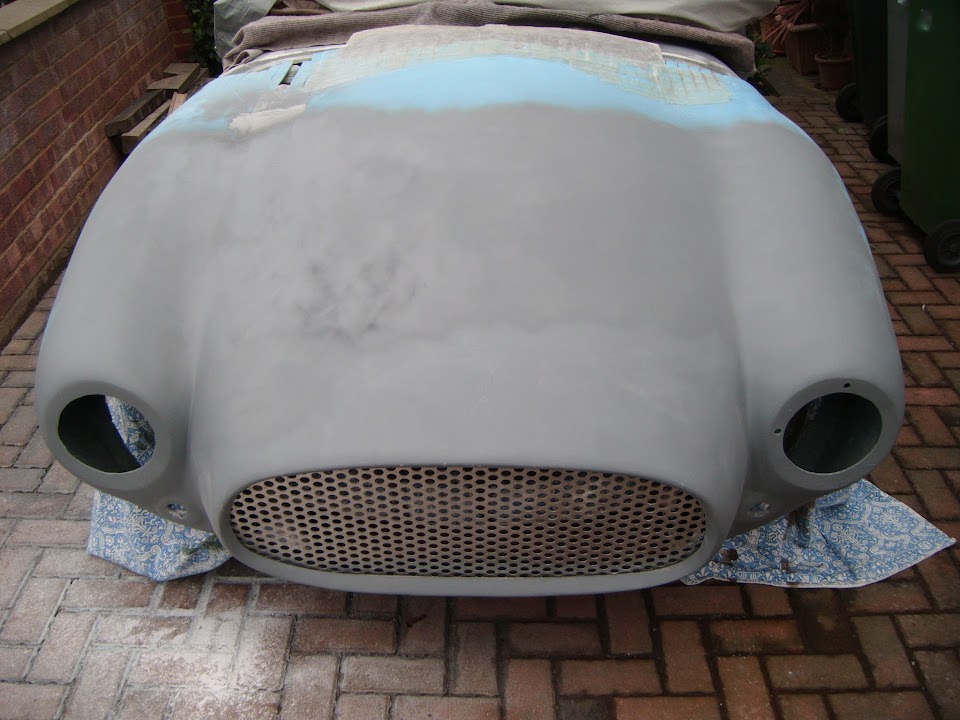
I can see why Swifty needed to do so much preparation work if he wanted a super smooth finish.

I may simply settle for the "been into the hay bales a few times" look and live with a smooth, but undulating surface.

- - - - - - - - - - - - - - - - - - - - - - - - - - - - - - -

I also gave one side of the petrol cap base ring a coat of etch primer too.


Because at some point I want to bond this into position.

- - - - - - - - - - - - - - - - - - - - - - - - - - - - - - -

I measured the distance the bonnet hinging bolts stick out beyond the nut.


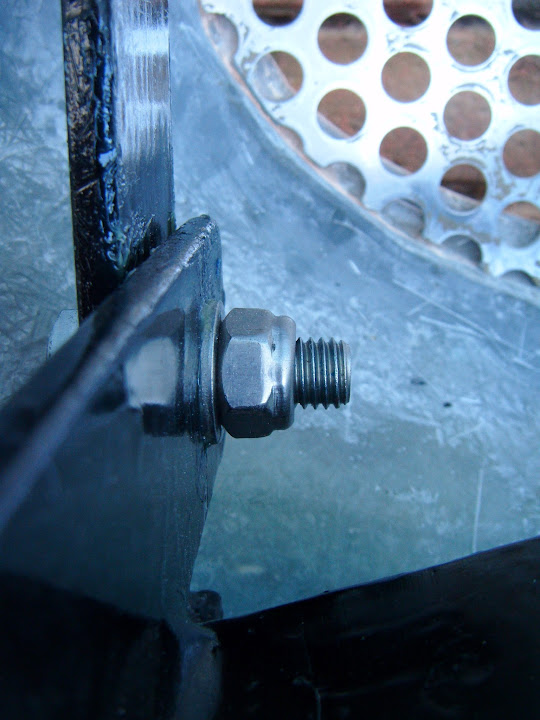
Then I experimented on one of my spare M12 bolts, by removing some of the thread with my angle grinder.
( I fitted 40mm bolts, but also bought 2 x 45mm bolts just in case. )


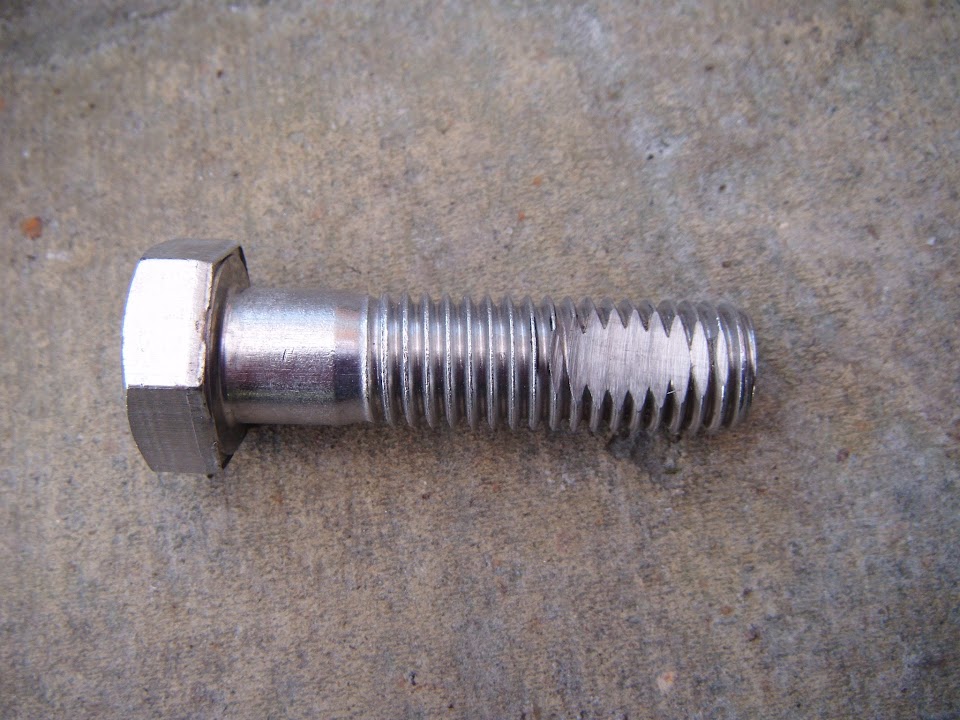
The plan was to use my new cobalt bits to drill a hole for an "R" clip to go through.

But my drill head has started oscillating slightly, which combined with my accidental application of brute force resulted in this.


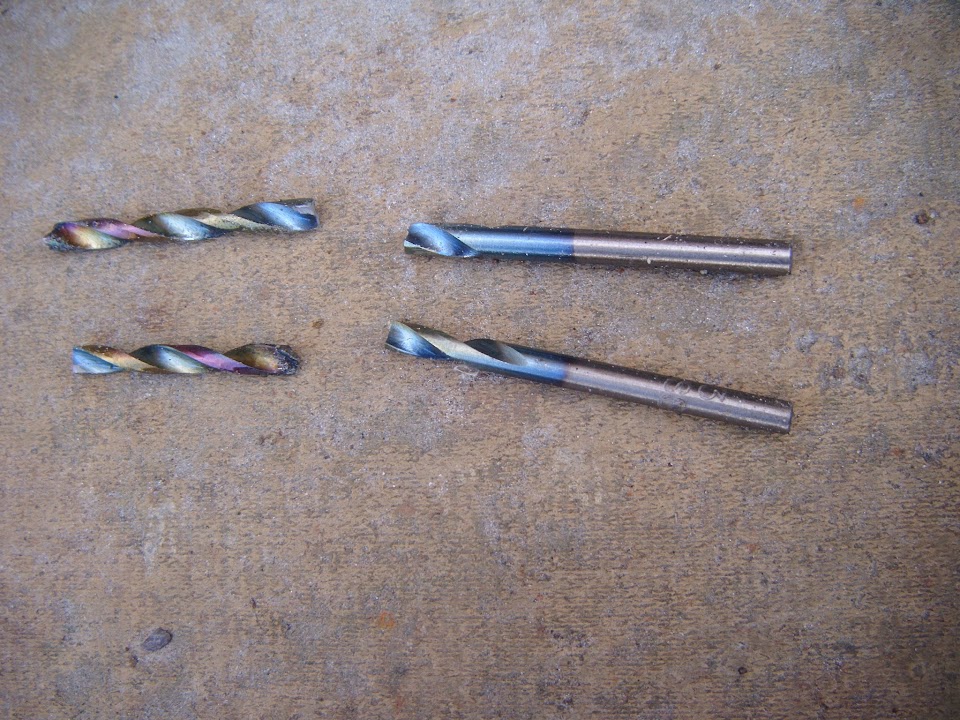
What made it worse, was that the remaining drill bits were barely making a dent in the bolt.


So I will put that in the "too difficult" pile for now and come back to it later.

End of Part 1...
Reply With Quote
  #1653  
Old 24th February 2015, 21:16
Paul L's Avatar
Paul L Paul L is offline
Senior Member
 
Join Date: Feb 2012
Location: Wembley, London
Posts: 5,056
Paul L is on a distinguished road
Default

A Mixed Day - Part 2:
I disconnected the rear wiring loom and brought it outside so I could test fit the rear lighting section in the "boot".


The good news is there should be no problems connecting the lighting to the loom.

The support bracket I built for the exhaust pipes will be a good place to attached the rear loom.


Although at this point I realised that I could not sort out the rest of the route with the body shell on.


As I was hoping to work out where the wires for the petrol tank sender needed to go, but that can also wait.

- - - - - - - - - - - - - - - - - - - - - - - - - - - - - - -

The first job I actually did this morning was to tape the "holey" grille in place so I could take a "Before" photo.


I thought this would give me a good comparison with the "After" photo when the new grille arrives later in the week.

However, this is one part of the day that turned out much better than expected as look what turned up in the afternoon.


Ordered on Sunday with standard delivery and here it was on Tuesday.

I had actually popped out on an errand and came home to find it in the porch.

For most of the day the weather kept quickly switching from blue skies to this.


Unbelievably as I arrived home this time, it was actually bright sunshine and hailstones!

So I had to wait for my chance to cut the mesh to match the grille opening.


Then I could tape it into position to see how it looks & thankfully it looks a lot better in real life compared to this photos.
( Edit - I've replaced this first photo with another one that is slightly better. )


So thanks again for all the feedback that lead to me taking this option.

- - - - - - - - - - - - - - - - - - - - - - - - - - - - - - -

So a bit of an odd day with some good progress and a few small set backs.

However, overall, I was very happy to get the chance to do some work outside.

Until next time, take care, Paul.

Last edited by Paul L; 25th February 2015 at 09:43.. Reason: Changing one photo
Reply With Quote
  #1654  
Old 24th February 2015, 21:31
8 Valve Ed 8 Valve Ed is offline
Senior Member
 
Join Date: Dec 2013
Location: Sunny Cumbria
Posts: 470
8 Valve Ed is on a distinguished road
Default

Hi Paul, what you need for awkward drilling jobs like this is a cheap pillar drill.

I got one off Facebook for 30 quid, almost unused. My neighbour came round hammering on the door of my borrowed shed, to tell me about it. I don't do Facebook but together with my son Michael they did the deal and I collected it minutes later, a mile down the road. Gumtree, Facebook, Preloved and there is another one which I can't remember, but there are plenty of options.

The one I got was very similar to this: https://www.machinemart.co.uk/shop/p...1b-drill-press

Not over powered but with patience gets the job done. At this stage of your build I would say it could be very handy for making brackets and drilling small pieces. I have used mine quite a bit recently. Drilling small holes by hand is dicy at best.
Reply With Quote
  #1655  
Old 24th February 2015, 21:35
reneanglia reneanglia is offline
Senior Member
 
Join Date: Jan 2015
Posts: 168
reneanglia is on a distinguished road
Default

Paul......drill a hole in the side of a nut and use this as a drill guide.........
Drill on low rpm with little pressure and use wd40 as a coolant.
René
Reply With Quote
  #1656  
Old 24th February 2015, 22:10
redratbike's Avatar
redratbike redratbike is offline
Senior Member
 
Join Date: Sep 2011
Posts: 1,446
redratbike is on a distinguished road
Default

Paul buy one of these converts drills to a pillar drill

http://www.mpdirect.co.uk/p/16889/si...FQ_KtAodyEwAuw
Reply With Quote
  #1657  
Old 25th February 2015, 09:31
davecymru's Avatar
davecymru davecymru is offline
Senior Member
 
Join Date: May 2011
Location: Somerset
Posts: 1,671
davecymru is on a distinguished road
Default

It's a shame you're not closer Paul as i have a spare Pillar Drill of my fathers that you could have had!

BTW i think you've made the right choice with the grill as, to me, that mesh looks much nicer than the religious grill.
Reply With Quote
  #1658  
Old 25th February 2015, 13:44
Paul L's Avatar
Paul L Paul L is offline
Senior Member
 
Join Date: Feb 2012
Location: Wembley, London
Posts: 5,056
Paul L is on a distinguished road
Default

Thanks for all the tips, links, suggestions and offers gentlemen.

Although it might actually be cheaper to simply get the six bolts drilled out by someone else.

But there is no great rush at this stage, so I will keep my options open.

Apart from taking a better photo of the grille this morning (see edited post above), no car work for me today.

I have ordered another heavy duty tarpaulin, which will be required when I strip the car back to the chassis.
( Along with permission from my wife to steal her parking space for a while. )

Unfortunately, I have remembered that I need to sort out the boot access panel before I remove the body shell.

So finally sorting out the locking pins, or fitting alternative catches will be my next job.

Even though I am not looking forward to this, it has to be done.

Until next time, take care, Paul.

PS
I had another good look at the mesh grille this morning and it really does look the part.
Reply With Quote
  #1659  
Old 25th February 2015, 14:19
reneanglia reneanglia is offline
Senior Member
 
Join Date: Jan 2015
Posts: 168
reneanglia is on a distinguished road
Default

The grill looks very pro...........and you can use the leftovers for the bbq....or make brussel waffels.........
About the bolts,pre-drill with a center drill............
René
Reply With Quote
  #1660  
Old 25th February 2015, 15:24
Scottie22 Scottie22 is offline
Senior Member
 
Join Date: May 2013
Posts: 2,161
Scottie22 is on a distinguished road
Default

Brilliant job on the grille Paul! Good choice of material.

If the car overheats now it won't be the fault of the grille!
Reply With Quote
Reply


Currently Active Users Viewing This Thread: 11 (0 members and 11 guests)
 

Posting Rules
You may not post new threads
You may not post replies
You may not post attachments
You may not edit your posts

BB code is On
Smilies are On
[IMG] code is On
HTML code is Off

Forum Jump


All times are GMT +0. The time now is 00:47.

copyright © madabout-kitcars.com 2000-2024
terms and conditions | privacy policy