|
|
| Tribute Automotive Builds Discuss your Tribute kit build |

15th March 2016, 10:31
|
 |
Senior Member
Enthusiast
|
|
Join Date: May 2014
Posts: 607
|
|
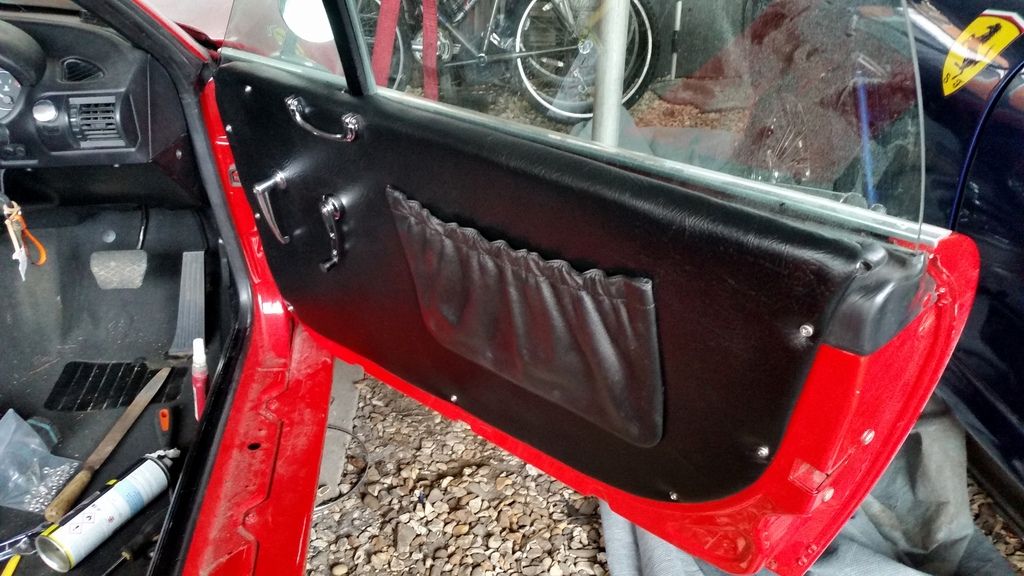
Finally got around to bolting the drivers outer door handle on so I could then fit the driver side door panel.
Last edited by Nubodi Automotive; 15th March 2016 at 12:22..
|
15th March 2016, 12:21
|
|
Senior Member
Enthusiast
|
|
Join Date: May 2014
Posts: 607
|
|
Sorry meant drivers door panel!
|
15th March 2016, 15:38
|
 |
Senior Member
|
|
Join Date: Sep 2011
Posts: 1,446
|
|
Quote:
Originally Posted by Nubodi Automotive

Still a long way to go yet though!
Being a convertible its more important than a coupe interior is I think, its all there with the roof peeled back its all on show.
I just wanted to show people that a good looking interior could be achieved under £500 by being creative and doing it yourself instead of paying out £3-5000 to a trimmer. I'm still on target at around £400 presently.
|
or blow it just by fitting this item http://www.classicferrariparts.co.uk...250-ashtray-2/ |
20th March 2016, 18:49
|
|
Senior Member
Enthusiast
|
|
Join Date: May 2014
Posts: 607
|
|
Okay progress will be accelerated as a show is looming. First jobs were on the black Rover 75 seats I'm using. I removed the headrests and filled in the resulting hole with black panel pins. They look okay for now.

The original Rover seat belts stalks were removed and the secondhand MG stalks bolted on. I put these on the inside of the runner not on the outside to give a little more room as the Rover seats are wider
 |
20th March 2016, 18:57
|
|
Senior Member
Enthusiast
|
|
Join Date: May 2014
Posts: 607
|
|
The Z3 roll bar loop supports have always been an 'eye sore' on my Kalifornia so it was time to remove them. I got out the large reciprocating saw and started cutting around the base. It's not advisable to use an angle grinder unless you cover the plastic rear window, carpets, seats, etc. Unfortunately the blade was worn out and there was not any blades in stock, it was too late to go to B&Q so I had no choice but to cut them off with a hacksaw.
Two hours later...

You have to be very careful not to damage the hydraulic hoses for the roof or wiring loom.
 |
20th March 2016, 19:00
|
|
Senior Member
Enthusiast
|
|
Join Date: May 2014
Posts: 607
|
|
I found some very smaller Pioneer speakers which were wired in and will hide under the carpet (hopefully)
 |
20th March 2016, 19:02
|
|
Senior Member
Enthusiast
|
|
Join Date: May 2014
Posts: 607
|
|
The exposed metal from the roll bar loops was sprayed matt black to stop them rusting. The plastic surround that went around the roll loop and down the sides of the sear were cut down also.

 |
20th March 2016, 19:06
|
|
Senior Member
Enthusiast
|
|
Join Date: May 2014
Posts: 607
|
|
In this picture you can see the roll bar support that was cut off. I had a piece of carpet left from a previous build and was the right colour (not black but dark charcoal).
This was secured by the same plastic studs that secured the original carpet up underneath by the back window. This is to cover the gap left after removing the plastics around the roll bars.
 |
20th March 2016, 19:08
|
|
Senior Member
Enthusiast
|
|
Join Date: May 2014
Posts: 607
|
|
I then put the hydraulic roof down to press any slack out of the carpet before using two more studs to secure the next part of carpet.

 |
20th March 2016, 19:14
|
|
Senior Member
Enthusiast
|
|
Join Date: May 2014
Posts: 607
|
|
I then spent all of the next morning coming up with a solution to the age old problem of getting a manual gear knob to work with an auto lock out. I found a solution which I will post separately as other auto owners from other forums and makes would like it.
Anyway the centre console was fitted with the ashtray (with hidden switches connected), gear and handbrakes leather gaiters and a new shiny alloy manual knob.


 |
20th March 2016, 19:16
|
|
Senior Member
Enthusiast
|
|
Join Date: May 2014
Posts: 607
|
|
This evening I'm going to clean, treat and feed the leather Rover seats ready for installation. Oh and about an hour of hovering before they can go in! Still aching from cutting those roll bar supports.
Last edited by Nubodi Automotive; 20th March 2016 at 19:20..
|
20th March 2016, 19:24
|
 |
Senior Member
|
|
Join Date: Nov 2014
Location: Norwich, Norfolk
Posts: 412
|
|
It's coming on really well and very informative. I may 'borrow' some of your ideas.
Cheers, Bob.
|
20th March 2016, 21:13
|
|
Senior Member
Enthusiast
|
|
Join Date: May 2014
Posts: 607
|
|
I hope so!
That's why I'm taking the trouble to write it up.
|
24th March 2016, 06:47
|
|
Senior Member
|
|
Join Date: Feb 2015
Posts: 678
|
|
Quick up date on the clocks - I've eben dragging my heels but I've now got them finished along with the mask that goes behind and gives the illumination colour (red we've gone for).
Lockwood was over 200 quid for one off and came down to 70 quid per unit for small production run so not worth it.
I'm going to try and get these commercially printed over the weekend (so colour fast) and then get the mask bonded on then it's simply a question of cutting and fitting.
|
24th March 2016, 07:39
|
 |
Senior Member
|
|
Join Date: Apr 2013
Location: Swansea
Posts: 803
|
|
Could the mask by produced as a vinyl printed sticker by one of the many sellers on eBay?
|
24th March 2016, 07:50
|
|
Senior Member
|
|
Join Date: Nov 2011
Posts: 3,558
|
|
Not sure if I should post this on a public forum but can I have photos of Richard knob please
|
24th March 2016, 08:24
|
|
Senior Member
Enthusiast
|
|
Join Date: May 2014
Posts: 607
|
|
Quote:
Originally Posted by WorldClassAccident
Not sure if I should post this on a public forum but can I have photos of Richard knob please
|
Its okay nick, I get asked this a lot. It seems my knob is in demand.
I will write up the modification this weekend in between shows (Friday and Monday) |
24th March 2016, 08:52
|
|
Senior Member
|
|
Join Date: Feb 2015
Posts: 678
|
|
Quote:
Originally Posted by y cymro
Could the mask by produced as a vinyl printed sticker by one of the many sellers on eBay?
|
the mask has to be in perfect alignment with the main gauge print - there's quite a good online guide I found here which explains it much better than I can but basically the mask is only there to block out residual light spill and give colour to illumination when your lights are on - it's printed on a transparency.
Have a look at this guide - it's excellent:
http://mazda626.net/topic/39309-maki...m-gauge-faces/ |
24th March 2016, 19:39
|
|
Senior Member
Enthusiast
|
|
Join Date: May 2014
Posts: 607
|
|
So on the back straight now.
I bolted on the fixed seat belt but when I tried it, it was choking me so I had to move it. This means a second carpet plug which is not ideal. I will redo the carpet in the winter using this one as a template but will do for the summer.
 |
24th March 2016, 19:41
|
|
Senior Member
Enthusiast
|
|
Join Date: May 2014
Posts: 607
|
|
While I was hoovering the carpet before fitting the seats, a worker drone was fitting a horn button and replacing the steering column shrouds. I think his mouth was open to catch the screws if they fell out?
 |
|
Currently Active Users Viewing This Thread: 1 (0 members and 1 guests)
|
|
|
 Posting Rules
|
You may not post new threads
You may not post replies
You may not post attachments
You may not edit your posts
HTML code is Off
|
|
|
All times are GMT +0. The time now is 03:44.
|


 Linear Mode

