|
|
| Dino 246 Builds and Discussion Da da da da daaa daa da da, ohoho Dino |

6th March 2014, 18:39
|
 |
Member
|
|
Join Date: Dec 2013
Posts: 37
|
|
wow you are really making a superb job of this build. This is going to ( does ) look amazing. Although I have to say that all eyes would be on that beautiful lady in the purple  , WOW is that your wife  . Good luck with the rest of the build although you don't need it. I can't wait for more photo's ( of the car ). Where did you get your hammer from was it Ebay?. Thanks . UFO17. |
6th March 2014, 19:23
|
|
Senior Member
|
|
Join Date: Jan 2014
Location: Hamburg
Posts: 174
|
|
The Lady in purple is the daughter of a friend of mine, it was her dream being brought to the graduation ball with the Countach! ;-)
Yes, the hammer I got from ebay, 100€ plus shipping, the english wheel cost a bit more, around 550€. But it is definitely worth it.
|
11th March 2014, 07:11
|
|
Senior Member
|
|
Join Date: Jan 2014
Location: Hamburg
Posts: 174
|
|
|
12th March 2014, 07:27
|
|
Senior Member
|
|
Join Date: Jan 2014
Location: Hamburg
Posts: 174
|
|
|
12th March 2014, 19:14
|
 |
Senior Member
|
|
Join Date: Feb 2012
Location: Wembley, London
Posts: 5,058
|
|
Alex - This is seriously impressive work. 
Your car is going to be spectacular when it is finished.
Good luck, Paul.
|
13th March 2014, 06:08
|
|
Senior Member
|
|
Join Date: Jan 2014
Location: Hamburg
Posts: 174
|
|
Thanks Paul!
|
15th March 2014, 09:34
|
|
Senior Member
|
|
Join Date: Jan 2014
Location: Hamburg
Posts: 174
|
|
Interesting information!
Thanks for the links, Ross
|
15th March 2014, 21:46
|
|
Senior Member
Enthusiast
|
|
Join Date: Mar 2008
Posts: 225
|
|
|
15th March 2014, 23:27
|
|
Senior Member
Enthusiast
|
|
Join Date: Mar 2008
Posts: 225
|
|
that last one is the Pininfarina 206 show car not the Drogo one
|
16th March 2014, 09:23
|
|
Senior Member
|
|
Join Date: Jan 2014
Location: Hamburg
Posts: 174
|
|
Quote:
Originally Posted by rossnzwpi

|
Woow, Ross
I was looking for a technical drawing like this one for weeks and did not find any, I gotta buy this one! It is A3, big enough to get all the measurements I need!
Since now I was only working with photos!
Thanks very much Ross! |
17th March 2014, 15:44
|
|
Senior Member
Enthusiast
|
|
Join Date: Mar 2008
Posts: 225
|
|
 book on Dino 206s
Hi, there is also this expensive and rare French book on the Dino 206S. It has drawings - in fact I think the inside of the cover is made of blueprints.
http://www.amazon.com/Ferrari-Dino-2...rari+dino+206s
cheers
Ross in NZ |
19th March 2014, 10:43
|
|
Junior Member
|
|
Join Date: Sep 2010
Posts: 19
|
|
Quote:
Originally Posted by rossnzwpi
|
Under the ISBN number ending ...108 this book is also on amazon.de, but without a price or a way of ordering. It appears also on amazon.fr, again without a price, but there is a button to click on to receive an email when it comes back into stock. |
19th March 2014, 16:15
|
|
Senior Member
|
|
Join Date: Jan 2014
Location: Hamburg
Posts: 174
|
|
Yeah, the book seems to be sold out, but thanks anyway!
|
27th March 2014, 07:28
|
|
Senior Member
|
|
Join Date: Jan 2014
Location: Hamburg
Posts: 174
|
|
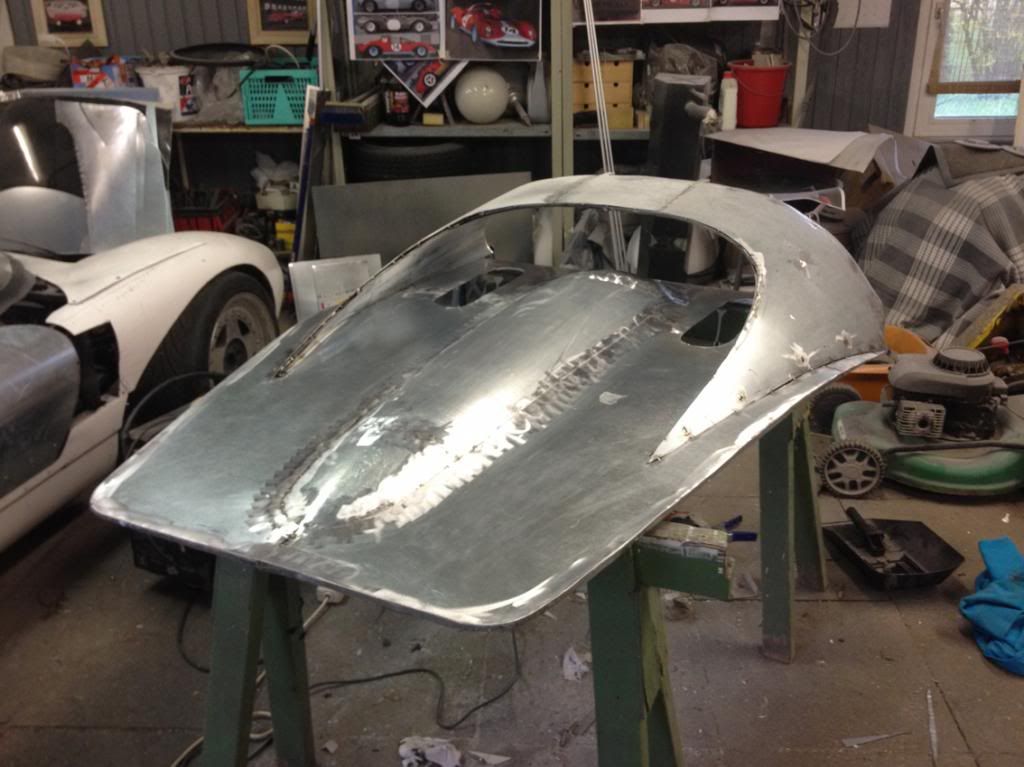
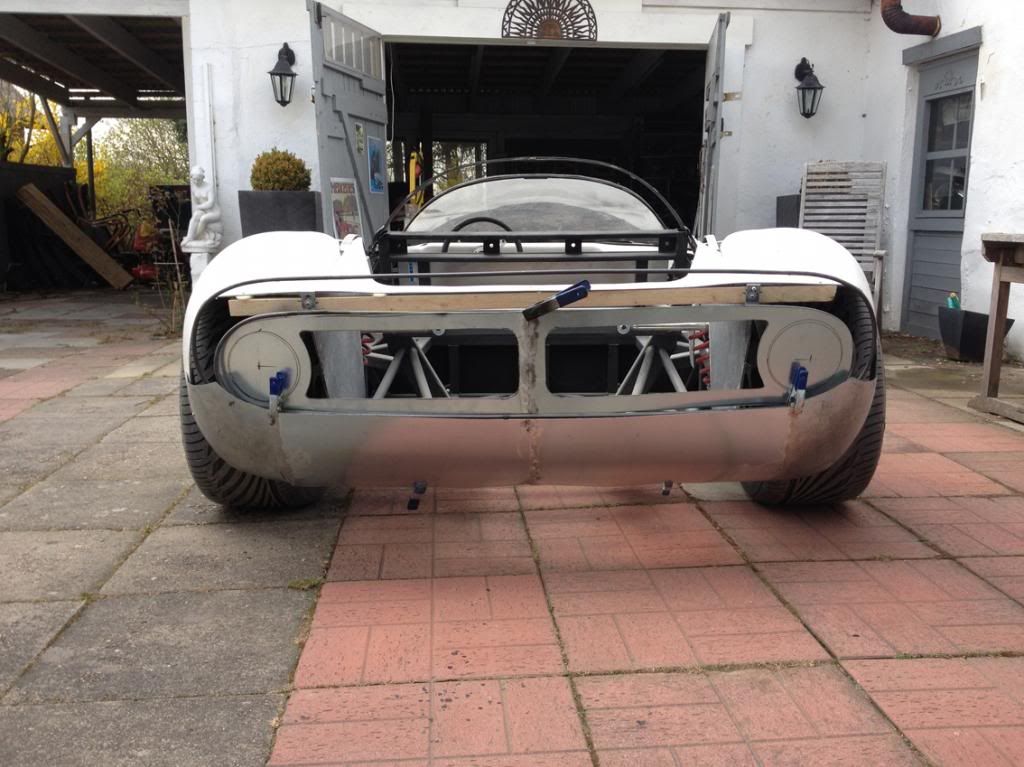
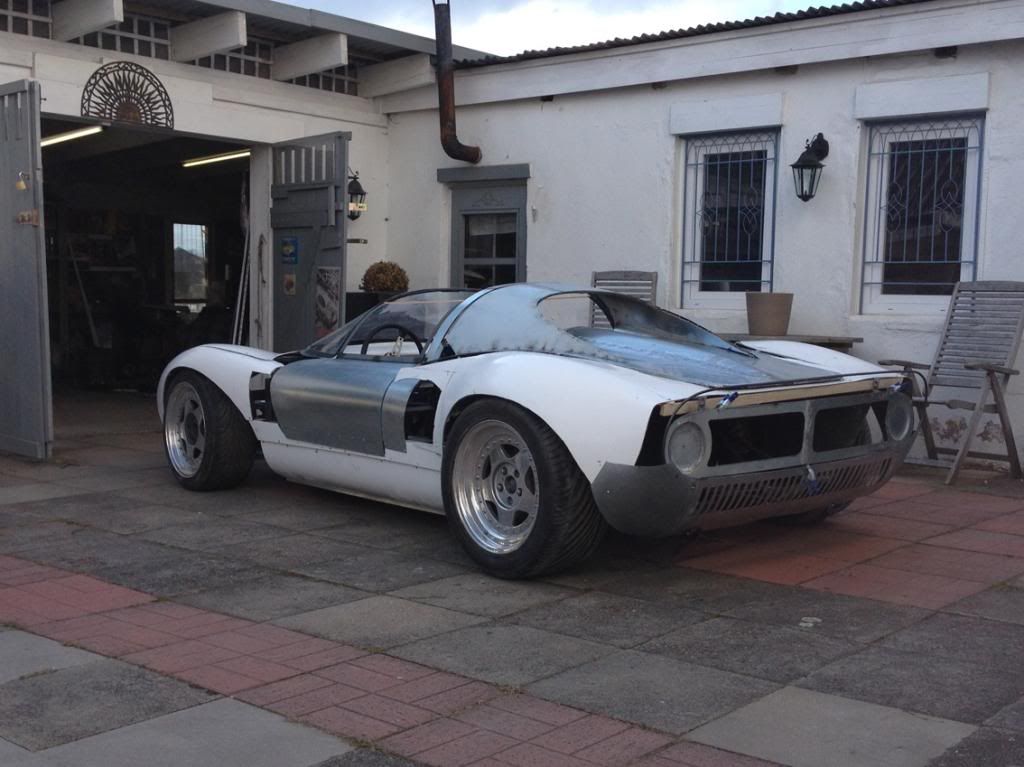
Some updates:
I finished the bonnet and put it on the car again, and this really looks like a step forward:

Last edited by Axel; 27th March 2014 at 07:49..
|
27th March 2014, 07:32
|
|
Senior Member
|
|
Join Date: Jan 2014
Location: Hamburg
Posts: 174
|
|
Then I started working at the lower rear panel with the 29 slots, I wheeled two pieces of sheet metal to threedimensional curvature and welded them together, and started to cut out the slots...what a pain in the a...!
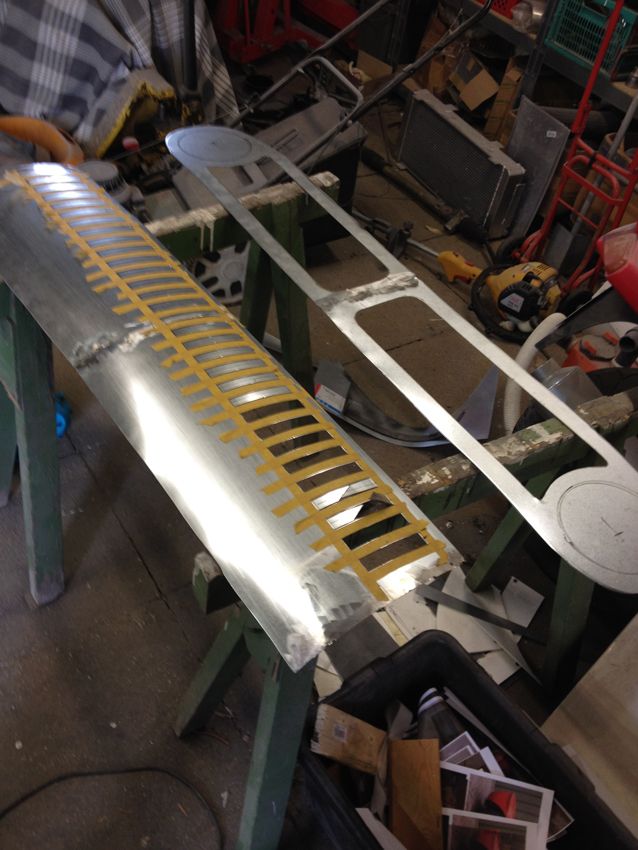
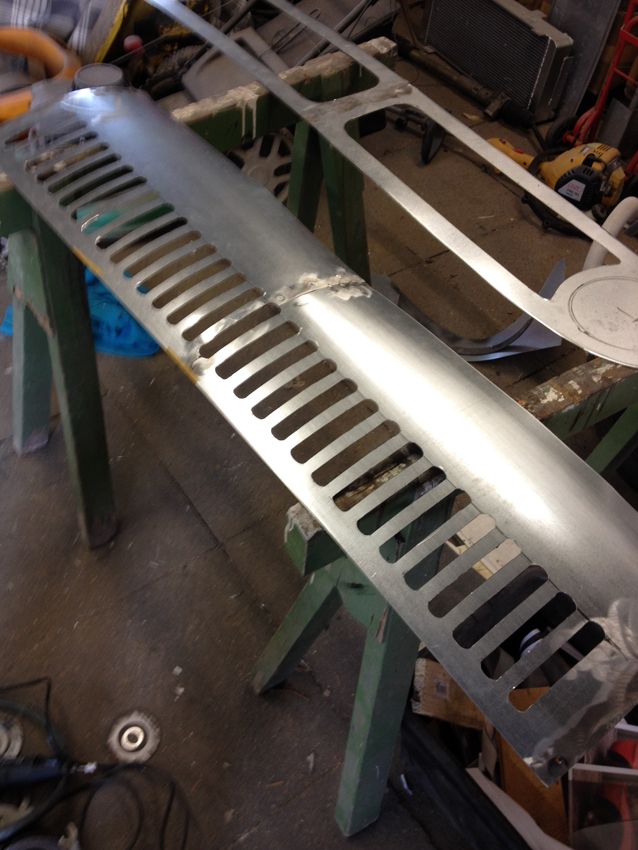
but at the end I felt it was worth the work:
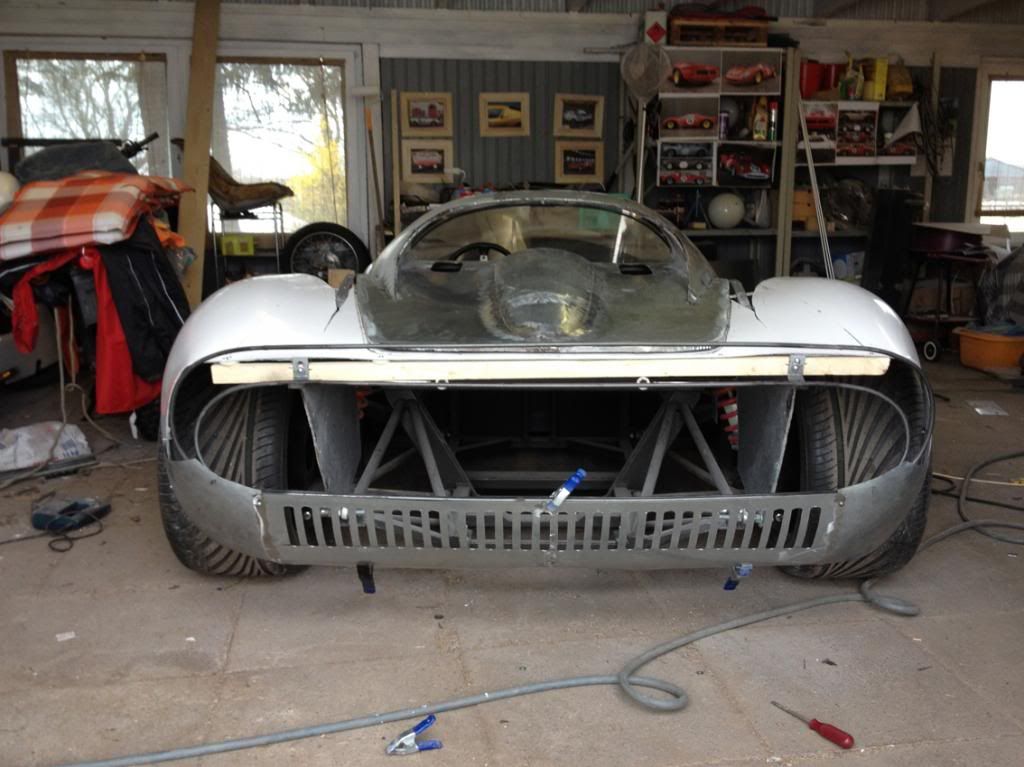
I was afraid that the panel will loose its stiffness with cutting that many slots in it, but amazingly it remained stiff, I guess due to the threedimensional curvature I gave it before!
.
Last edited by Axel; 27th March 2014 at 07:44..
|
27th March 2014, 07:36
|
|
Senior Member
|
|
Join Date: Jan 2014
Location: Hamburg
Posts: 174
|
|
After that I was working at the panels for the taillights:
I cut two pieces of wood with identical circular holes in them, and put the metal between them like a sandwich.
And than I was hammering by hand inside the circular top hole to give the metal a deflection for the integration of taillights and I was surprised it was really working out!
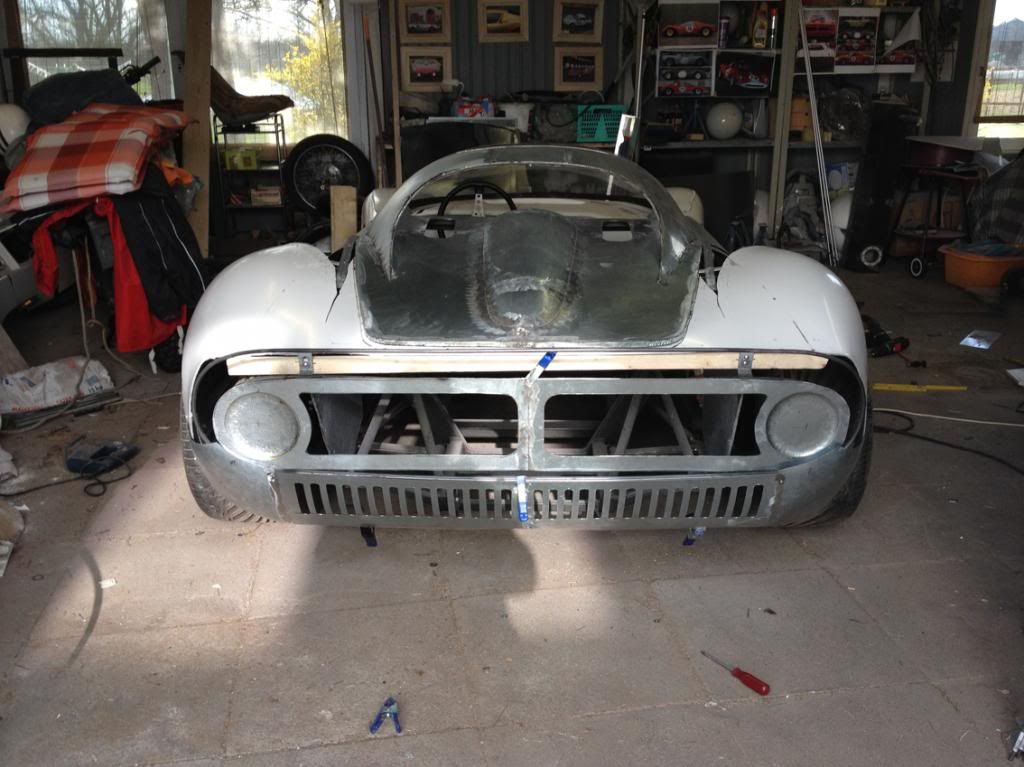
looks good outside:
 |
27th March 2014, 07:40
|
|
Senior Member
|
|
Join Date: Jan 2014
Location: Hamburg
Posts: 174
|
|
Last edited by Axel; 27th March 2014 at 07:52..
|
27th March 2014, 10:22
|
|
Senior Member
|
|
Join Date: Jun 2011
Location: birchington, kent
Posts: 1,769
|
|
Hi Axel, how did you get the slots that neat?
|
|
Currently Active Users Viewing This Thread: 1 (0 members and 1 guests)
|
|
|
 Posting Rules
|
You may not post new threads
You may not post replies
You may not post attachments
You may not edit your posts
HTML code is Off
|
|
|
All times are GMT +0. The time now is 05:36.
|


 Linear Mode

